Marketplace- Responsive and Specialized Ranza Theme for Opencart
Documented by Mojoomla - June - 2020
Marketplace - Responsive and Specialized Ranza Theme for Opencart
Documented by Marketplace - June - 2020
Market Place Admin Side
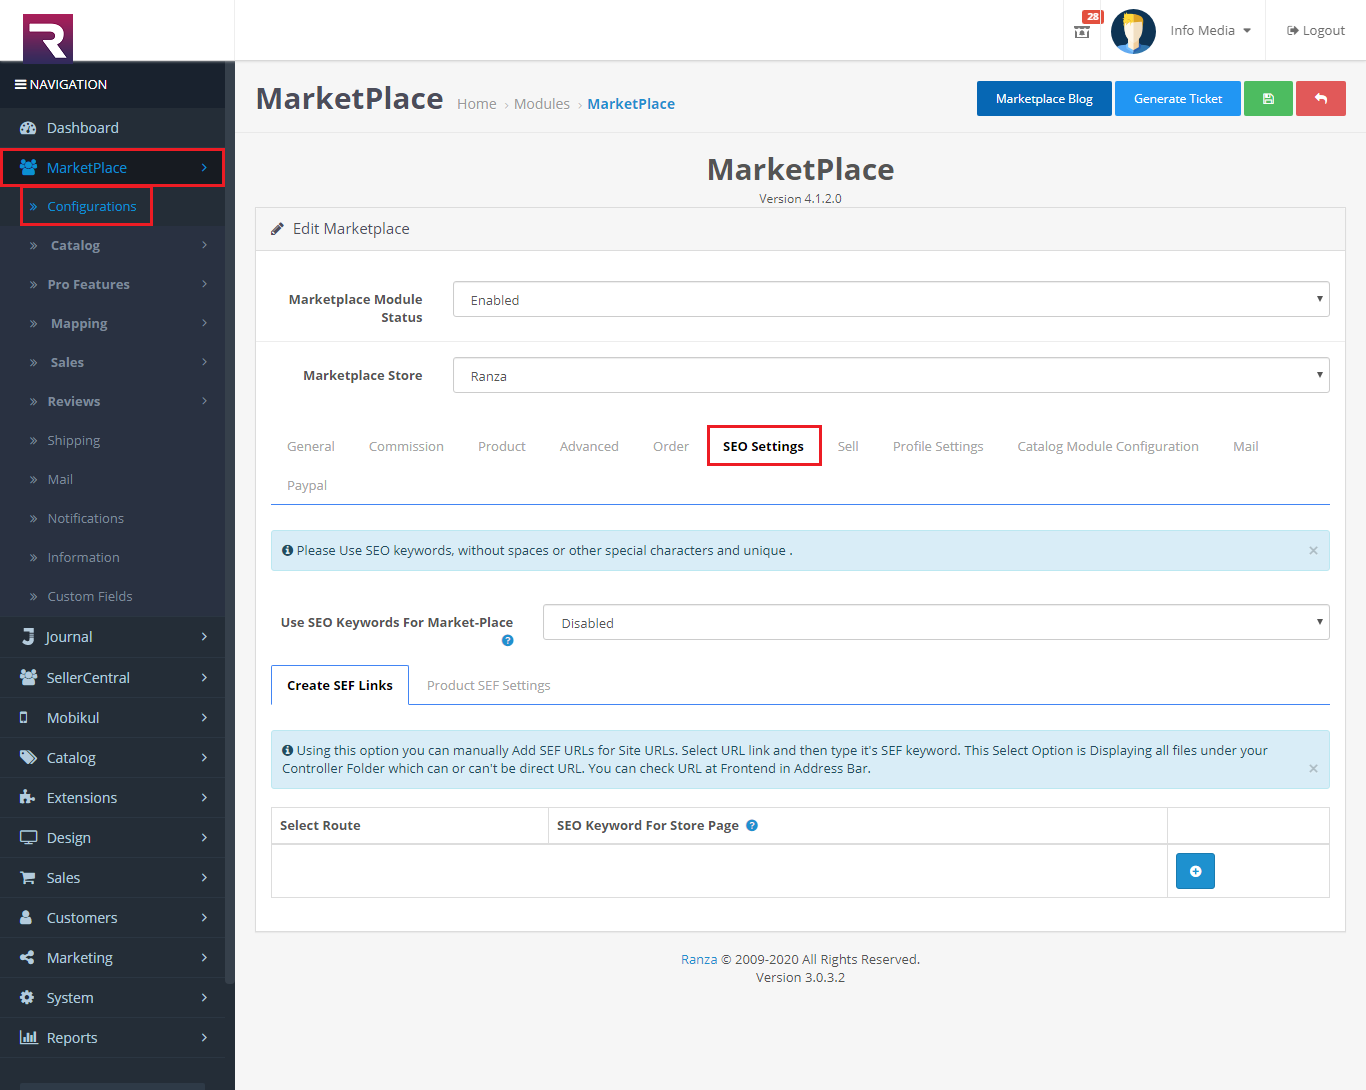
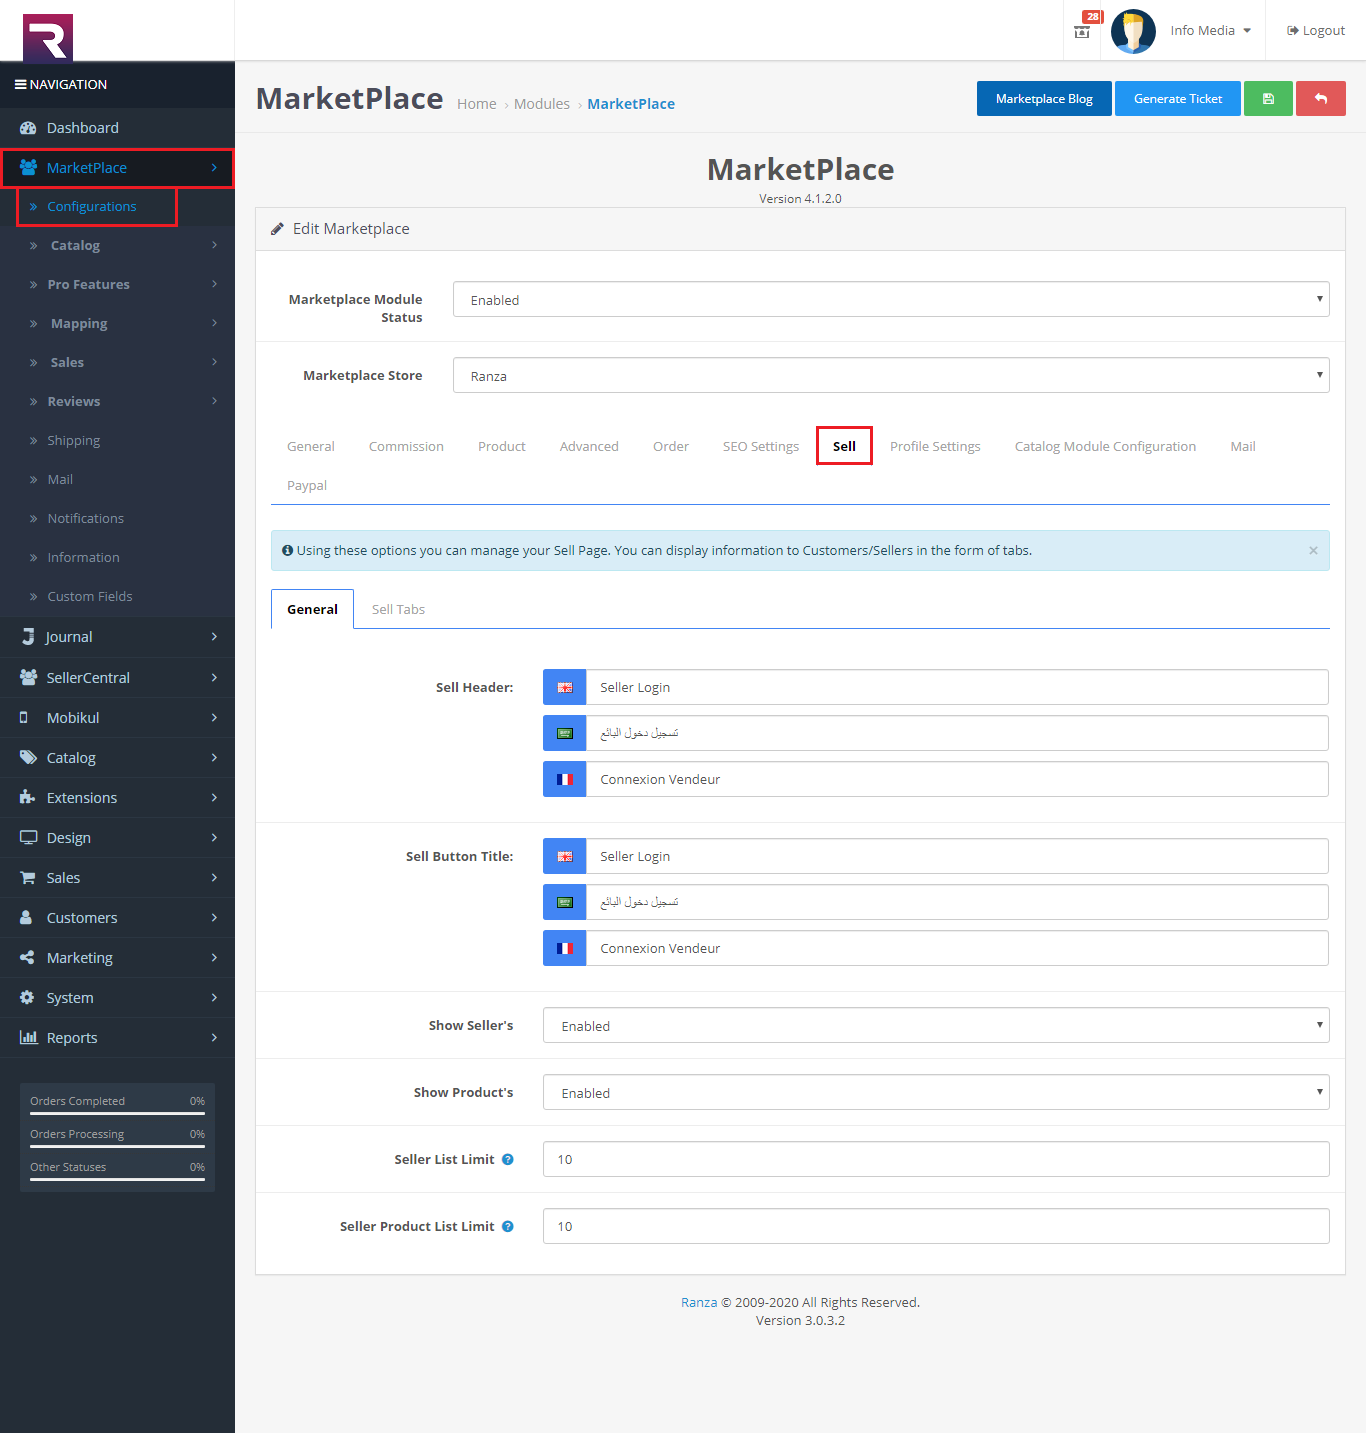
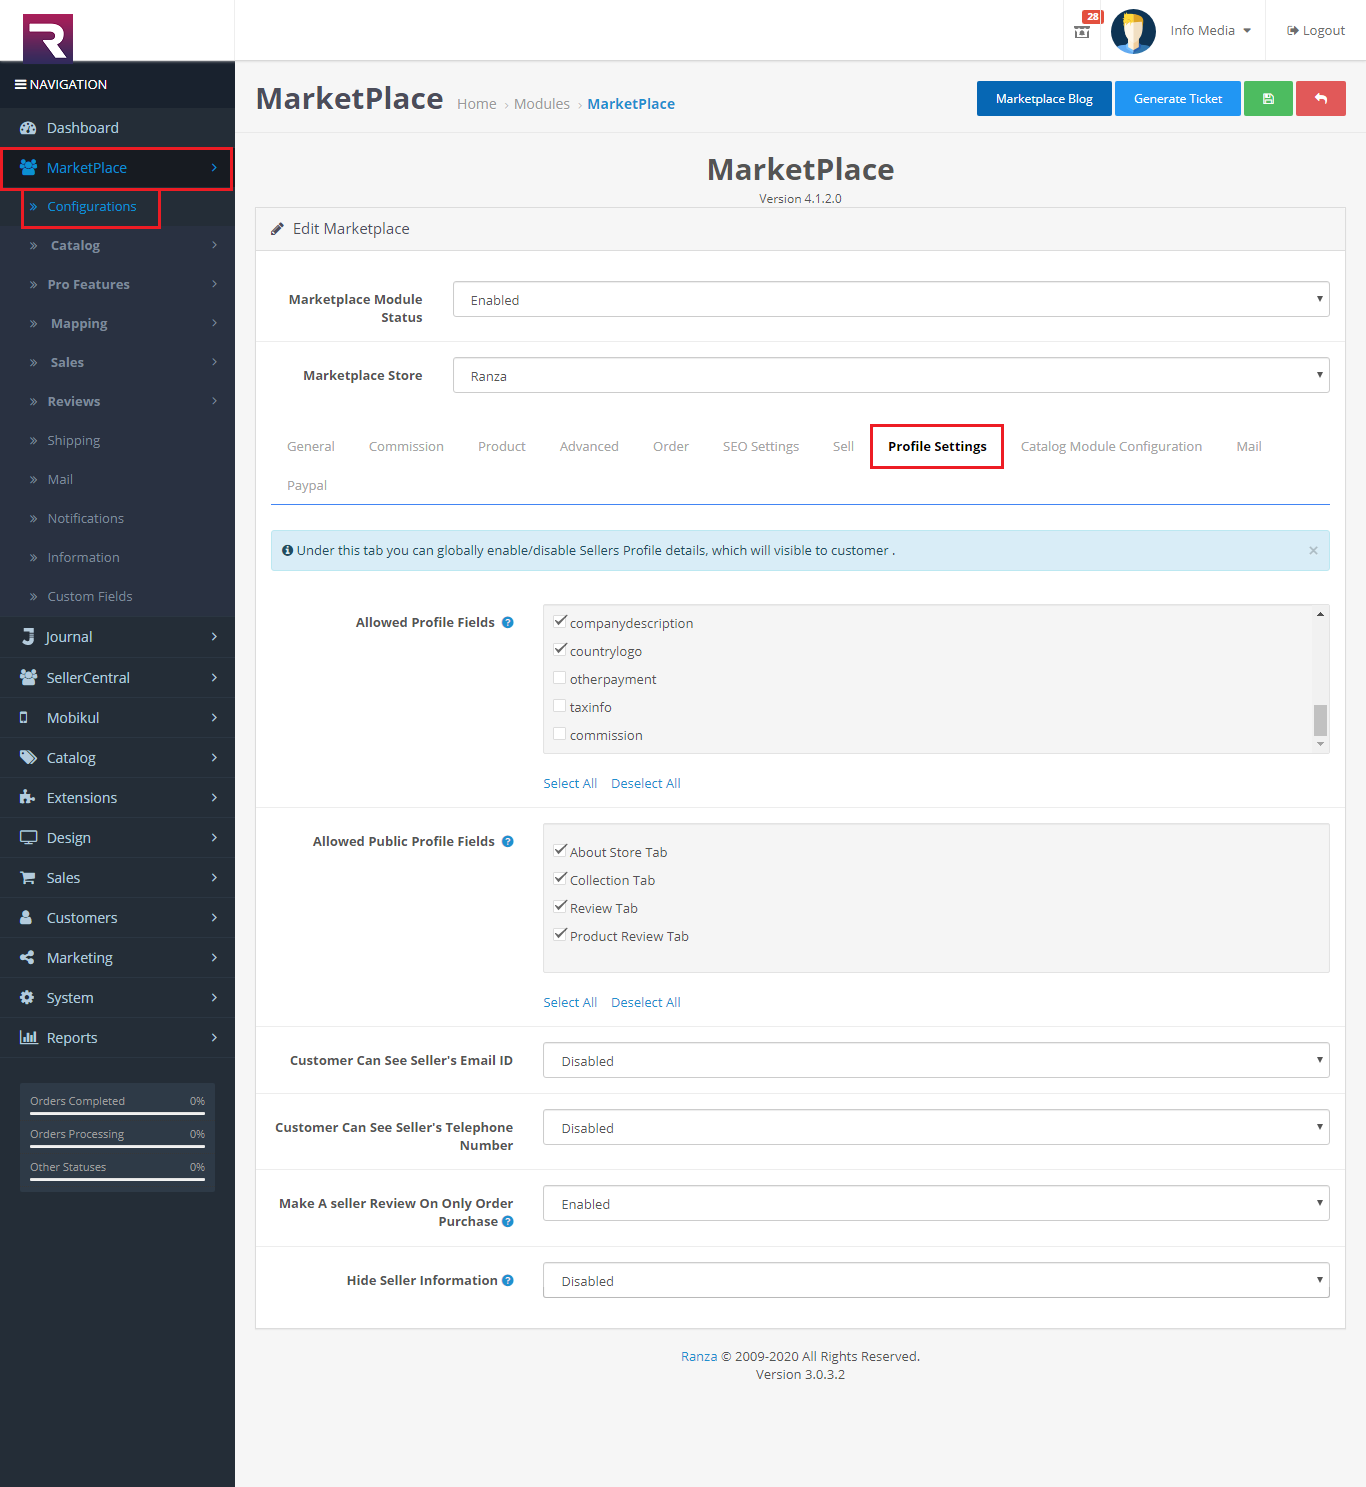
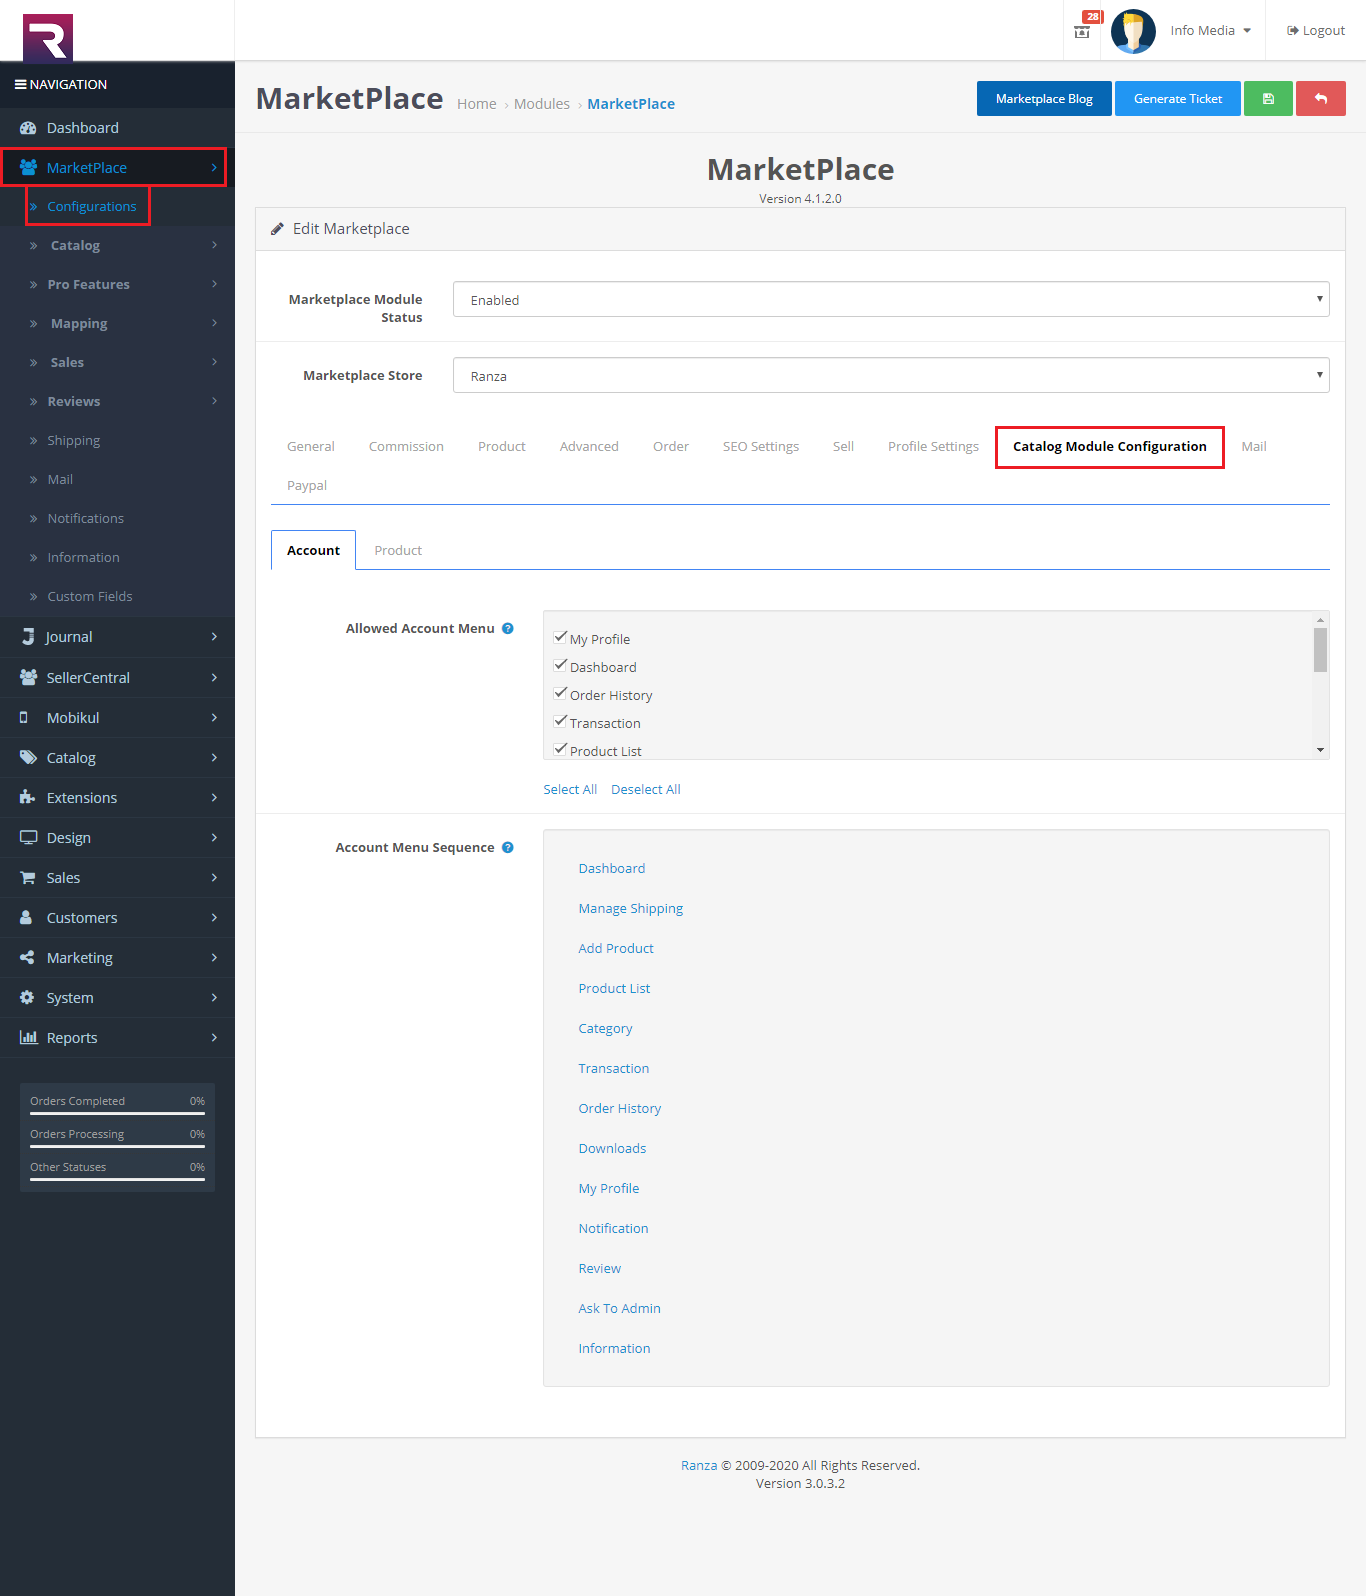
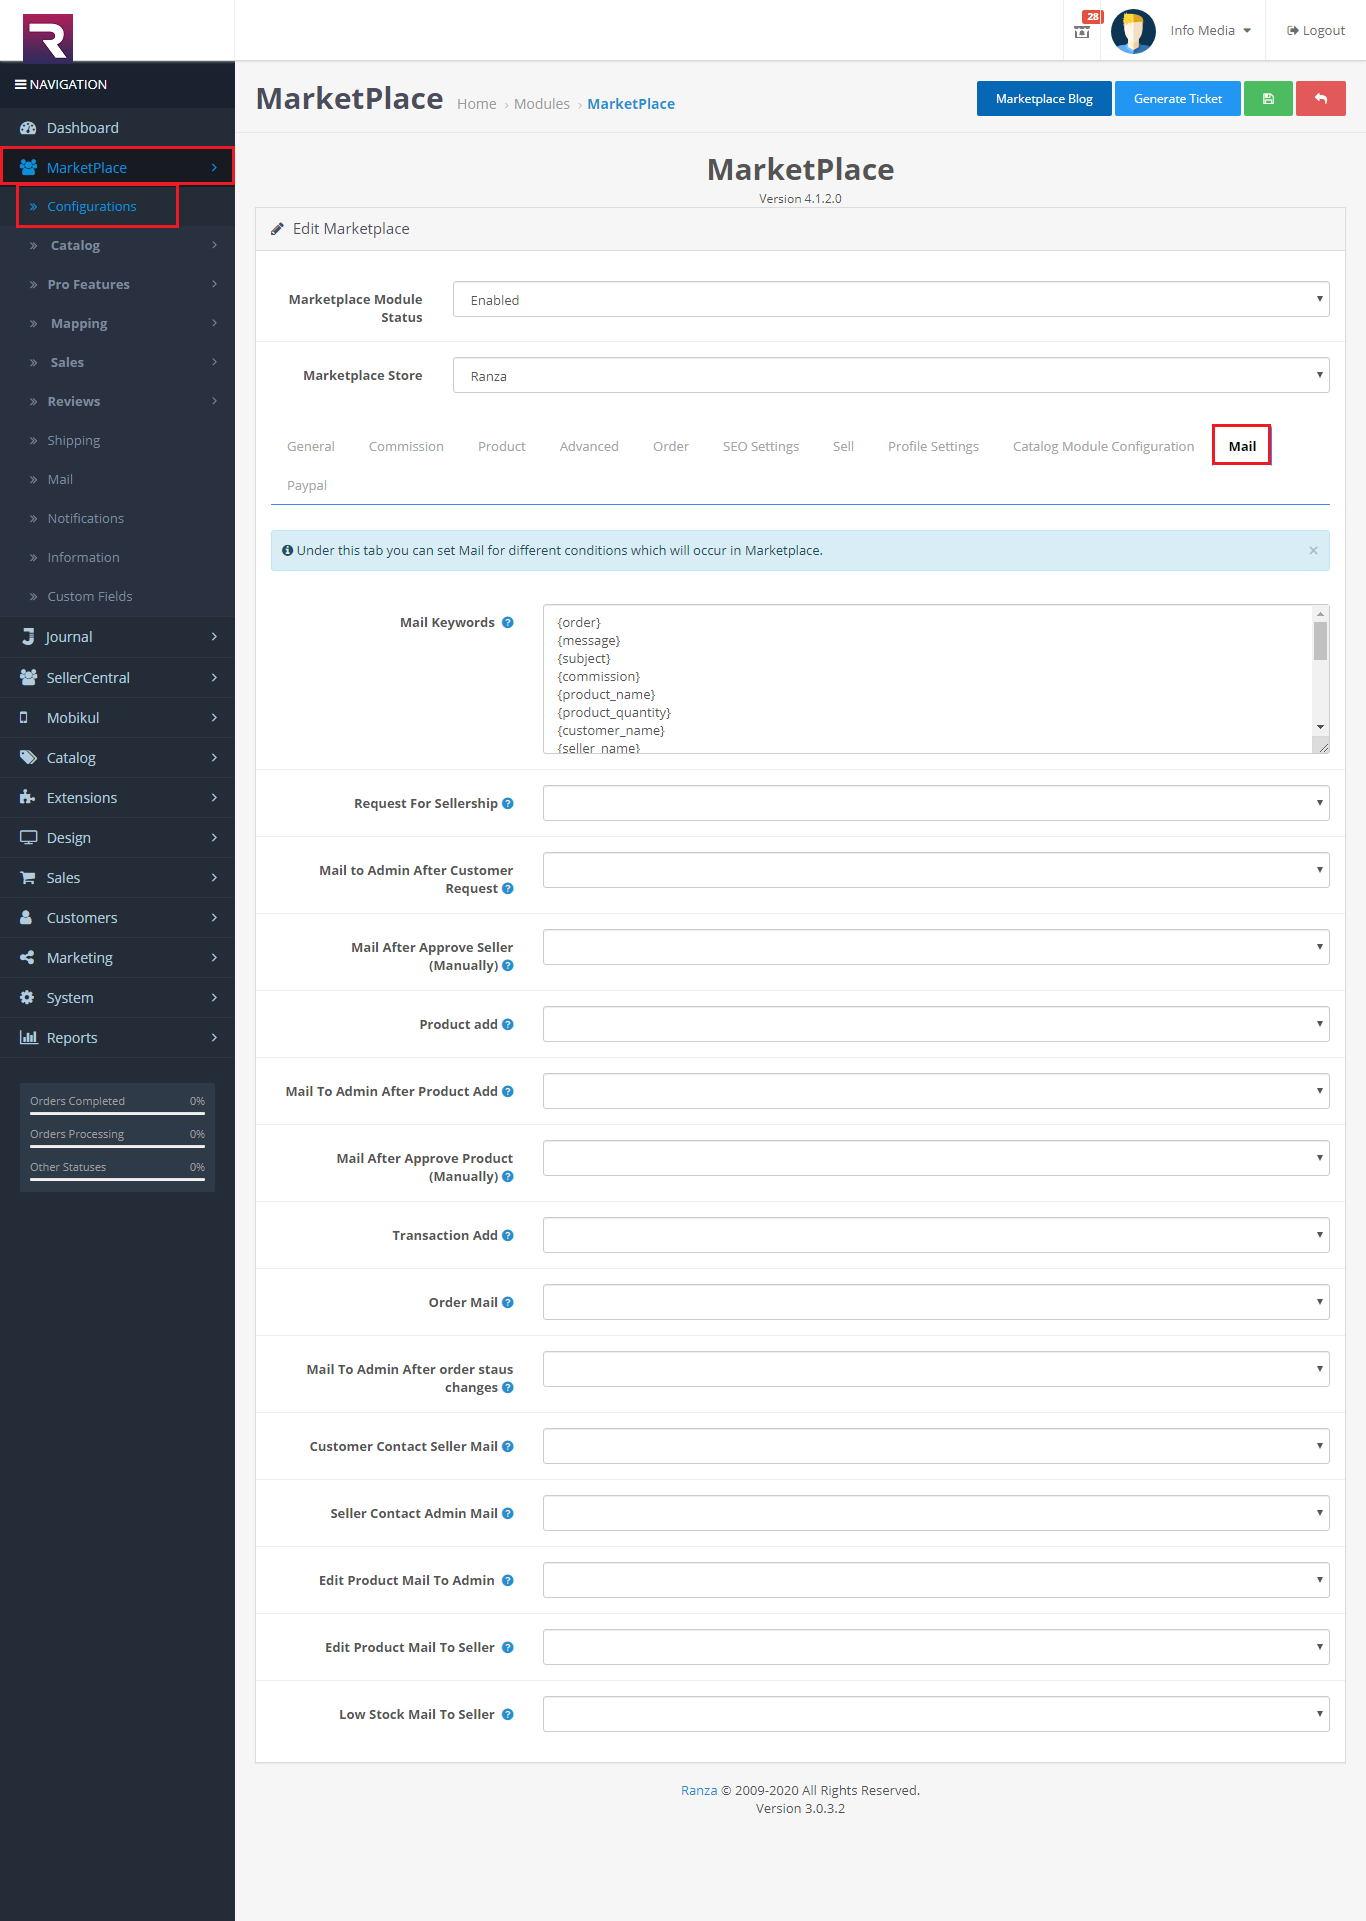
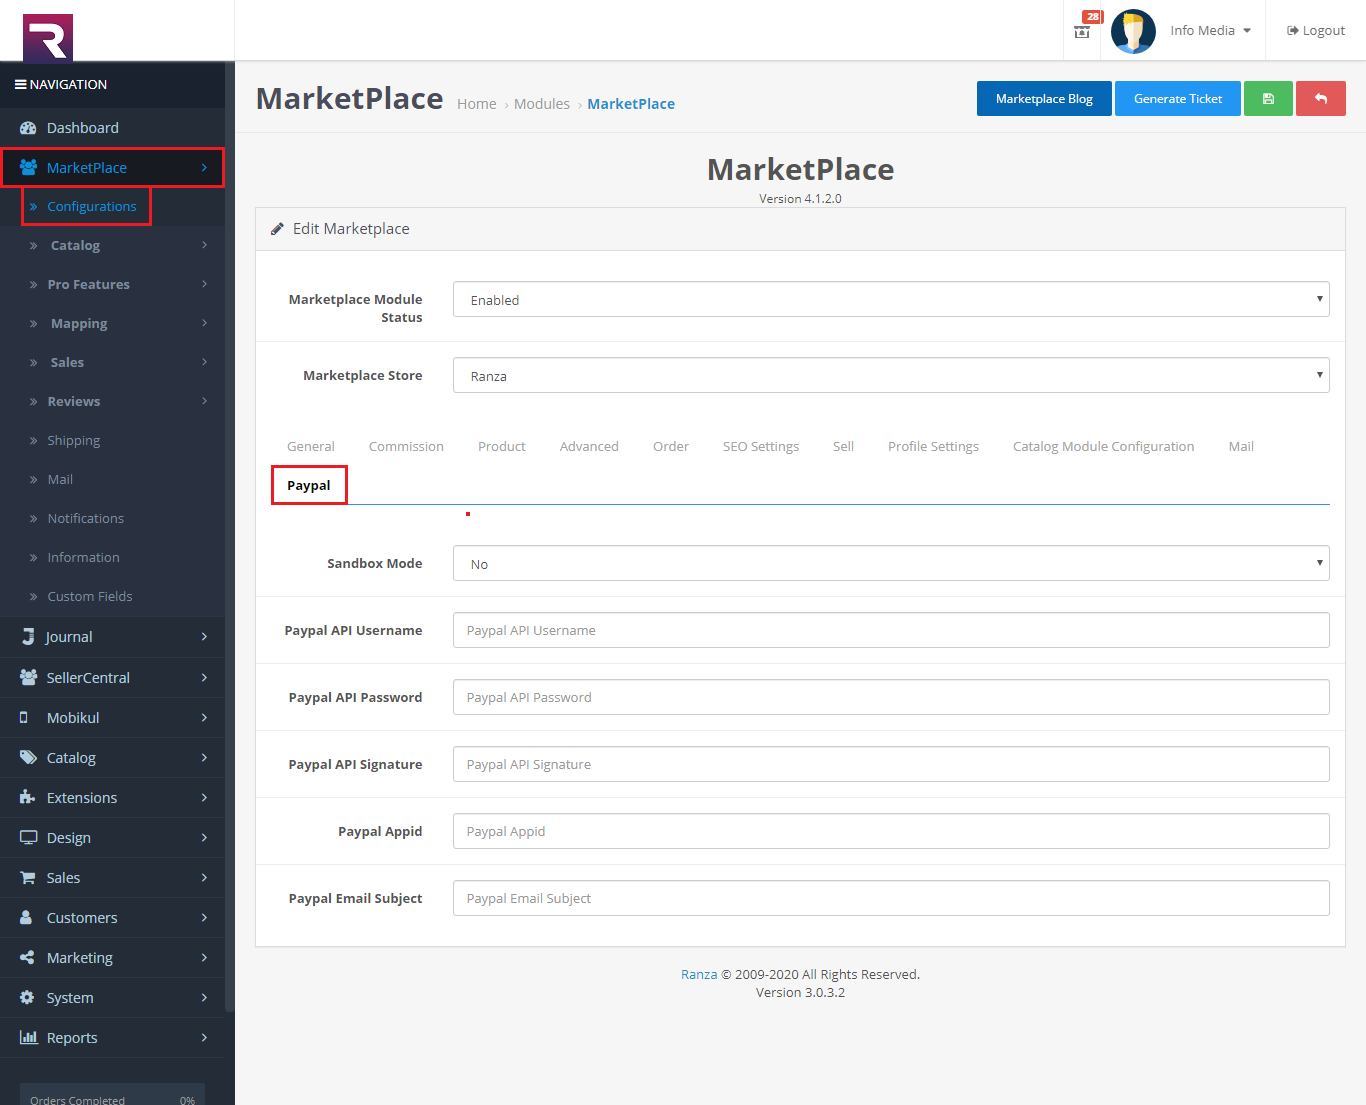
1. Configration
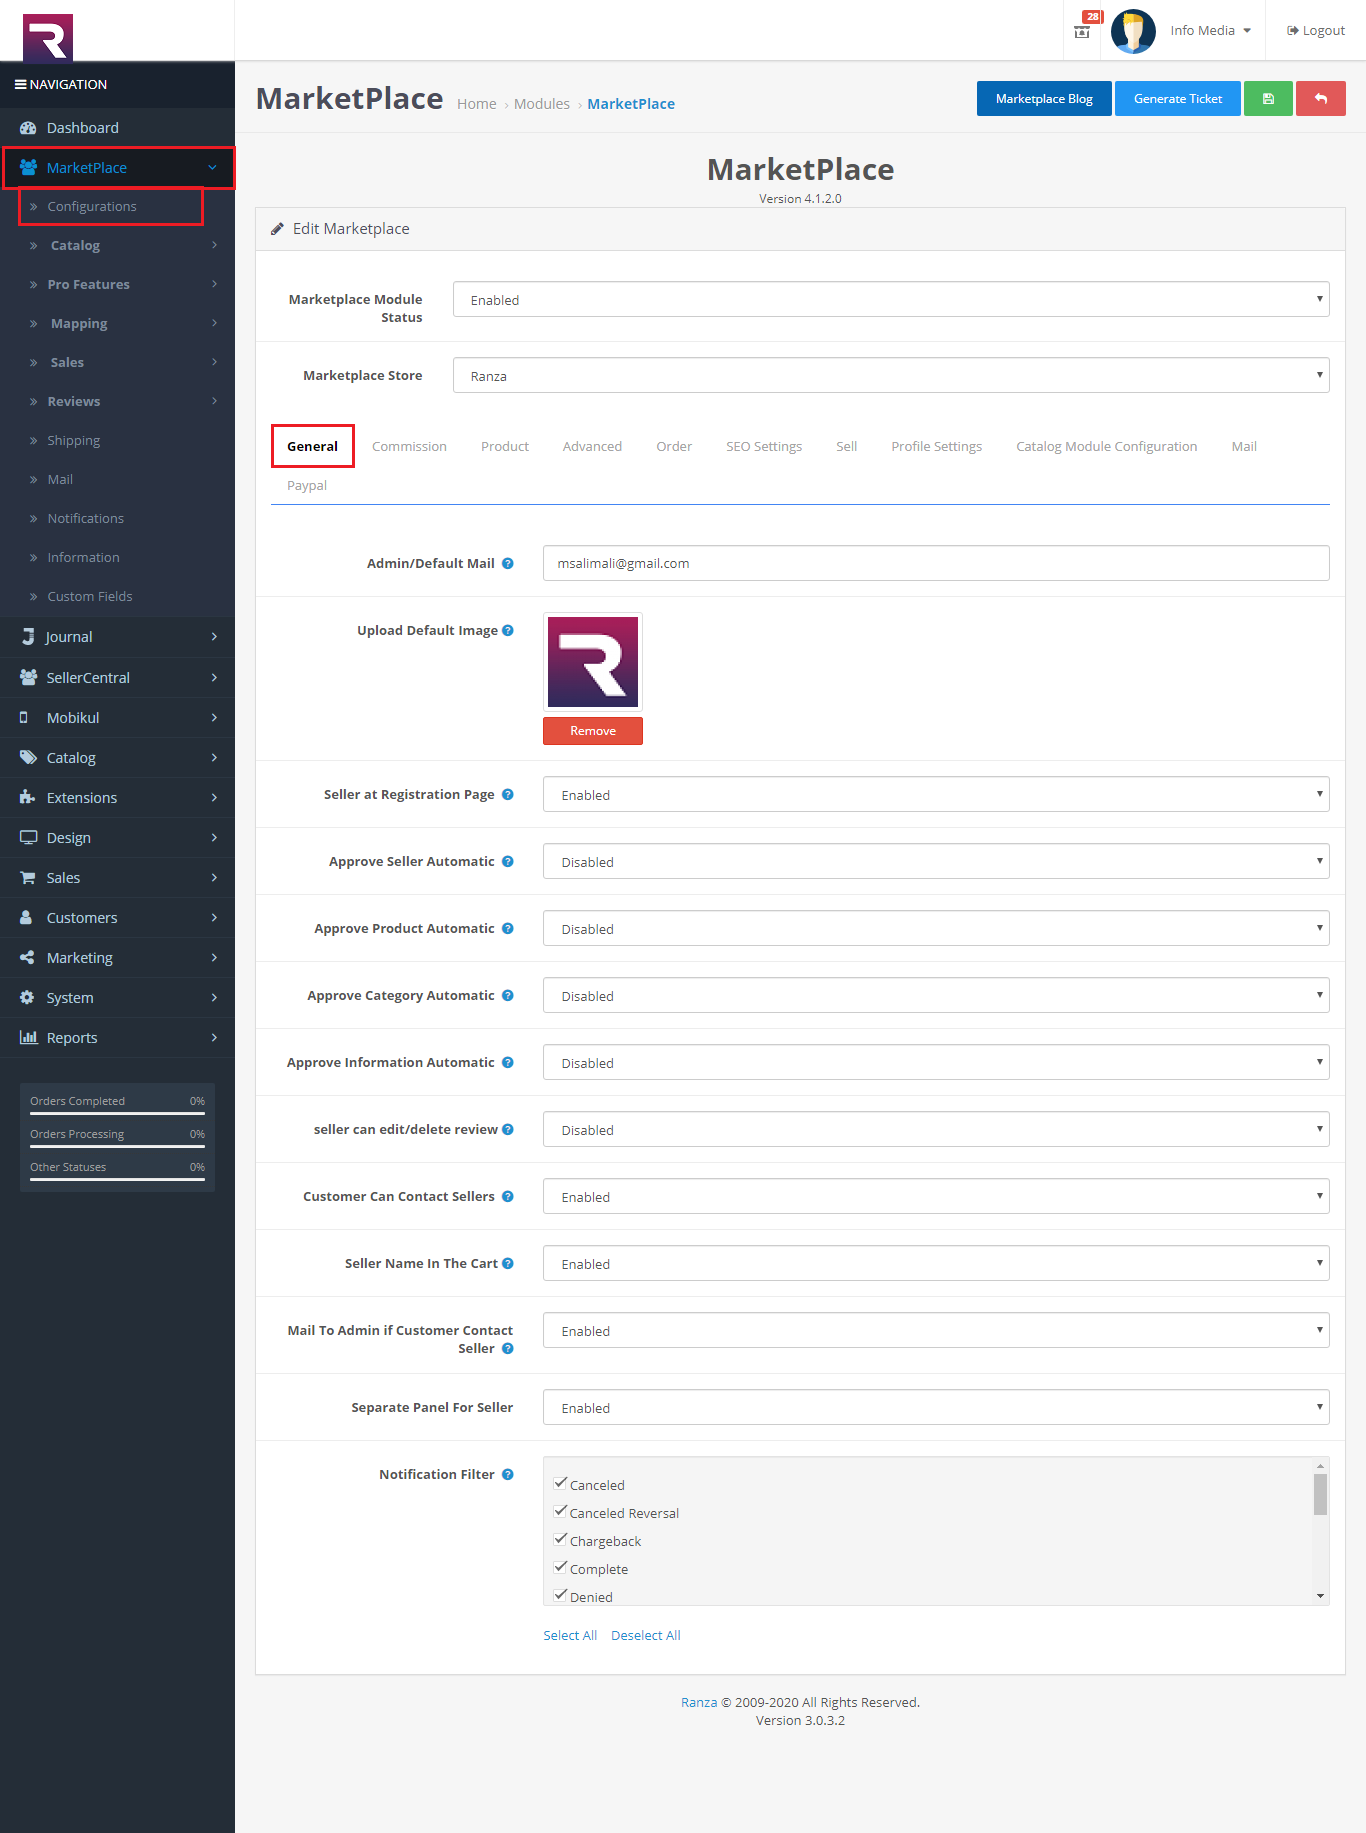
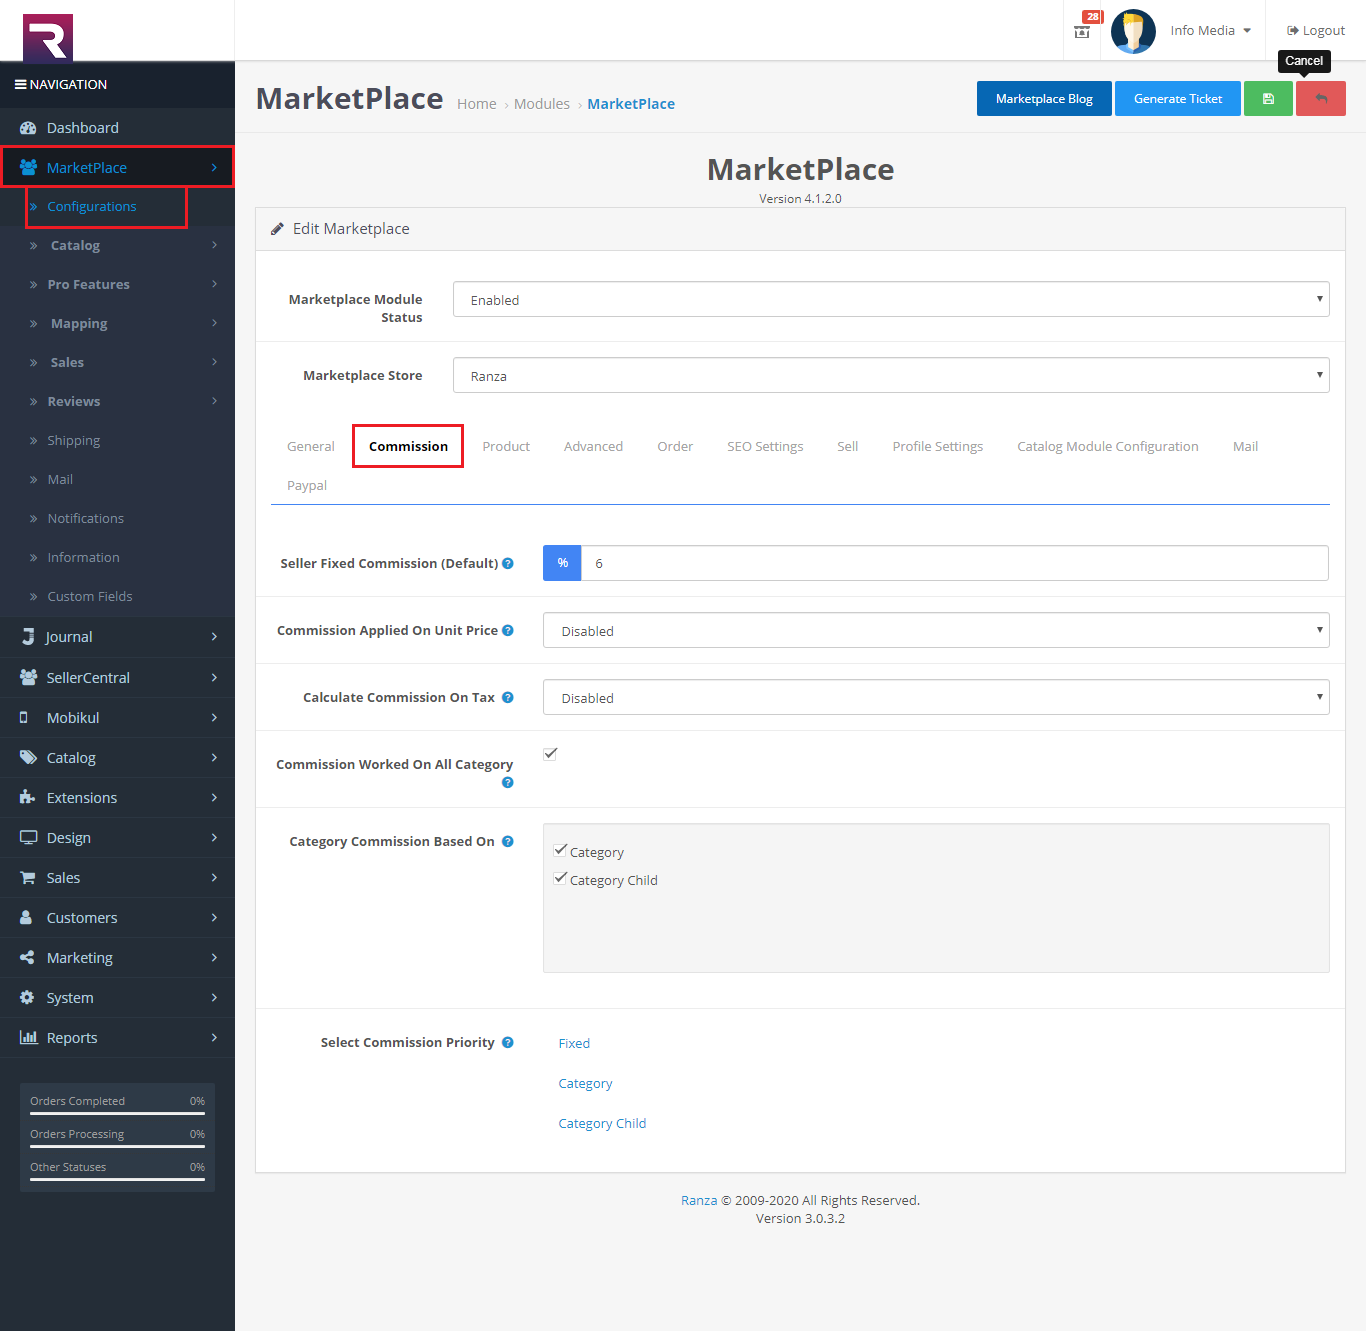

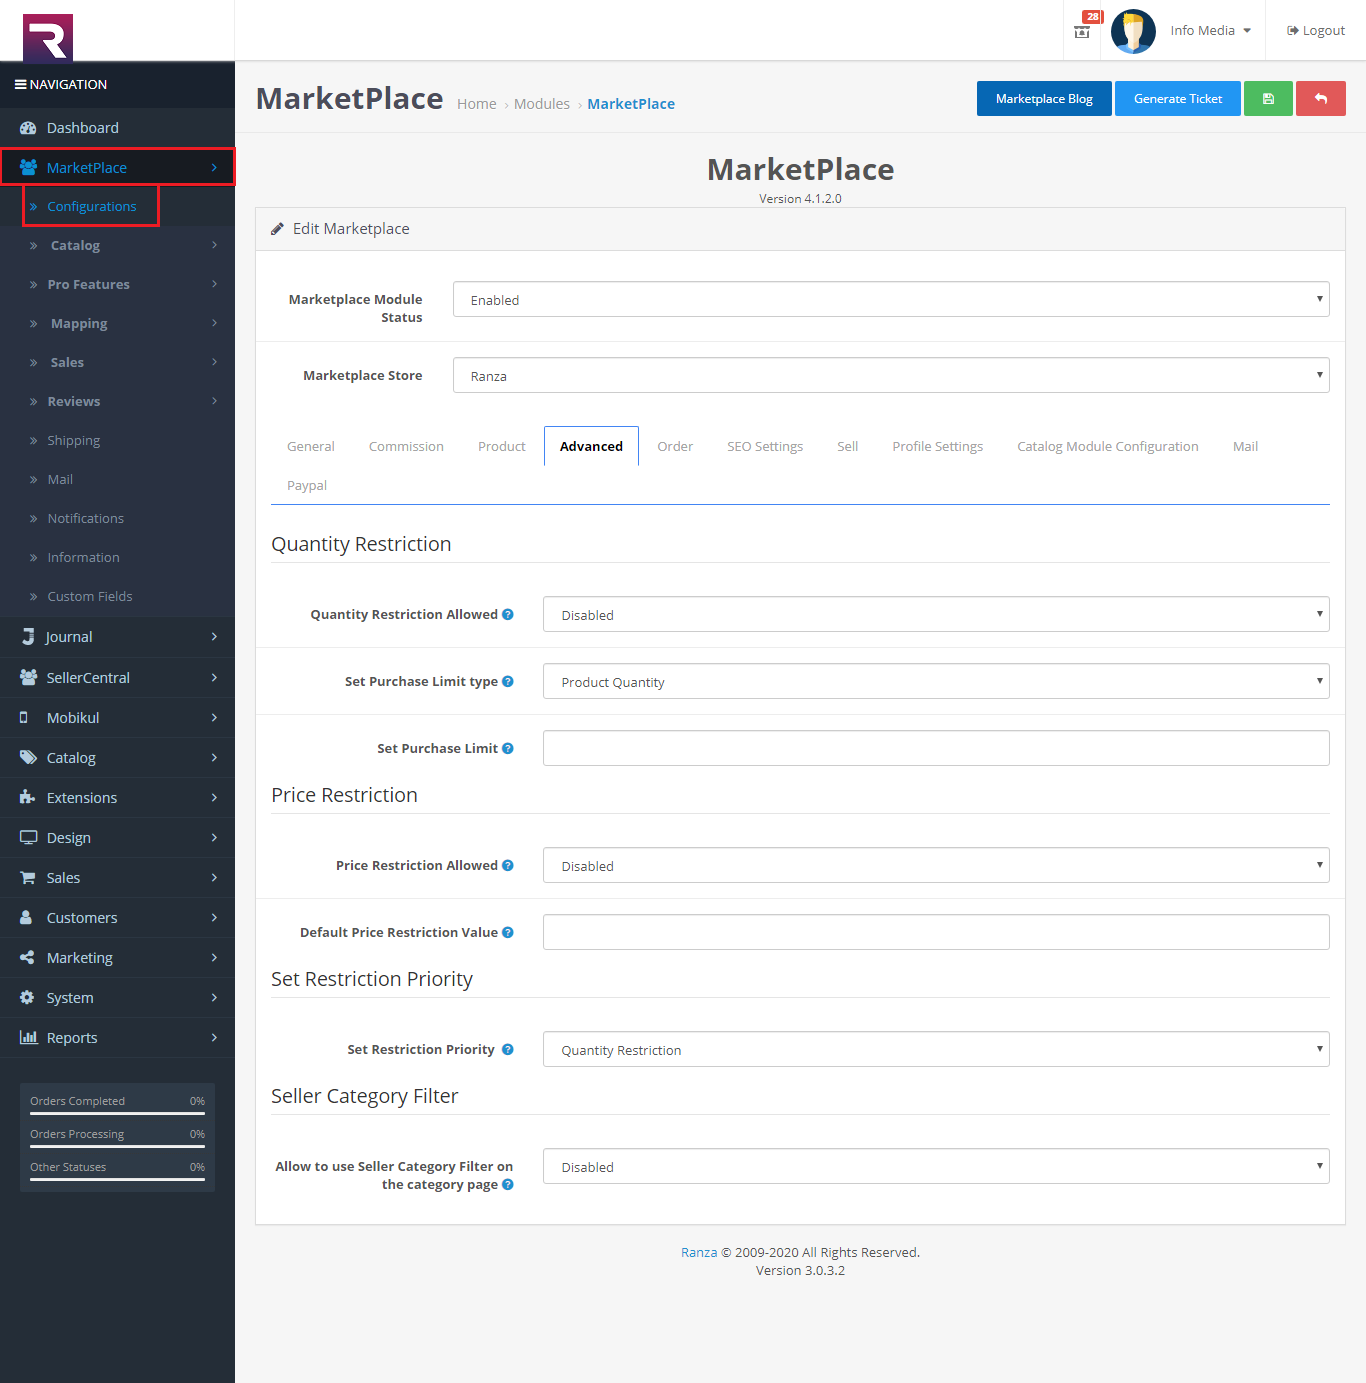
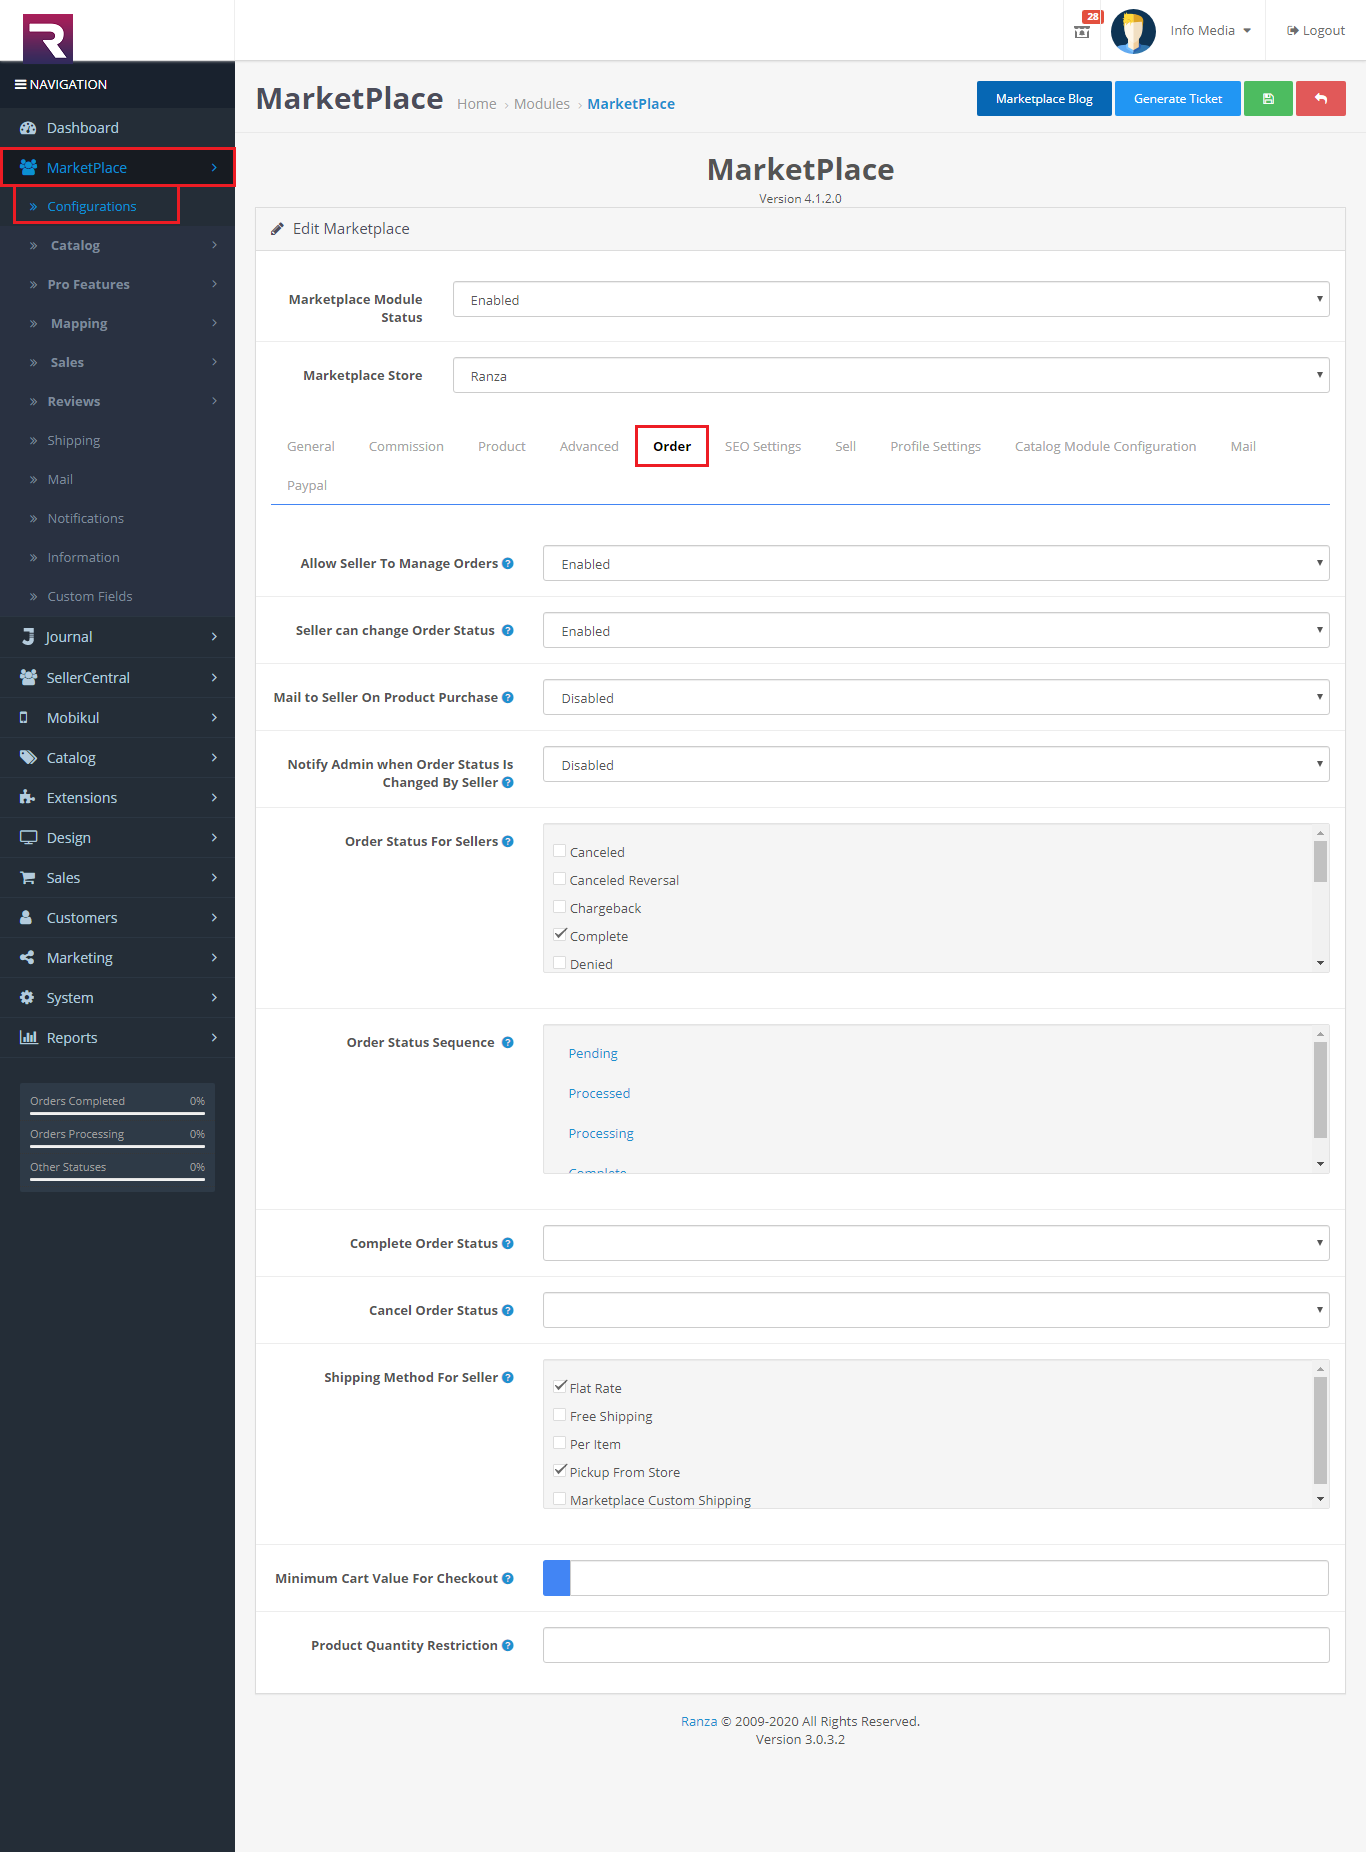
-
- General
- Commission
- Product
- Advanced
- Order
- SEO Settings
- Sell
- Profile Settings
- Catalog Module Configuration
- Paypal
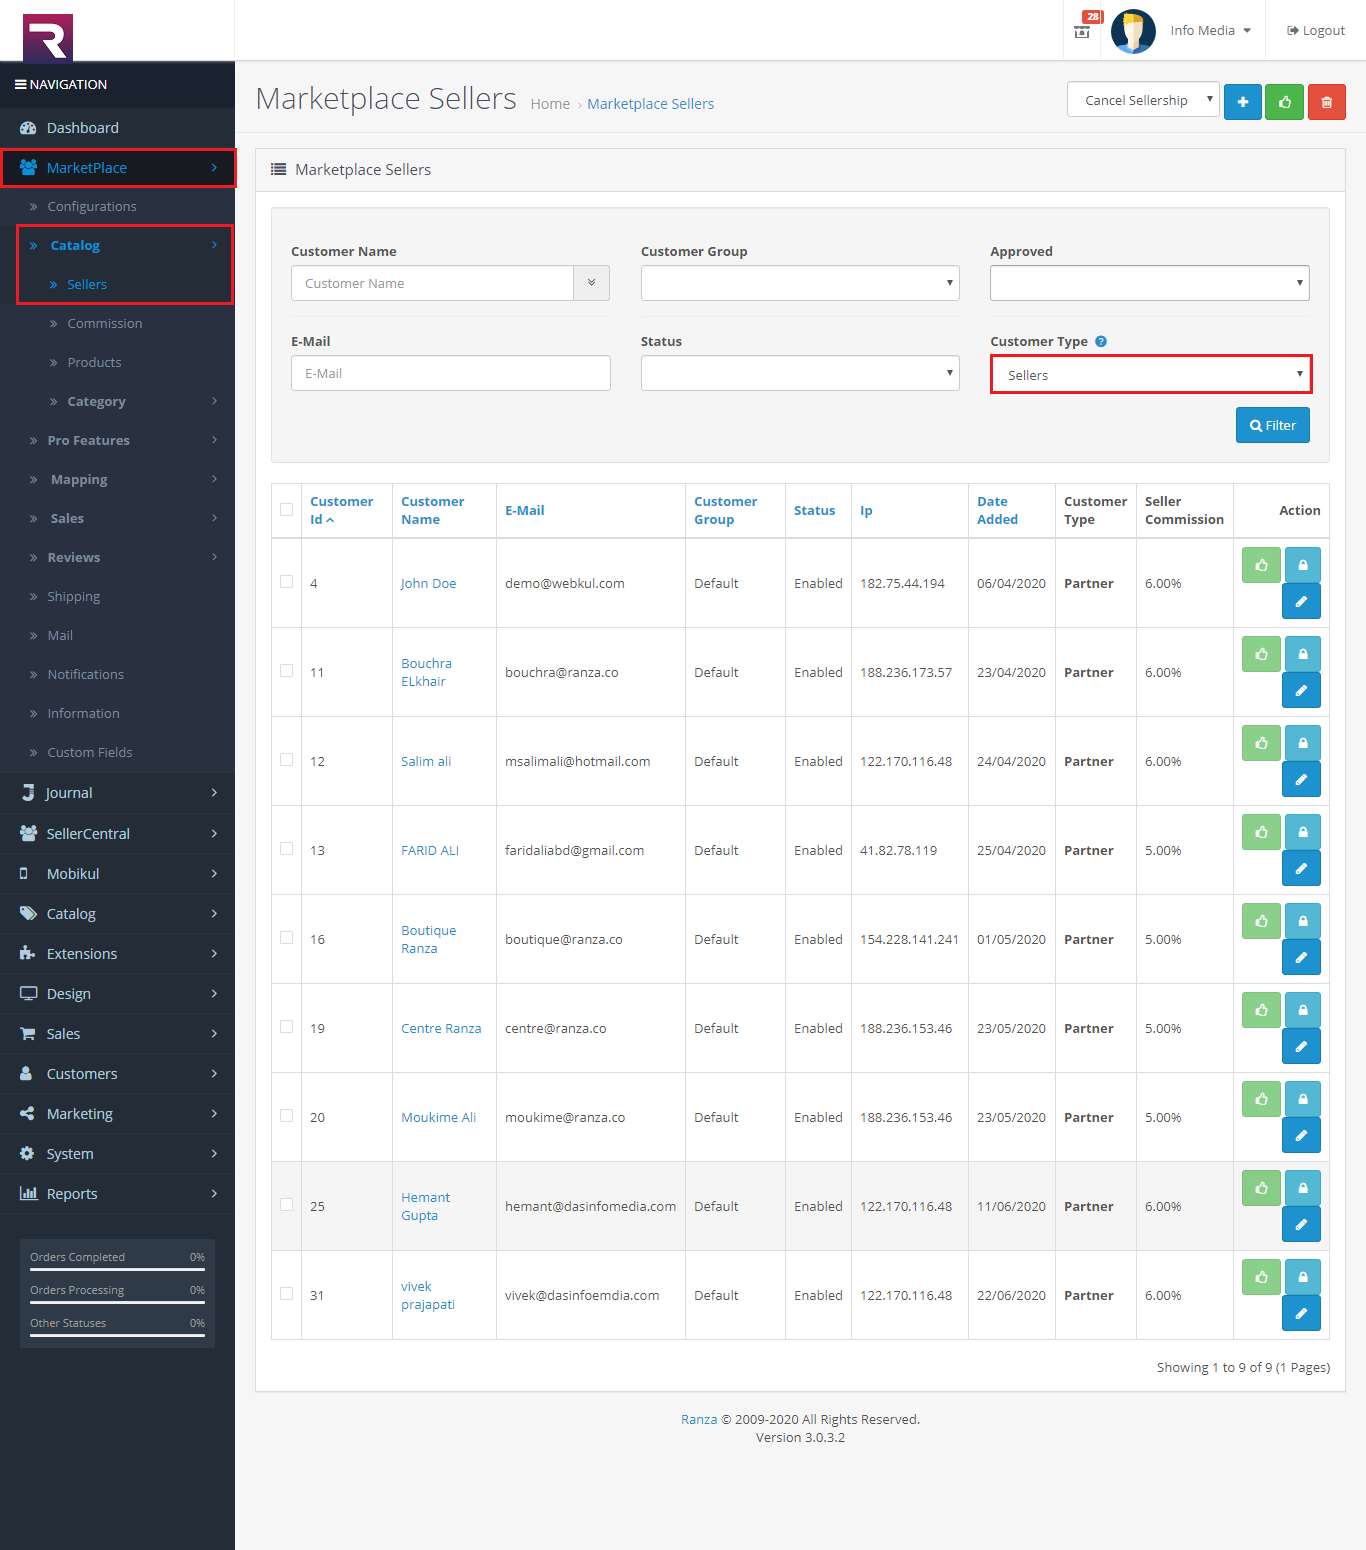
2. Catalog
1. Seller
-
- Seller Register
- Seller Approval
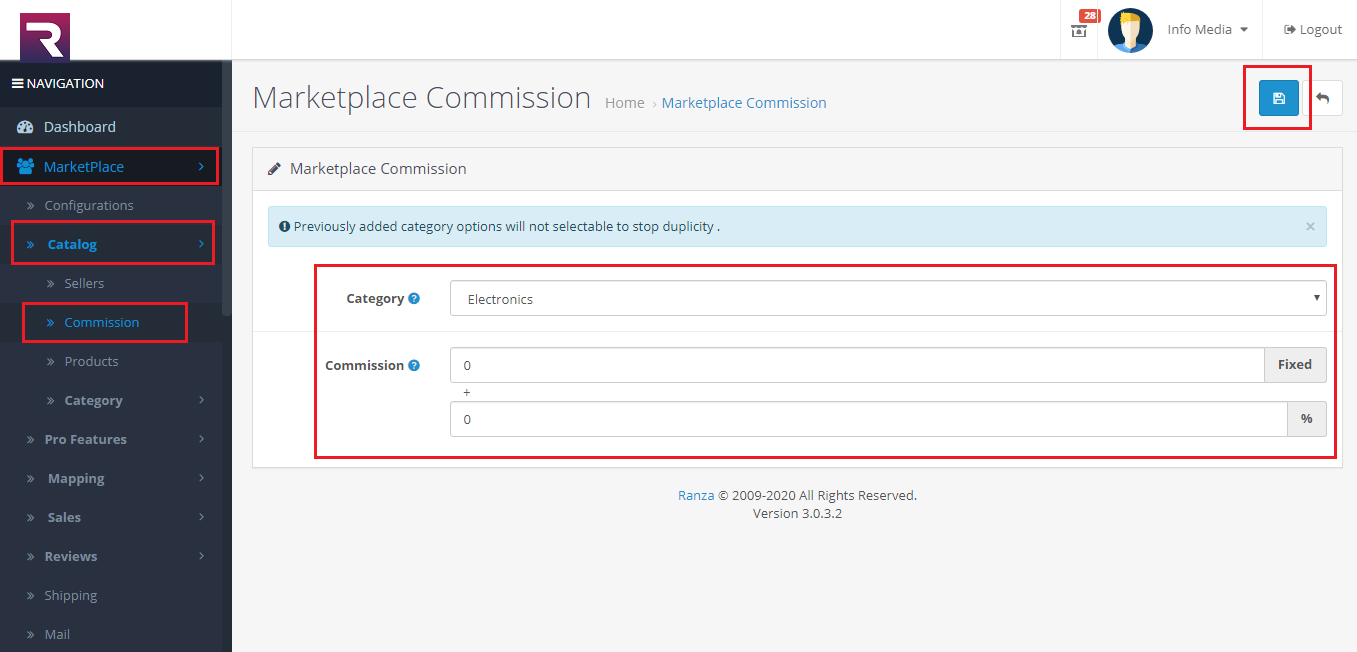
3. Commission
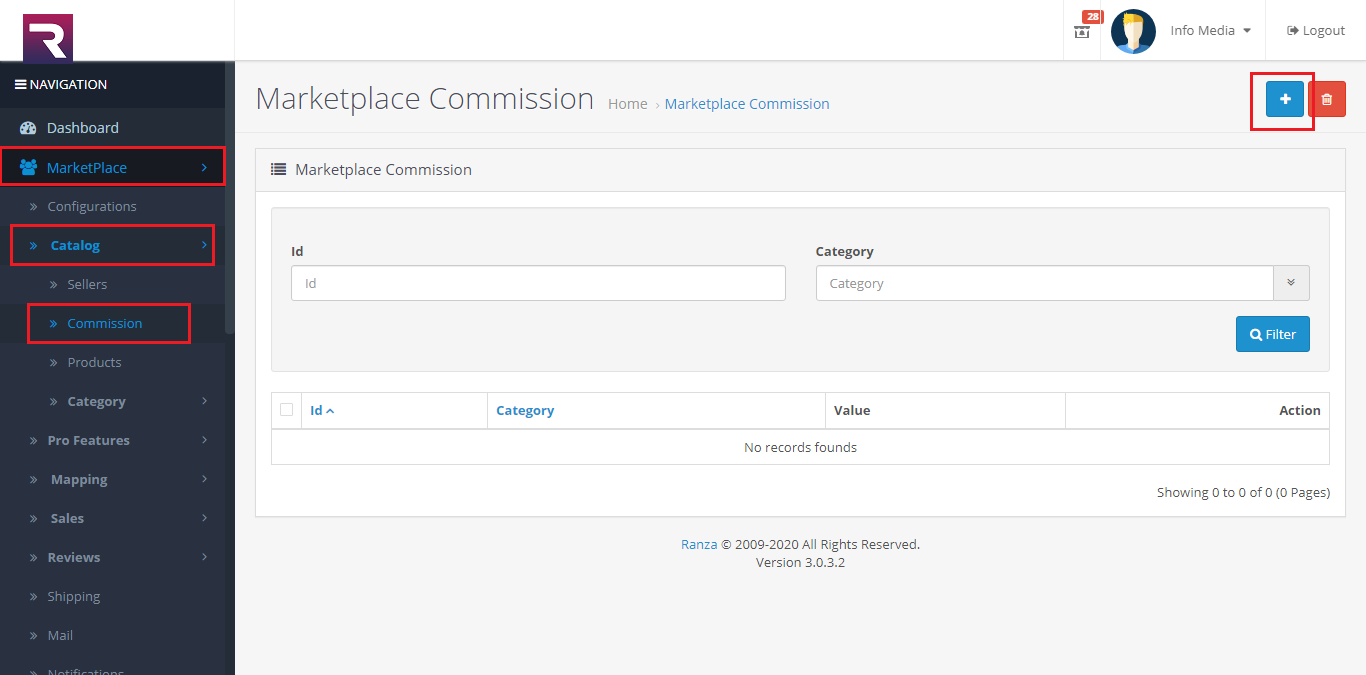
-
- Add Seller Commission
- Add Seller Commission Field
- Category :- Select category
- Commission :- Fixed
- Commission :- Percentage(%)
4. Product
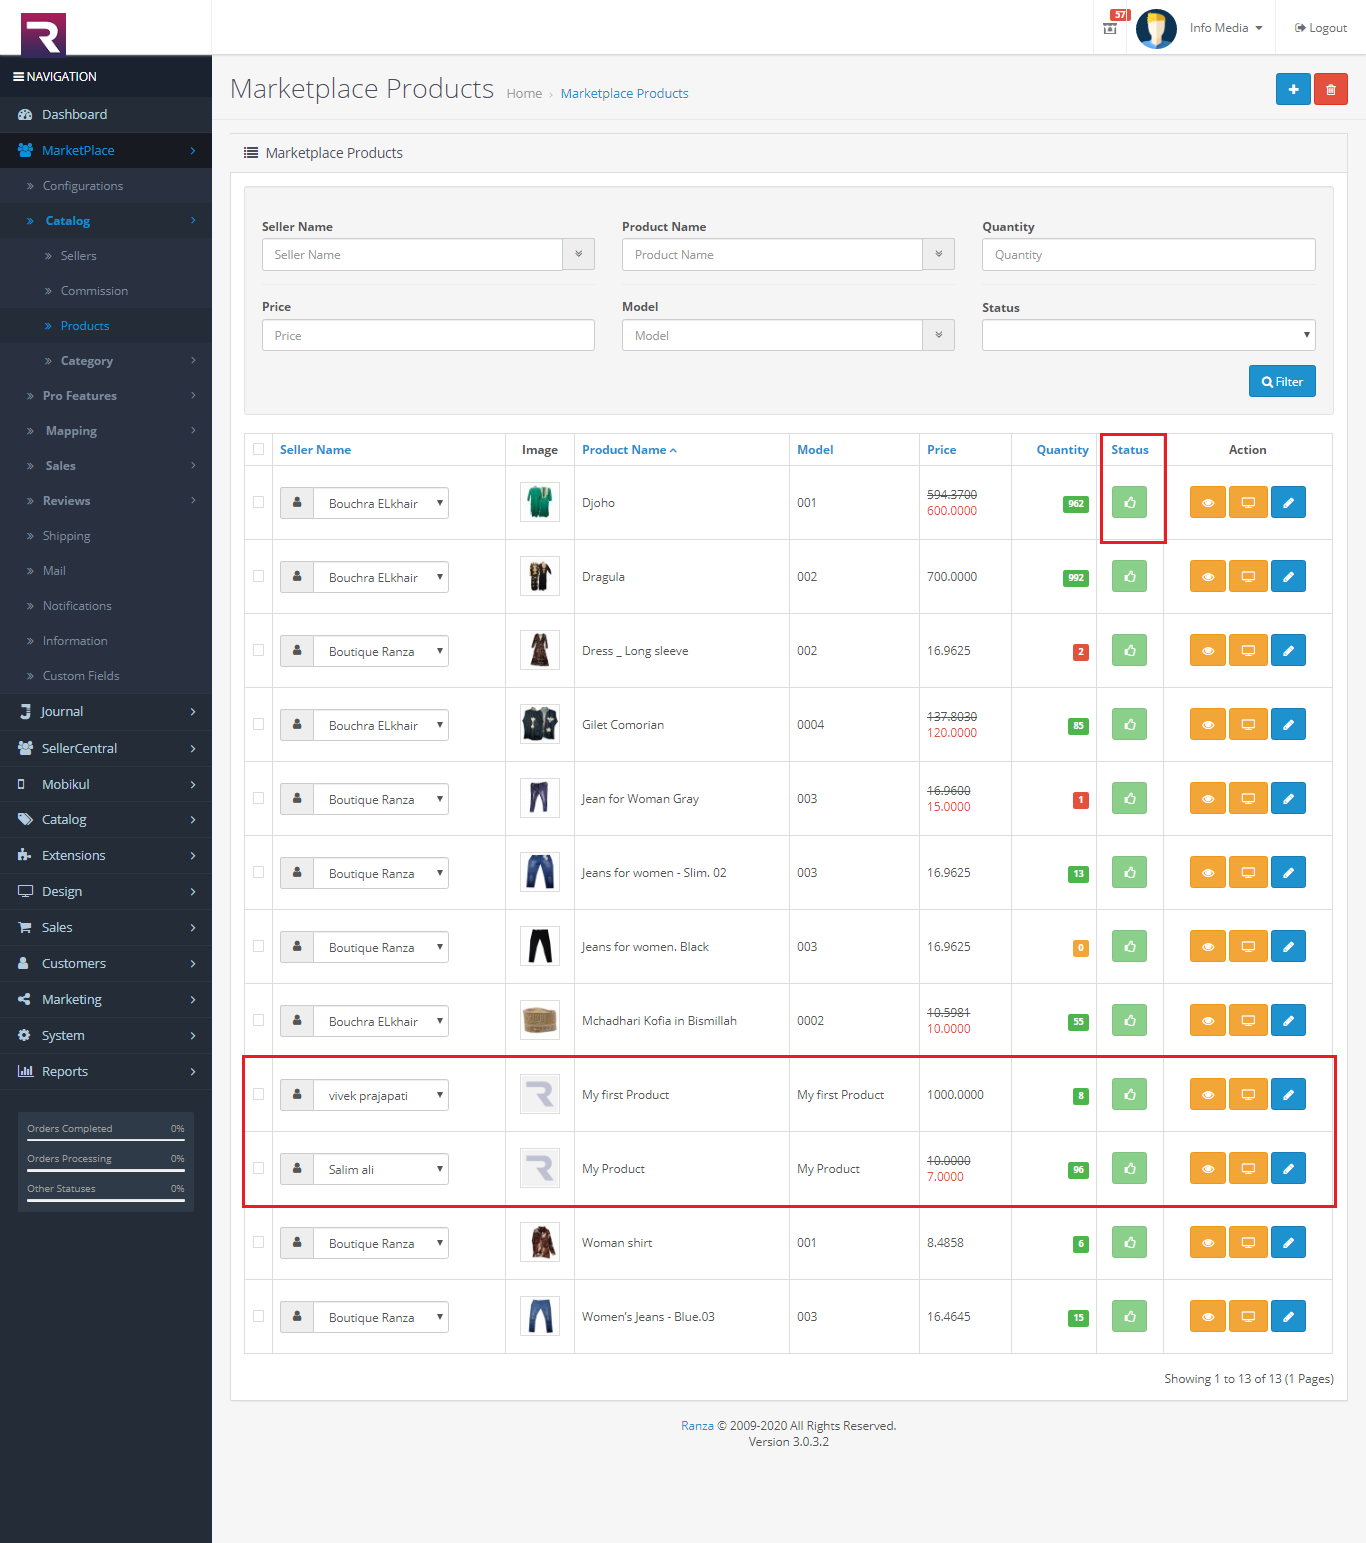
-
- Product Approval and details.
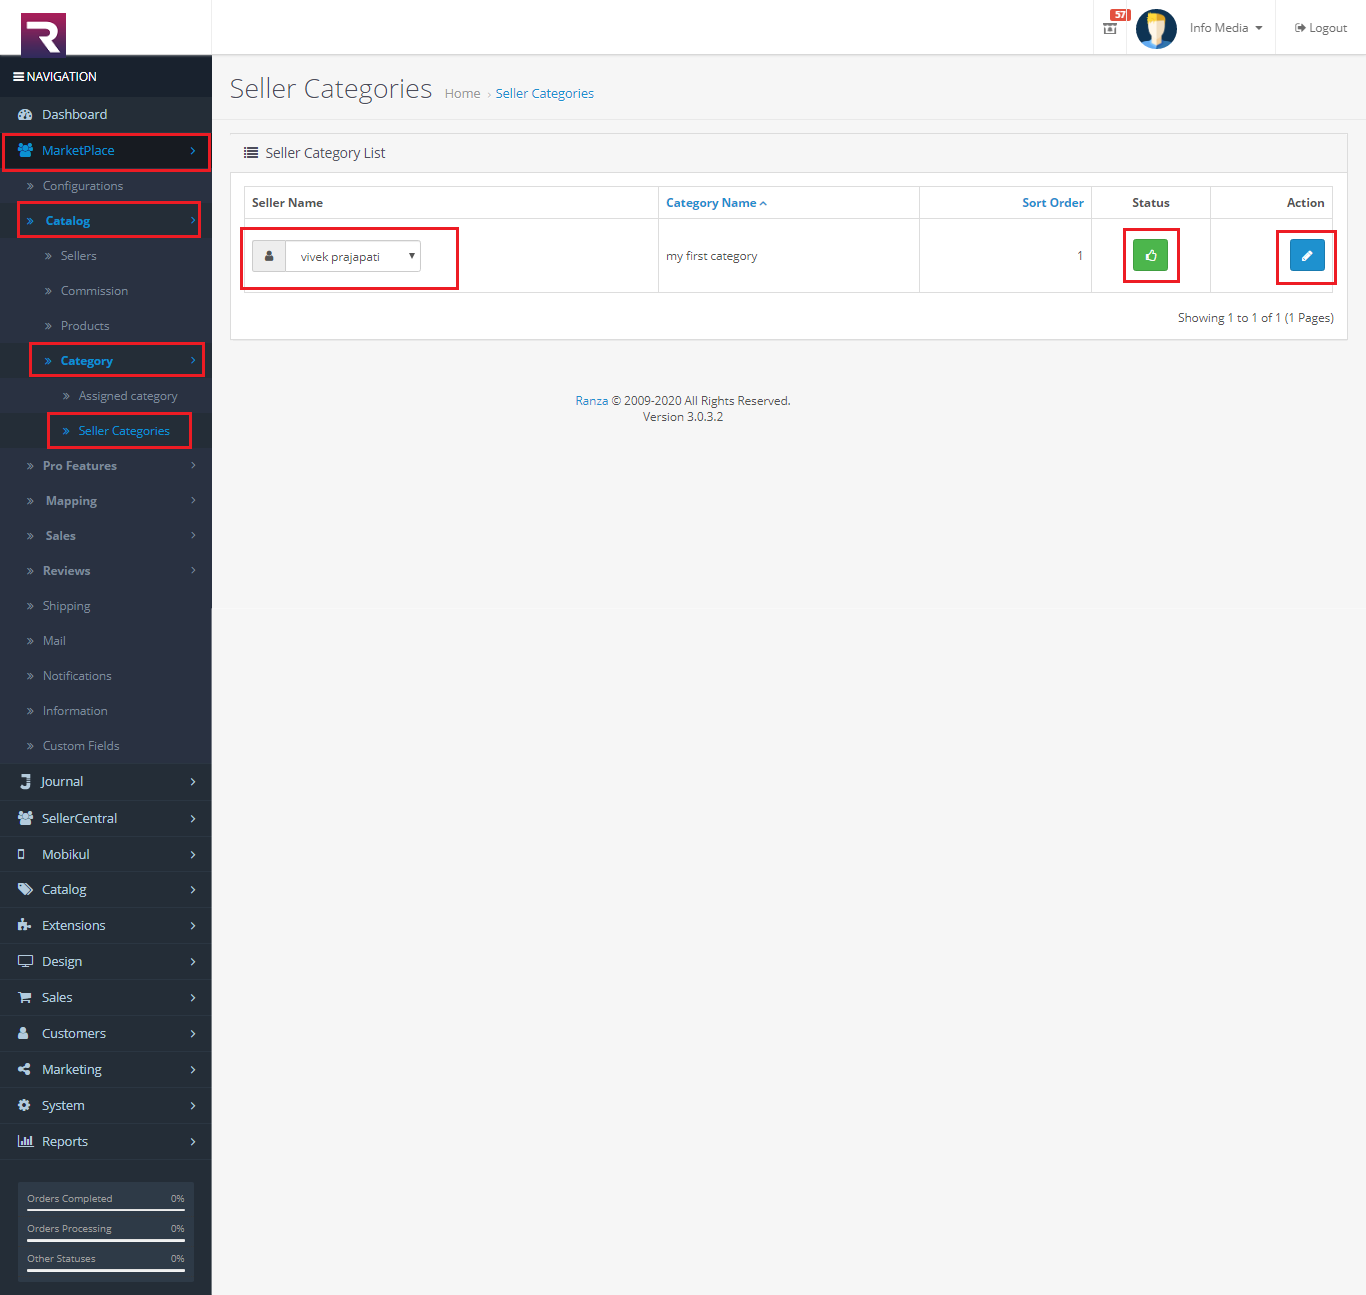
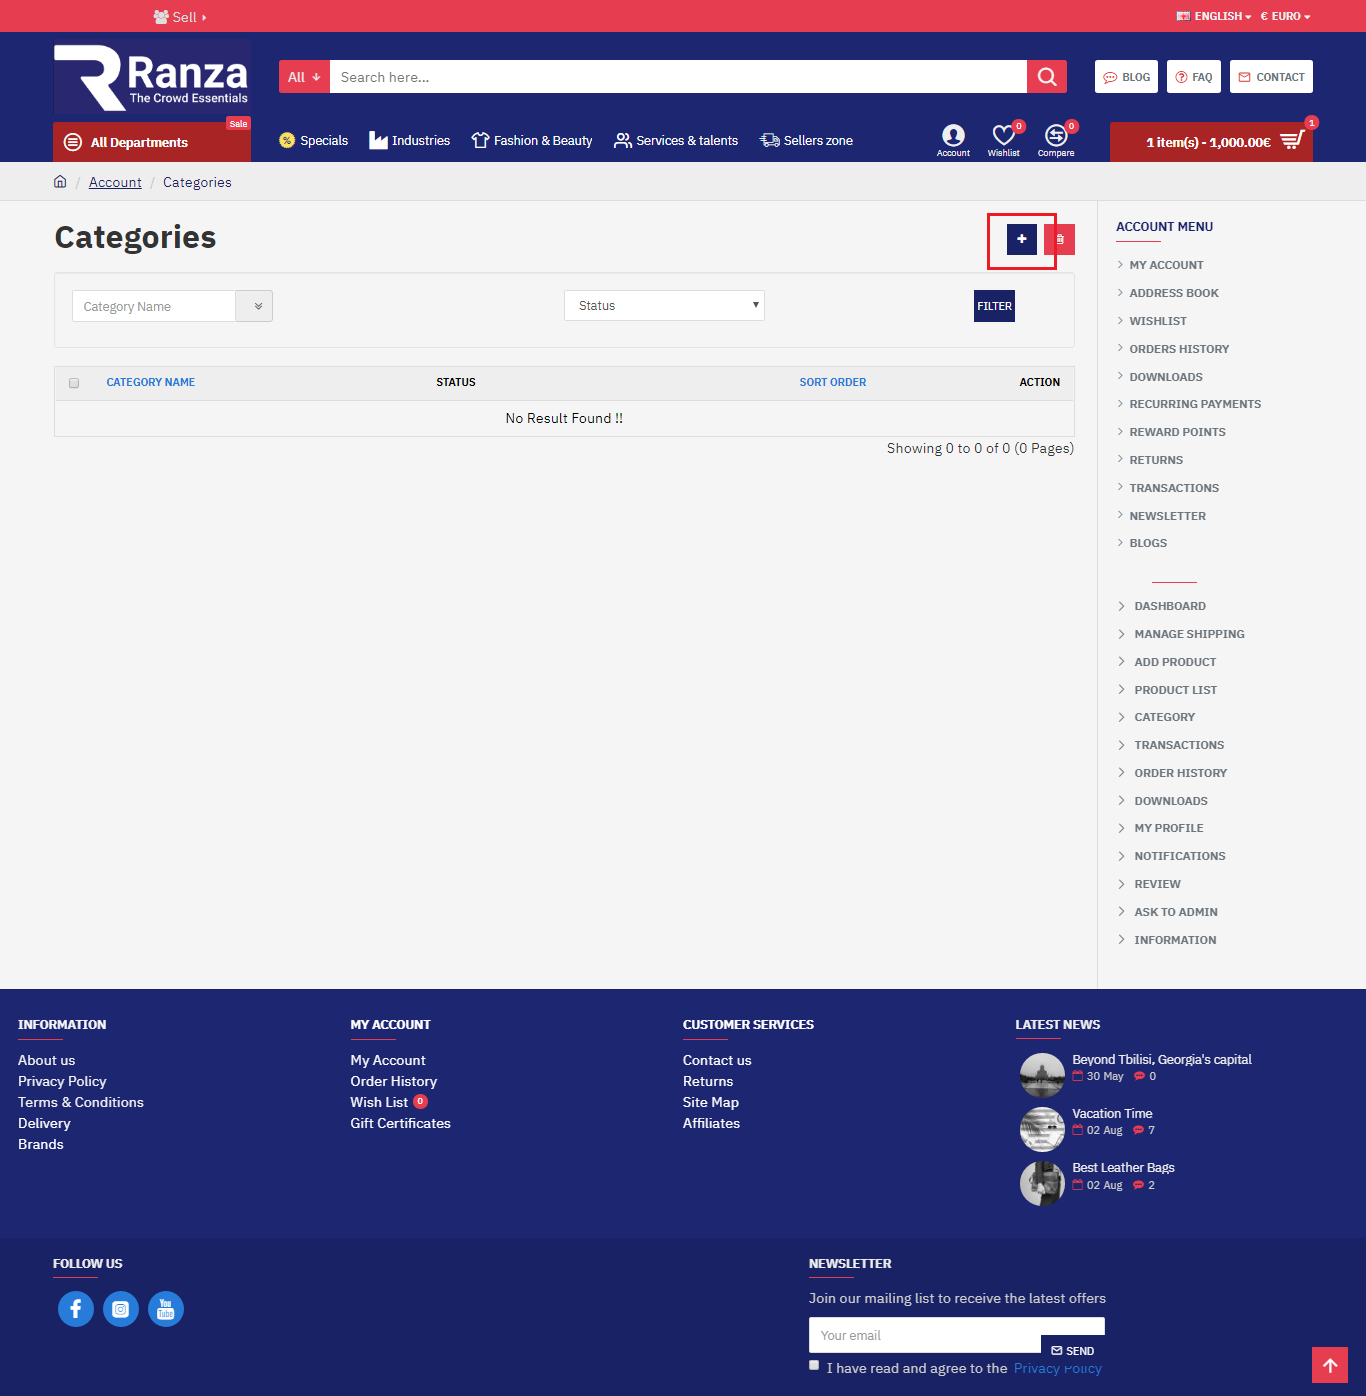
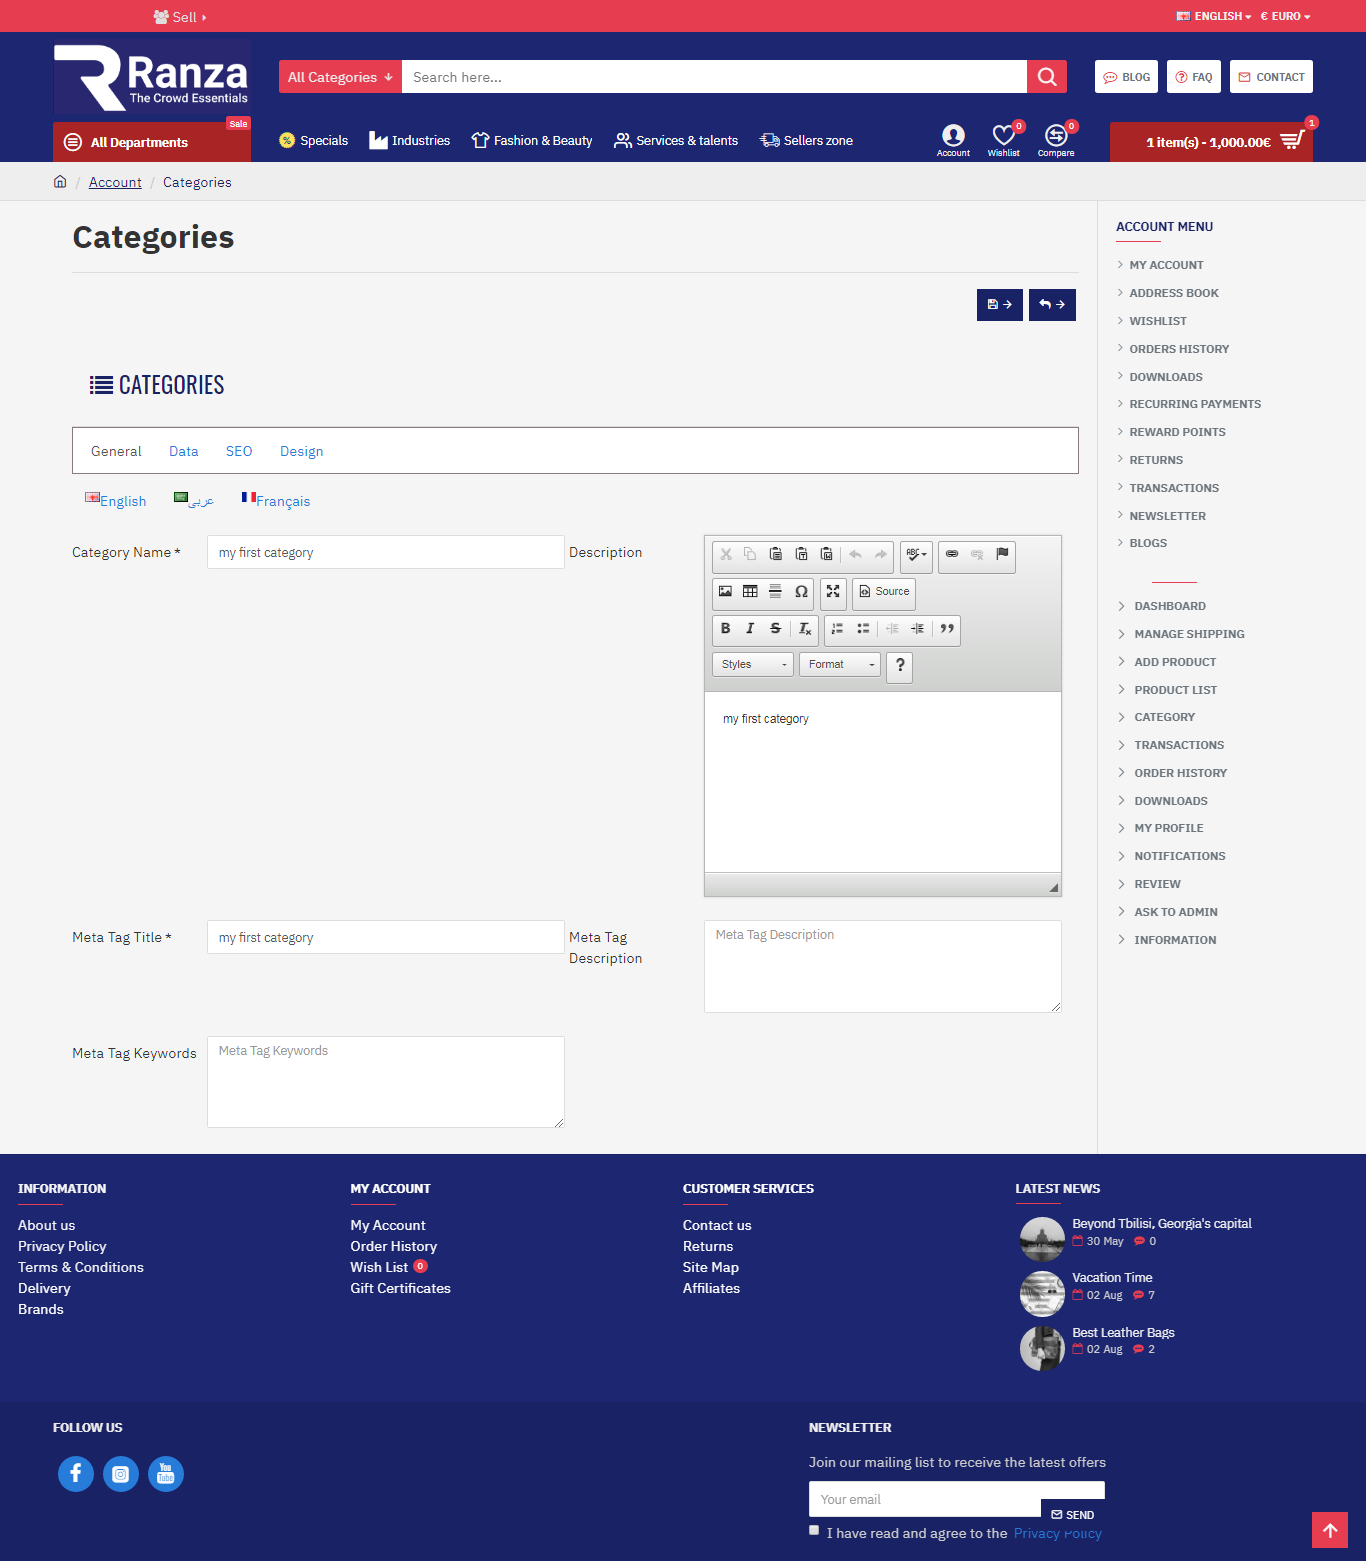
5. Category
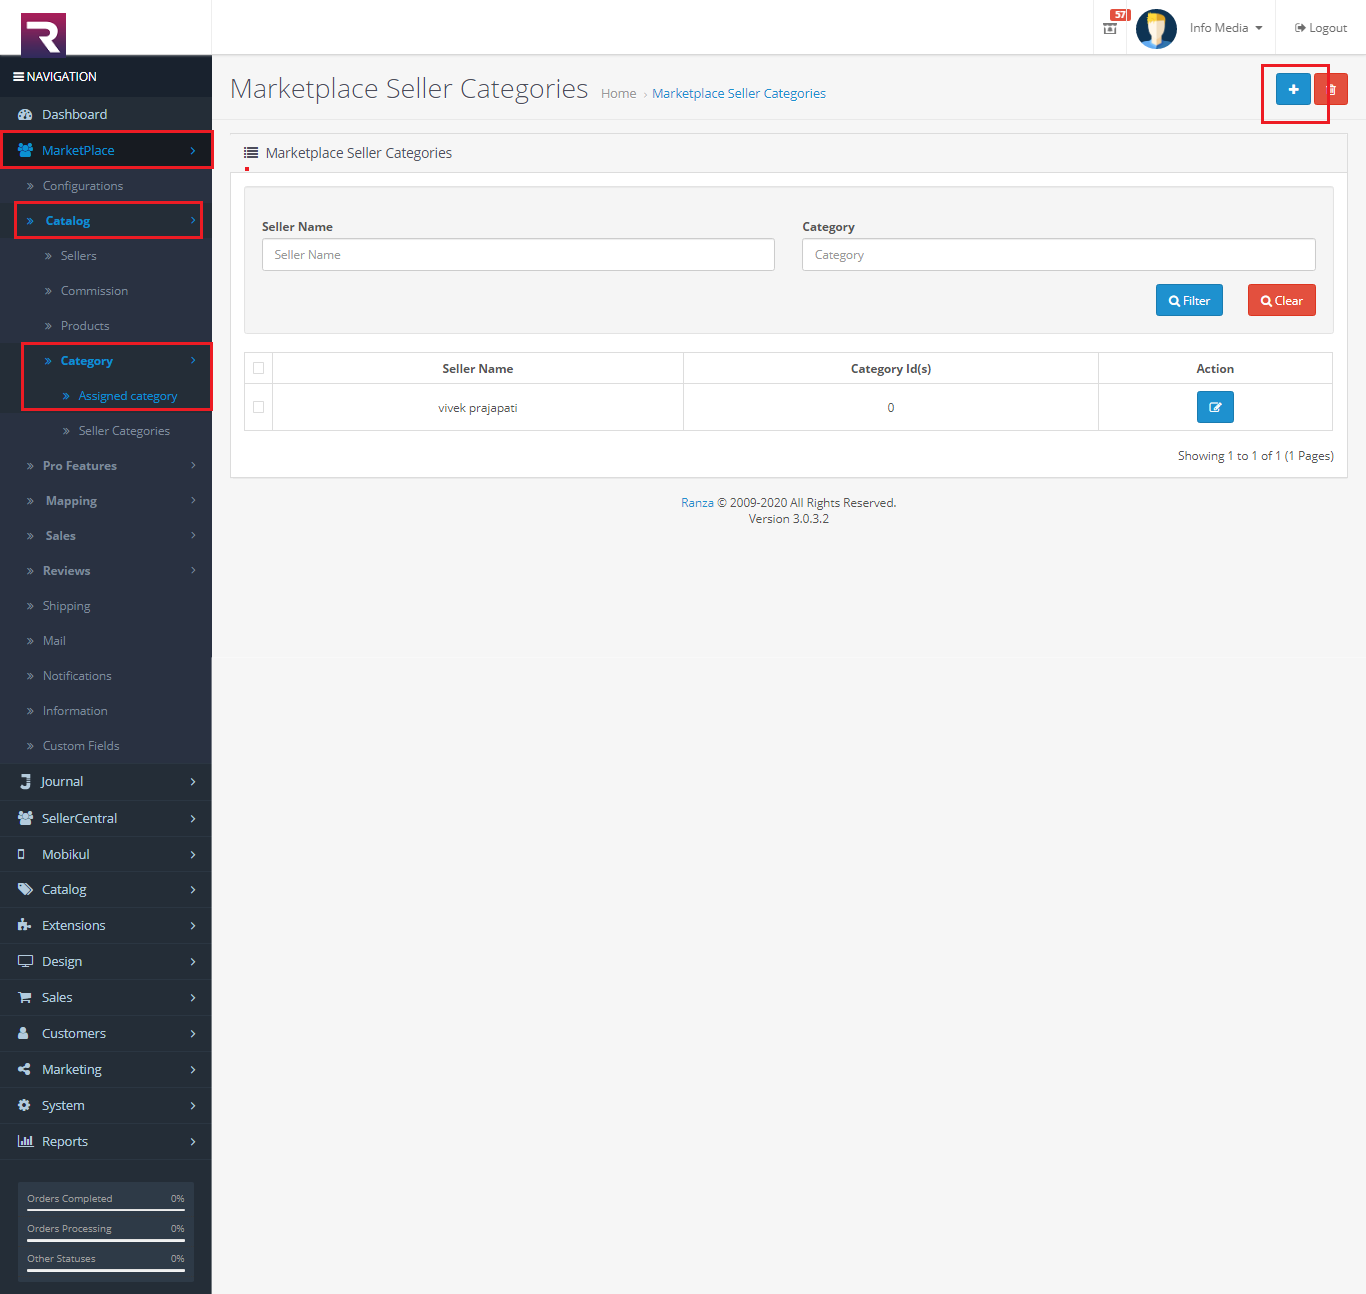
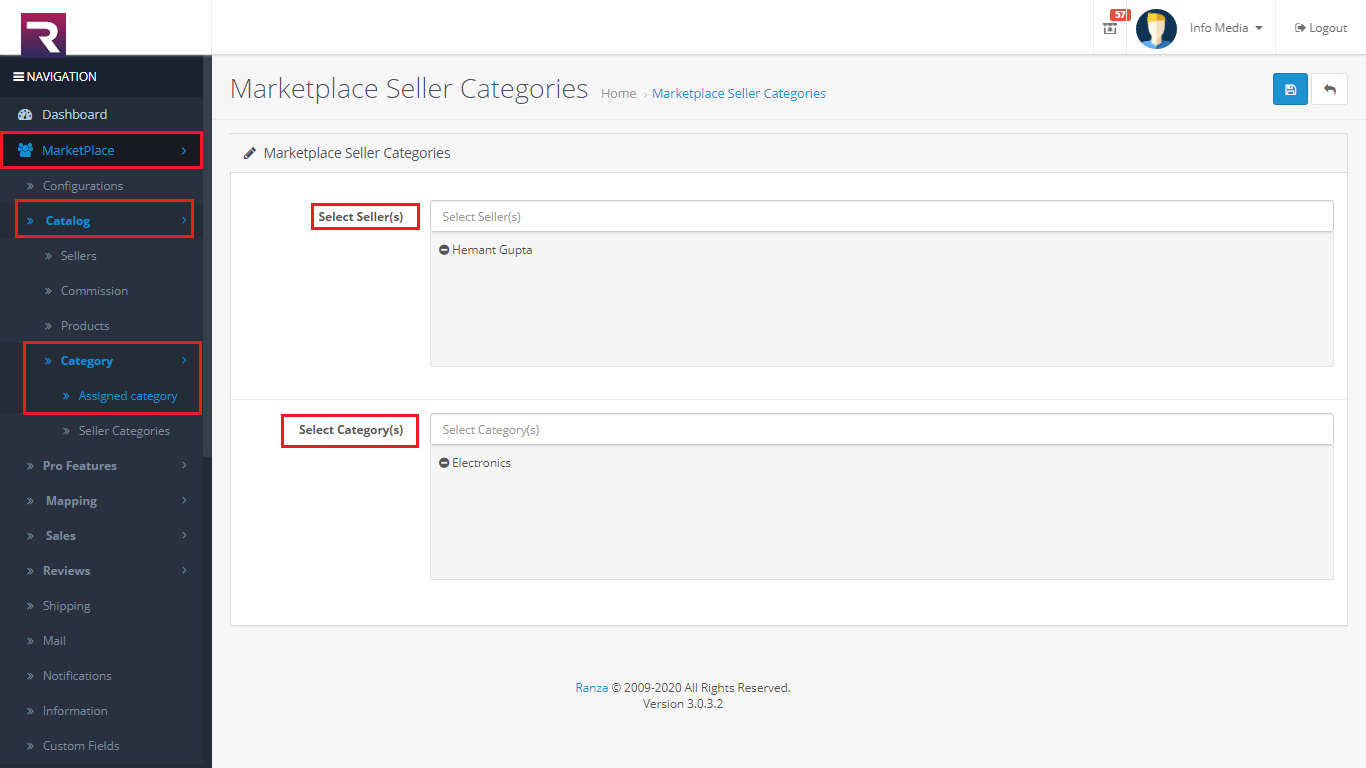
-
- Assigned Category
- 1 Seller for admin will add the category.
- Seller Category
- The seller adds the category. After admin approval will appear on the front side..
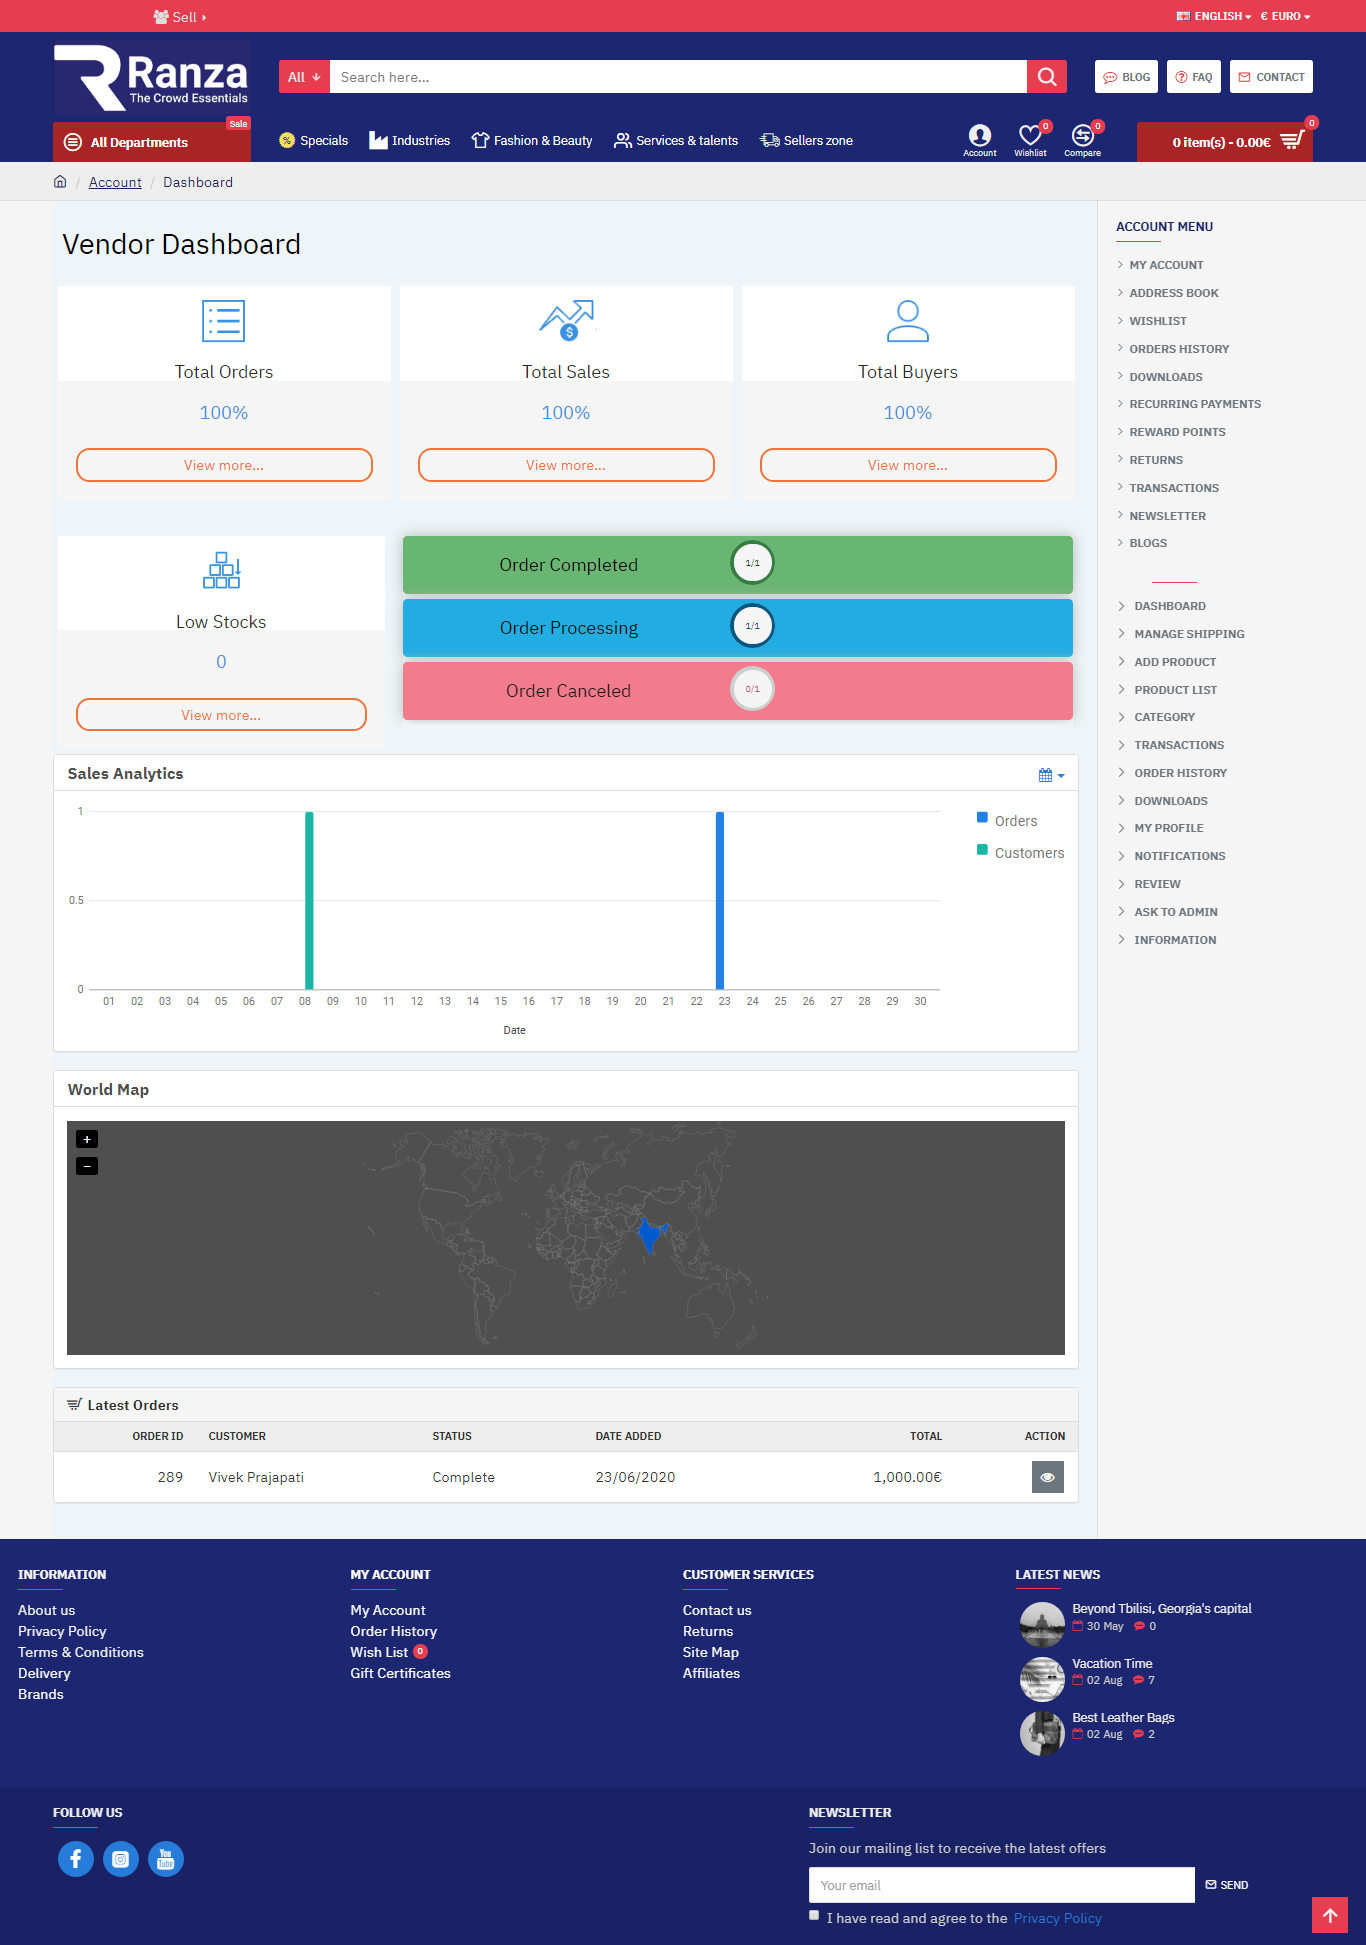
Seller Dashboard
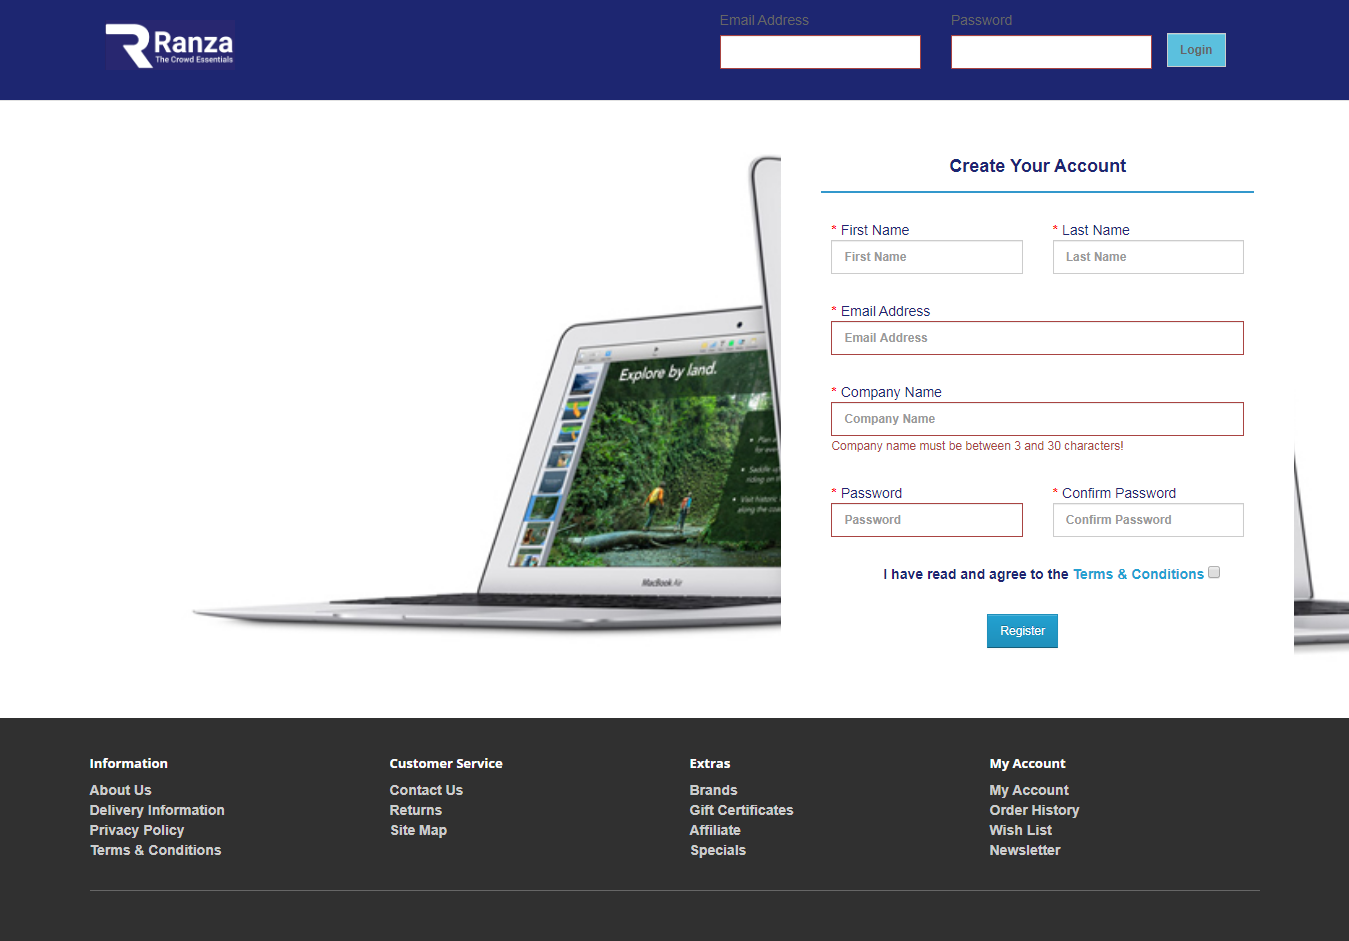
1) Seller Register
- First Name
- Last Name
- Gmail Address
- Comapny Name
- Password
- Confirm Password
2) Seller Login After Approval

3) Seller Account Details
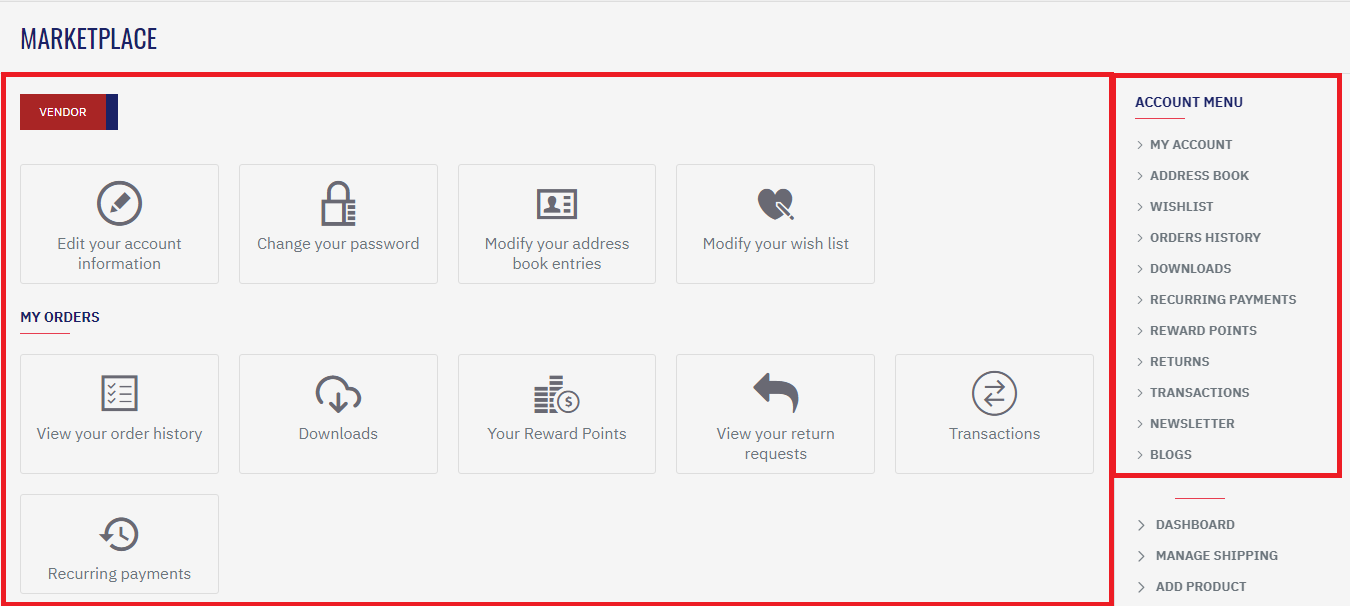
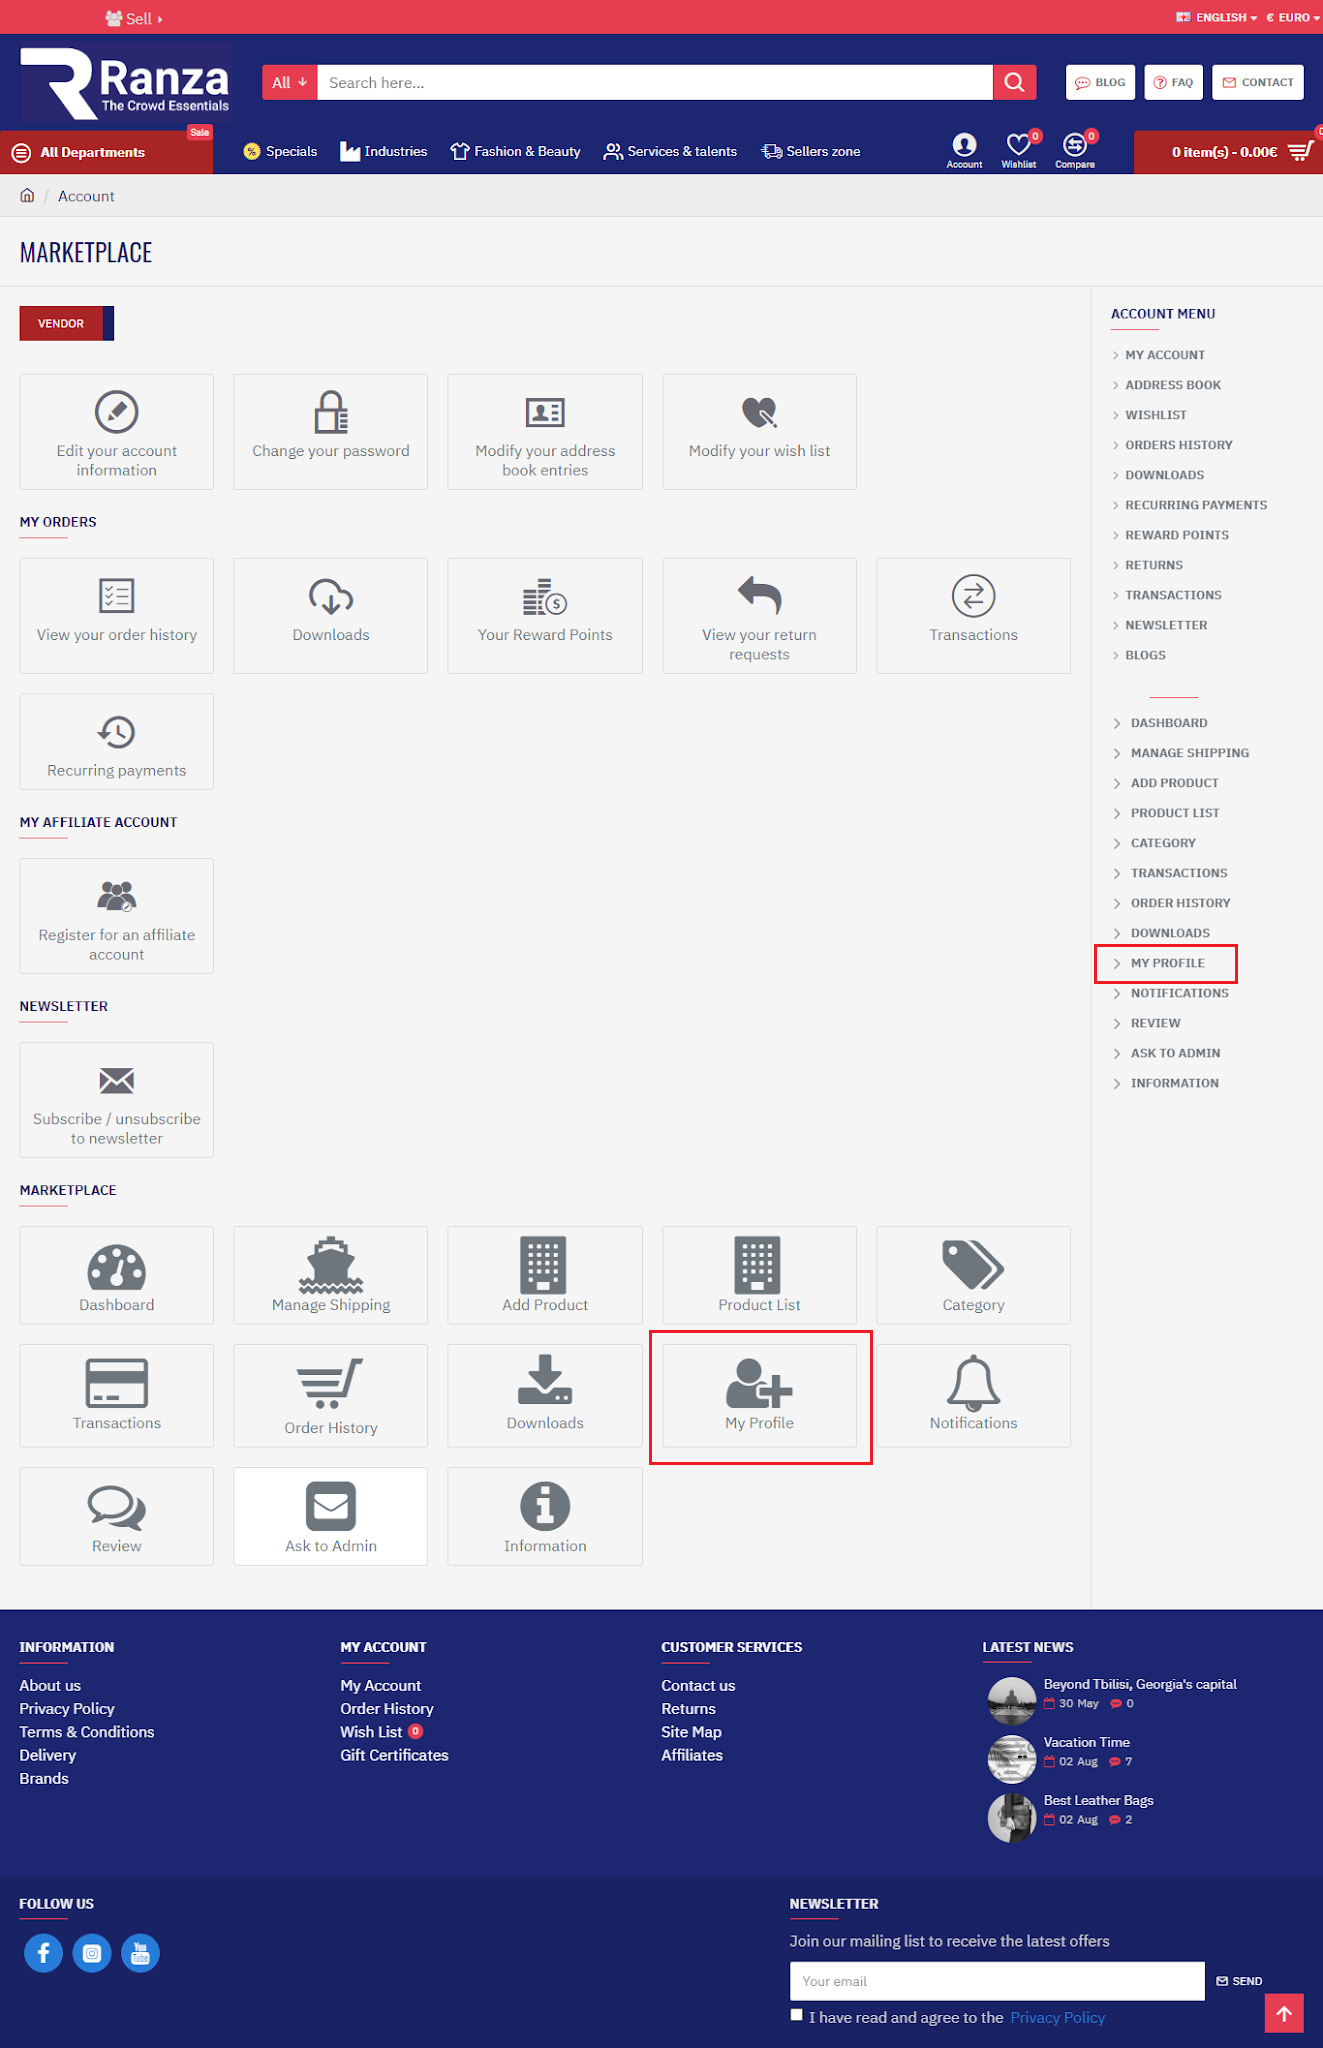
4) Seller Marketplace Details
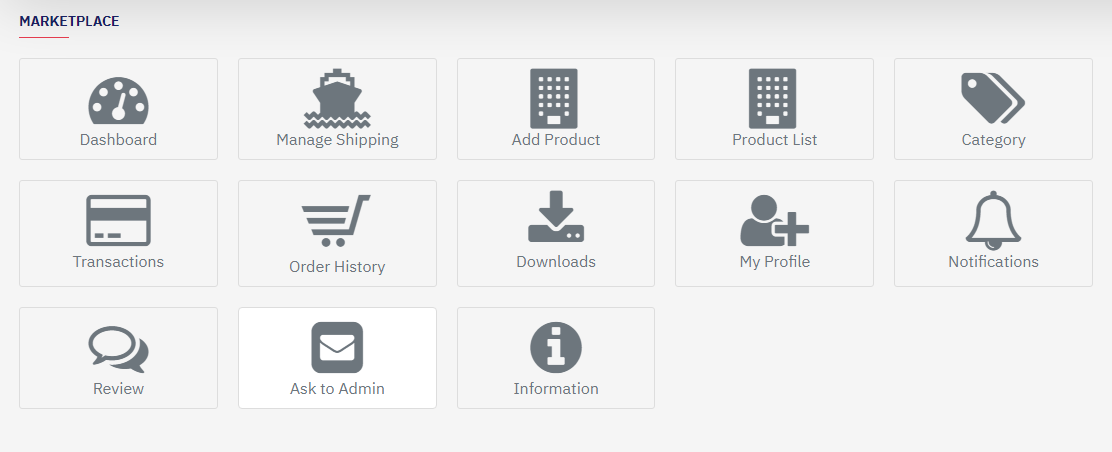
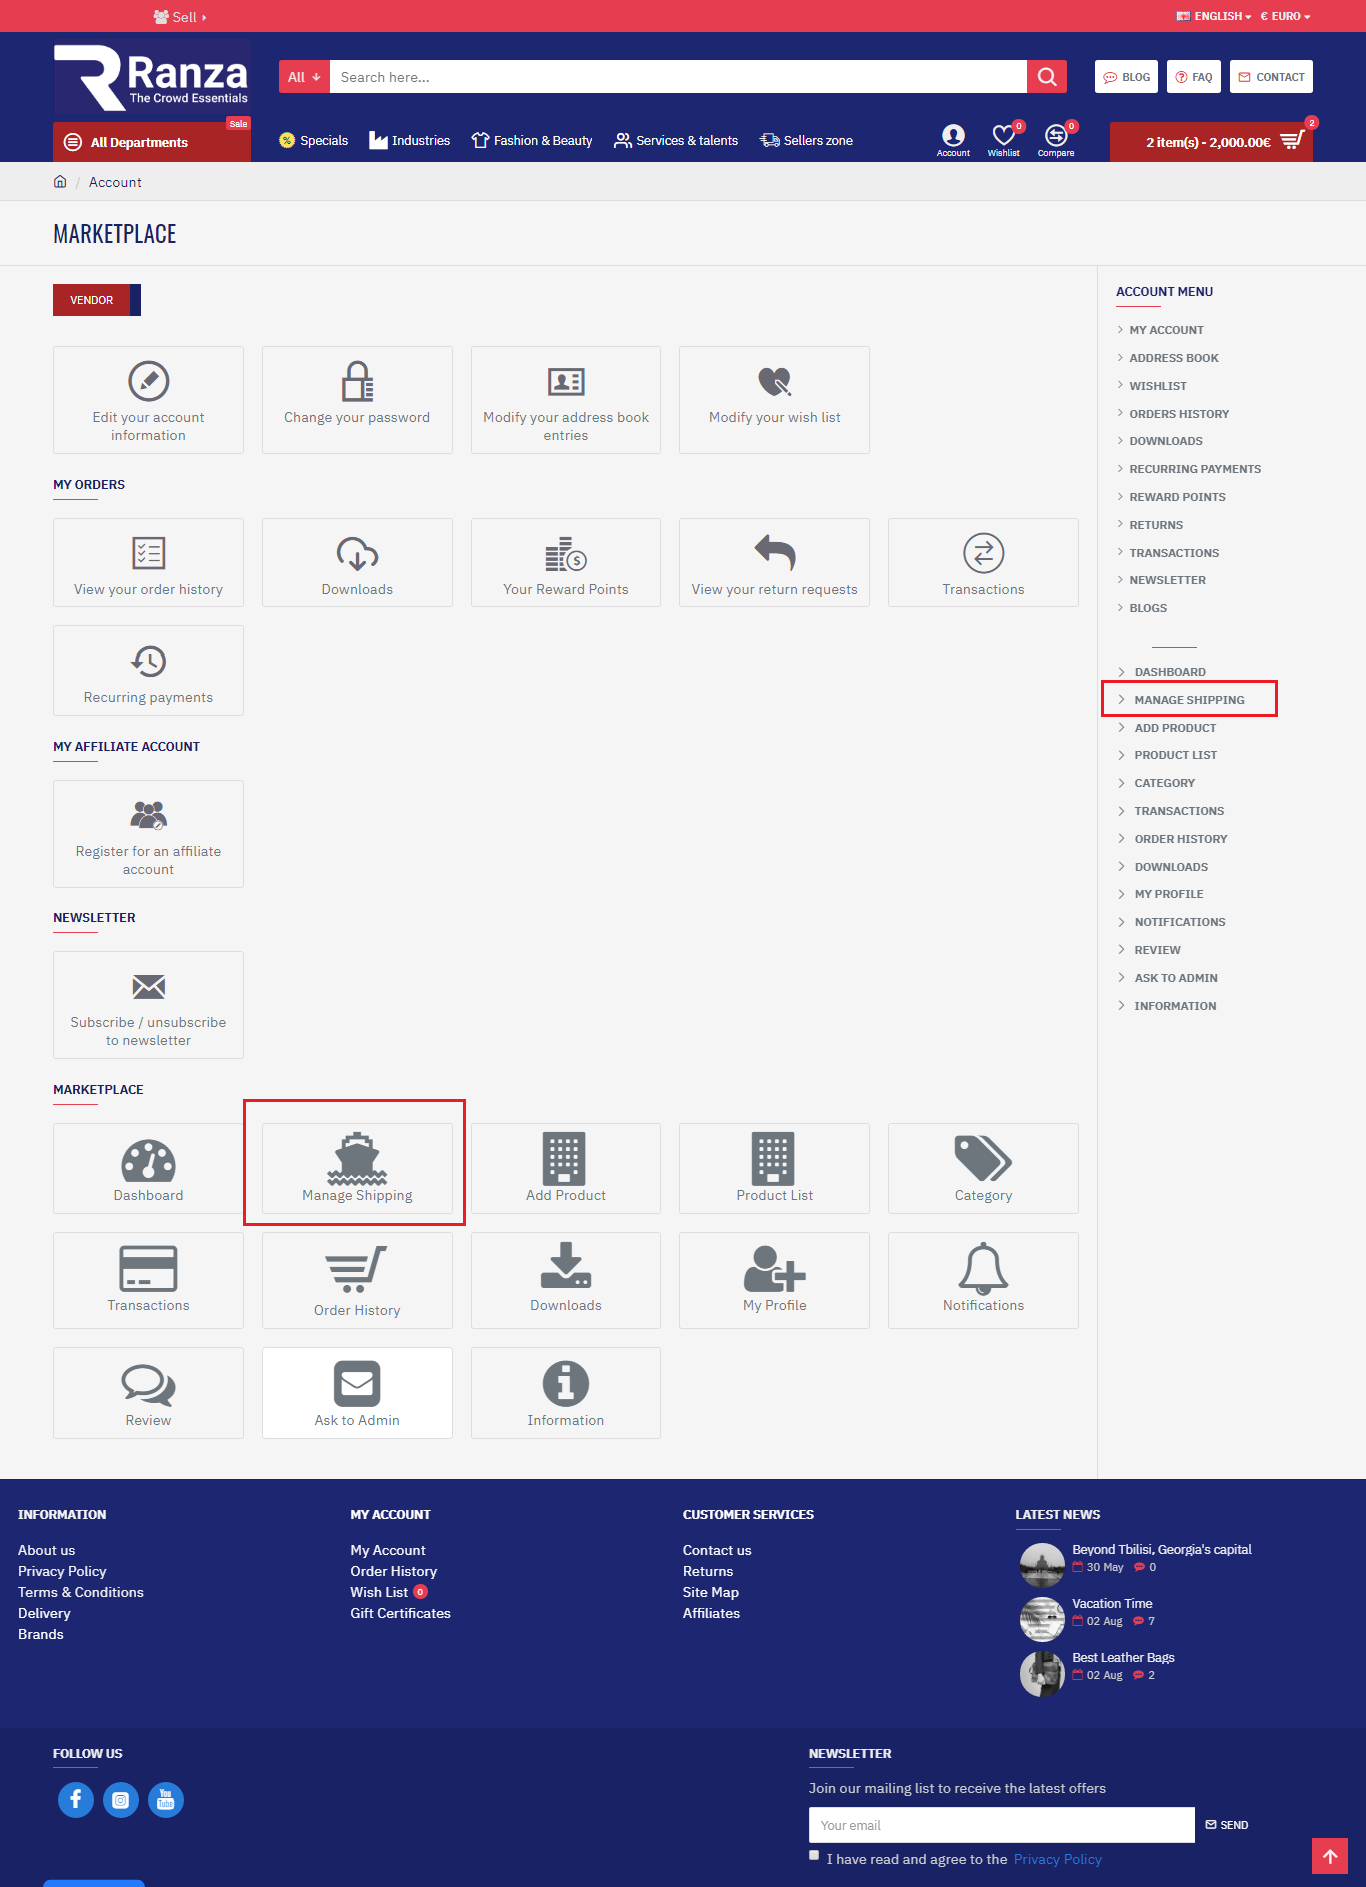
- Dashboard
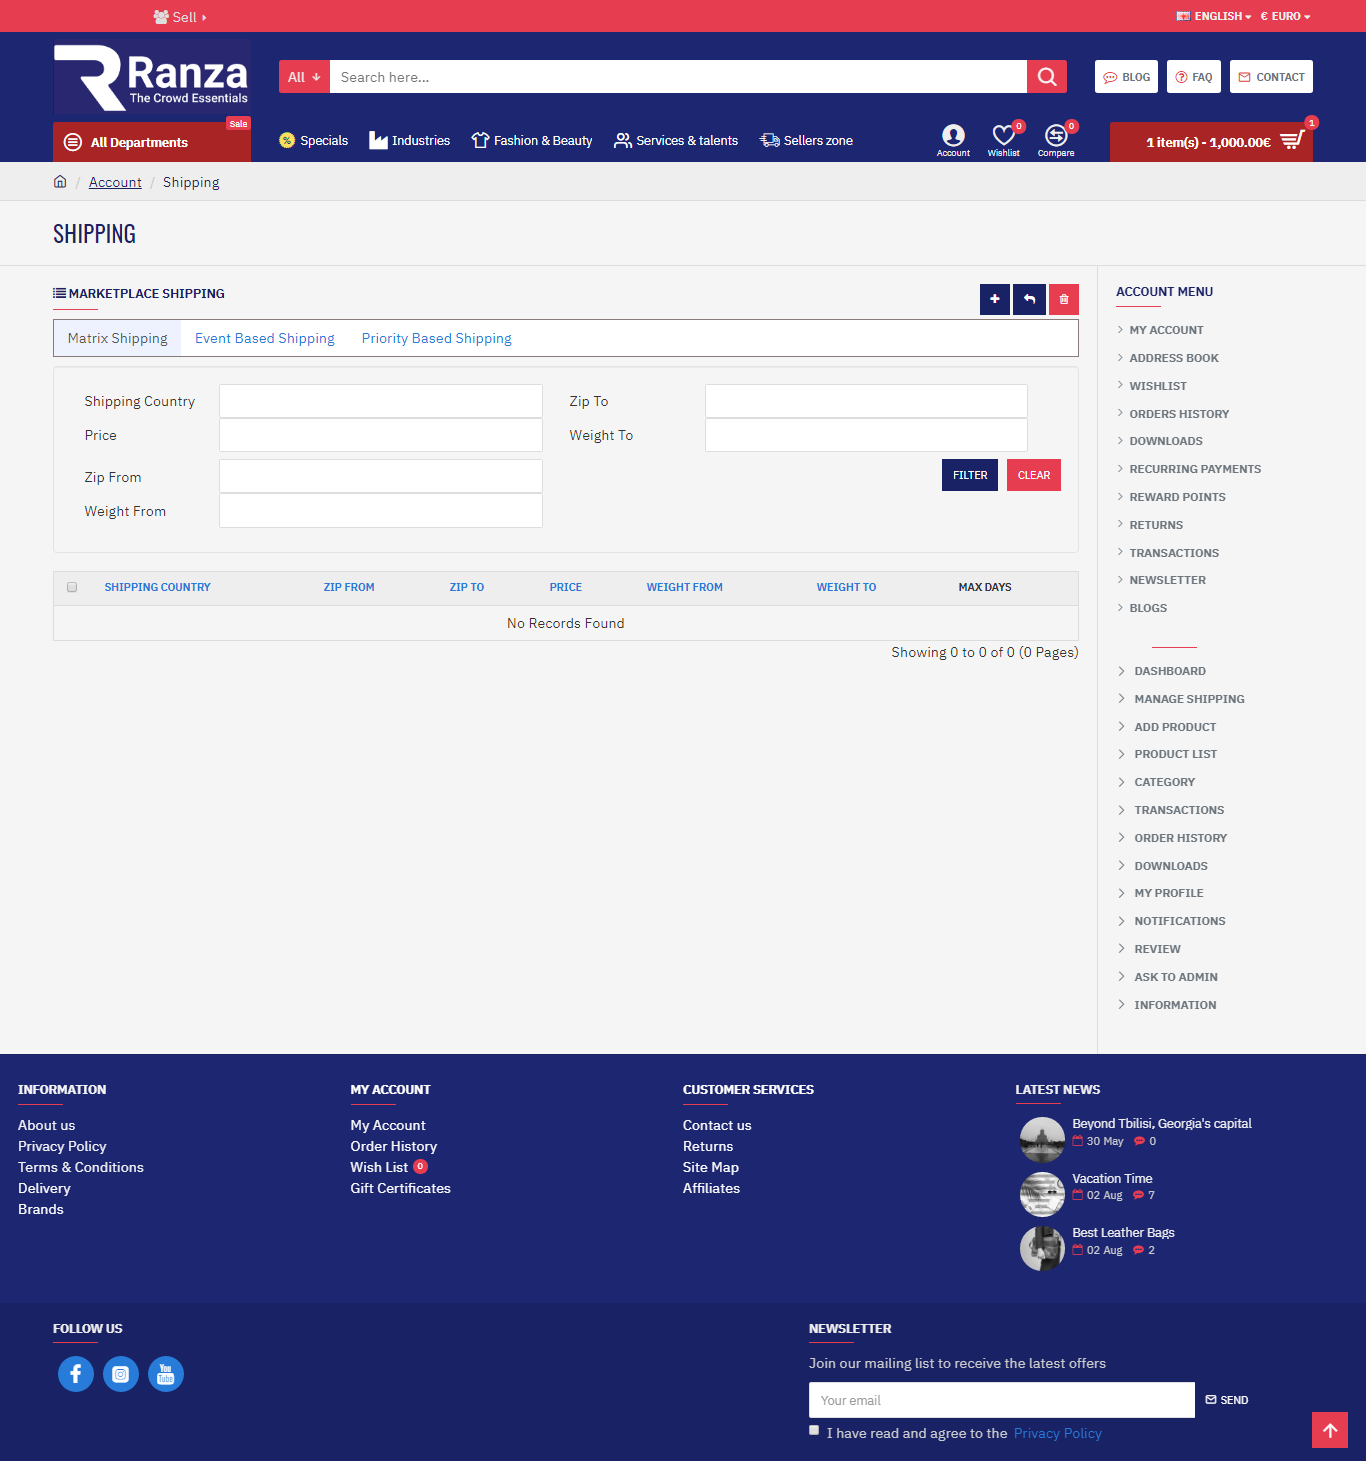
- Manage Shipping
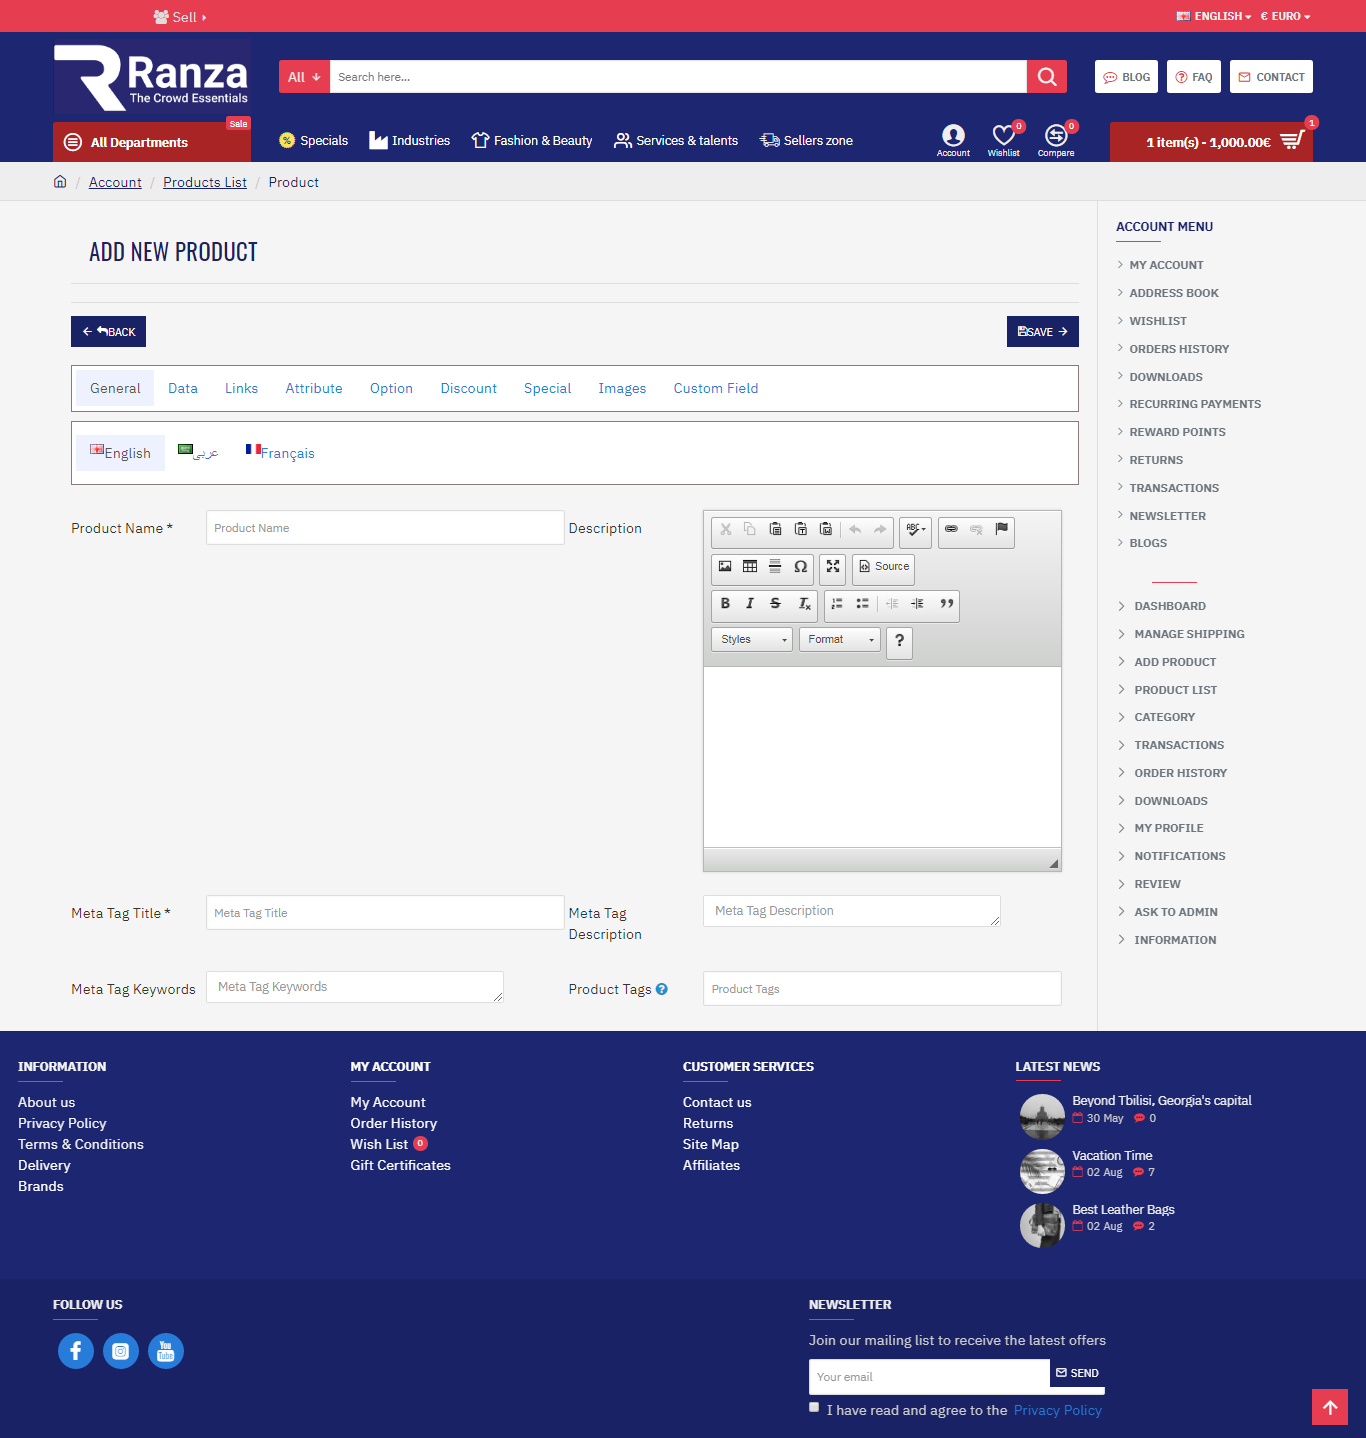
- Add Product
- Comapny Name
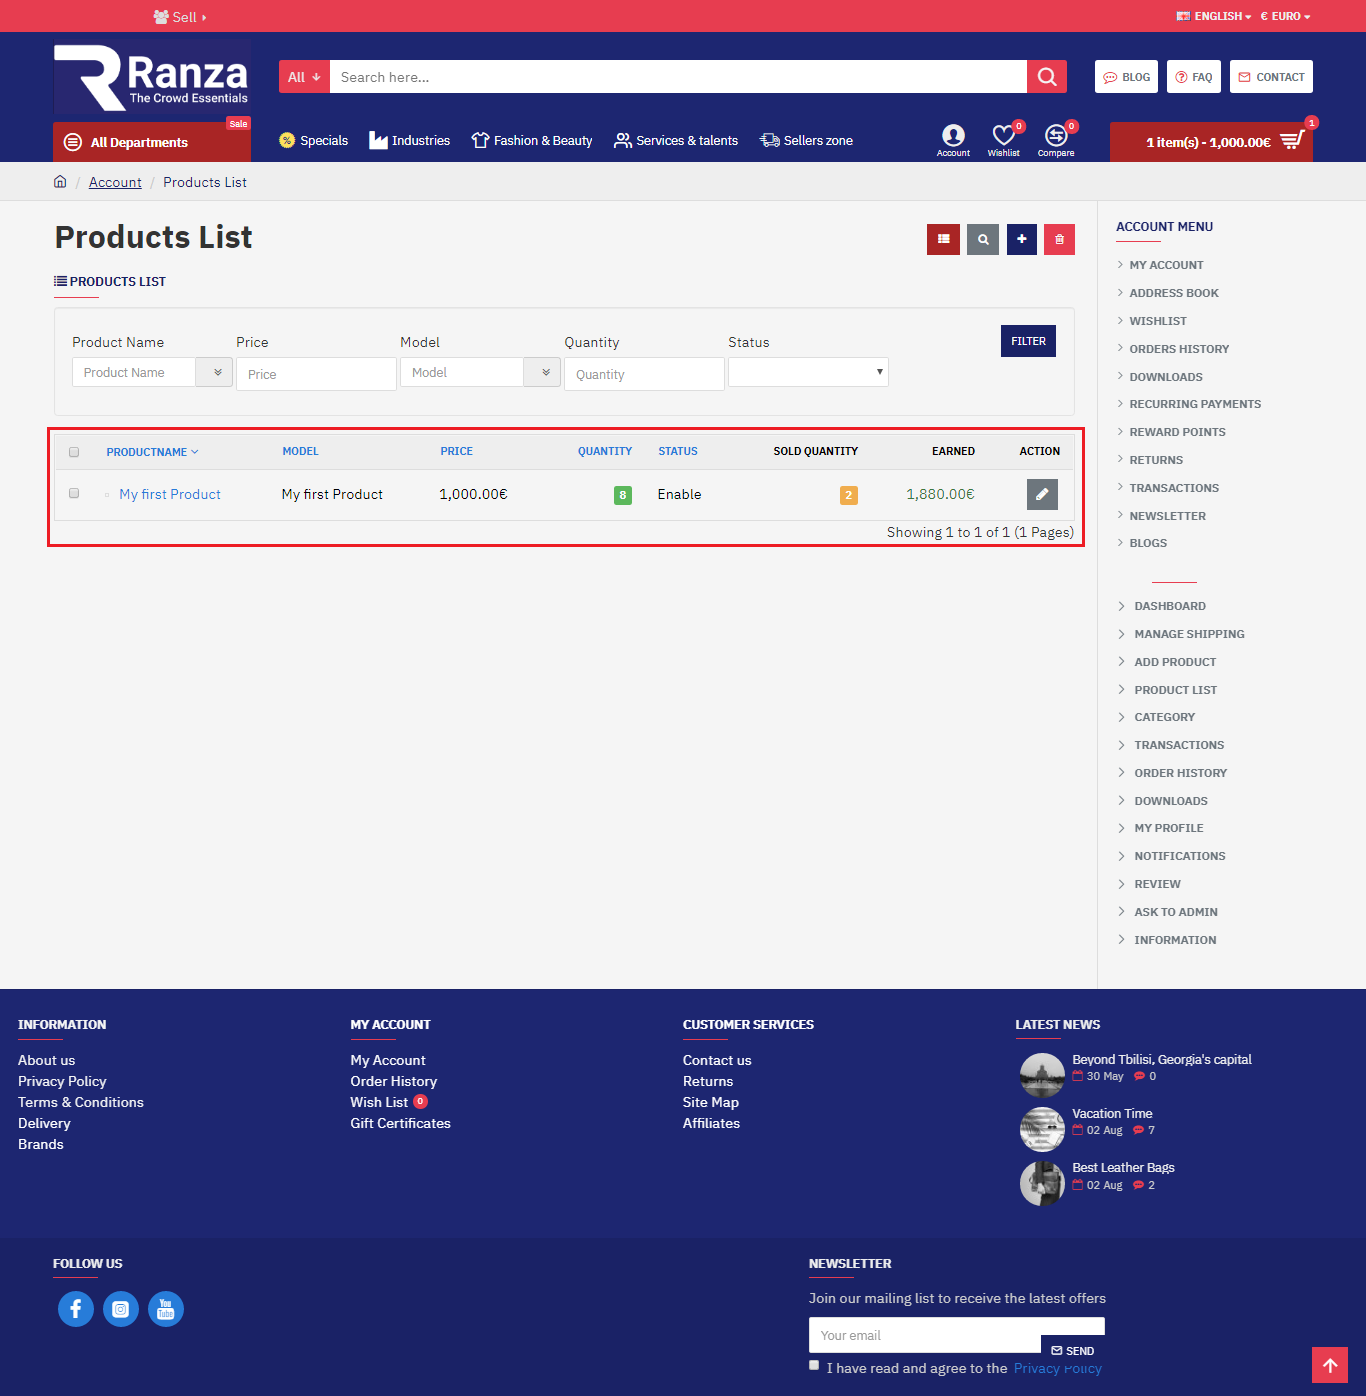
- Product List
- Category
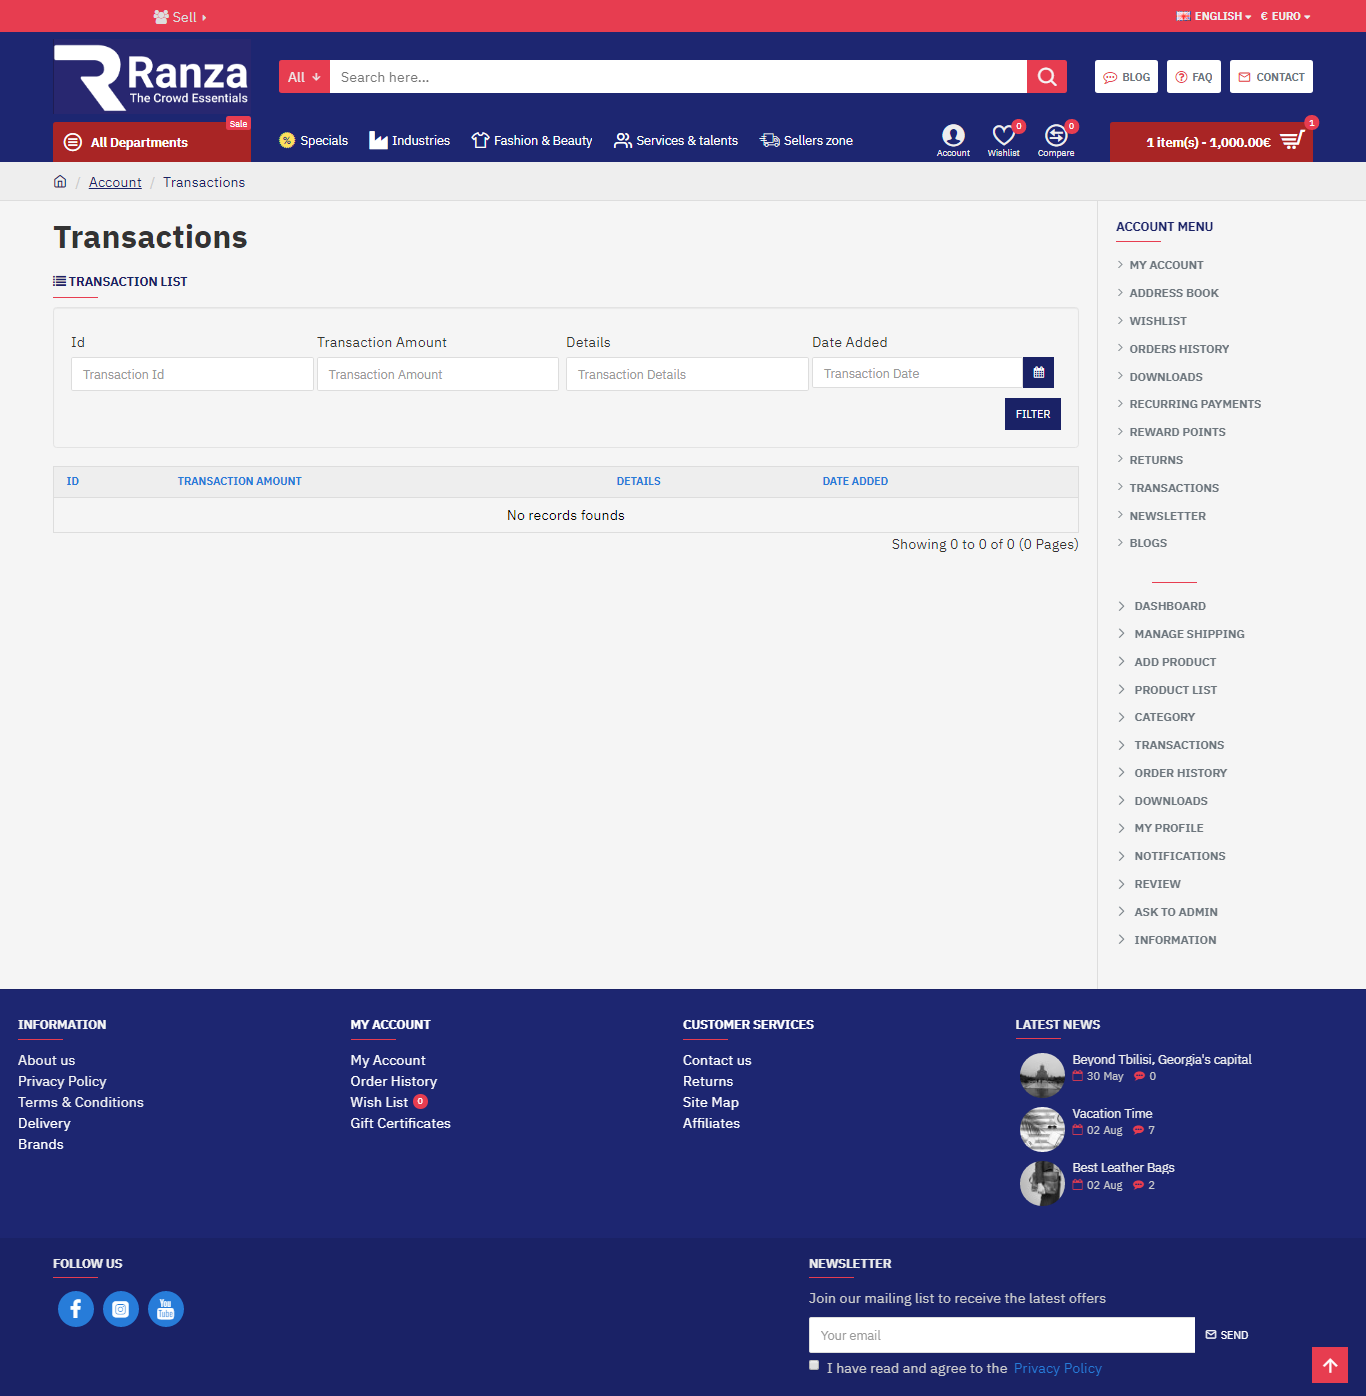
- Transactions
- Manage Shipping
- Order History
- My Profile
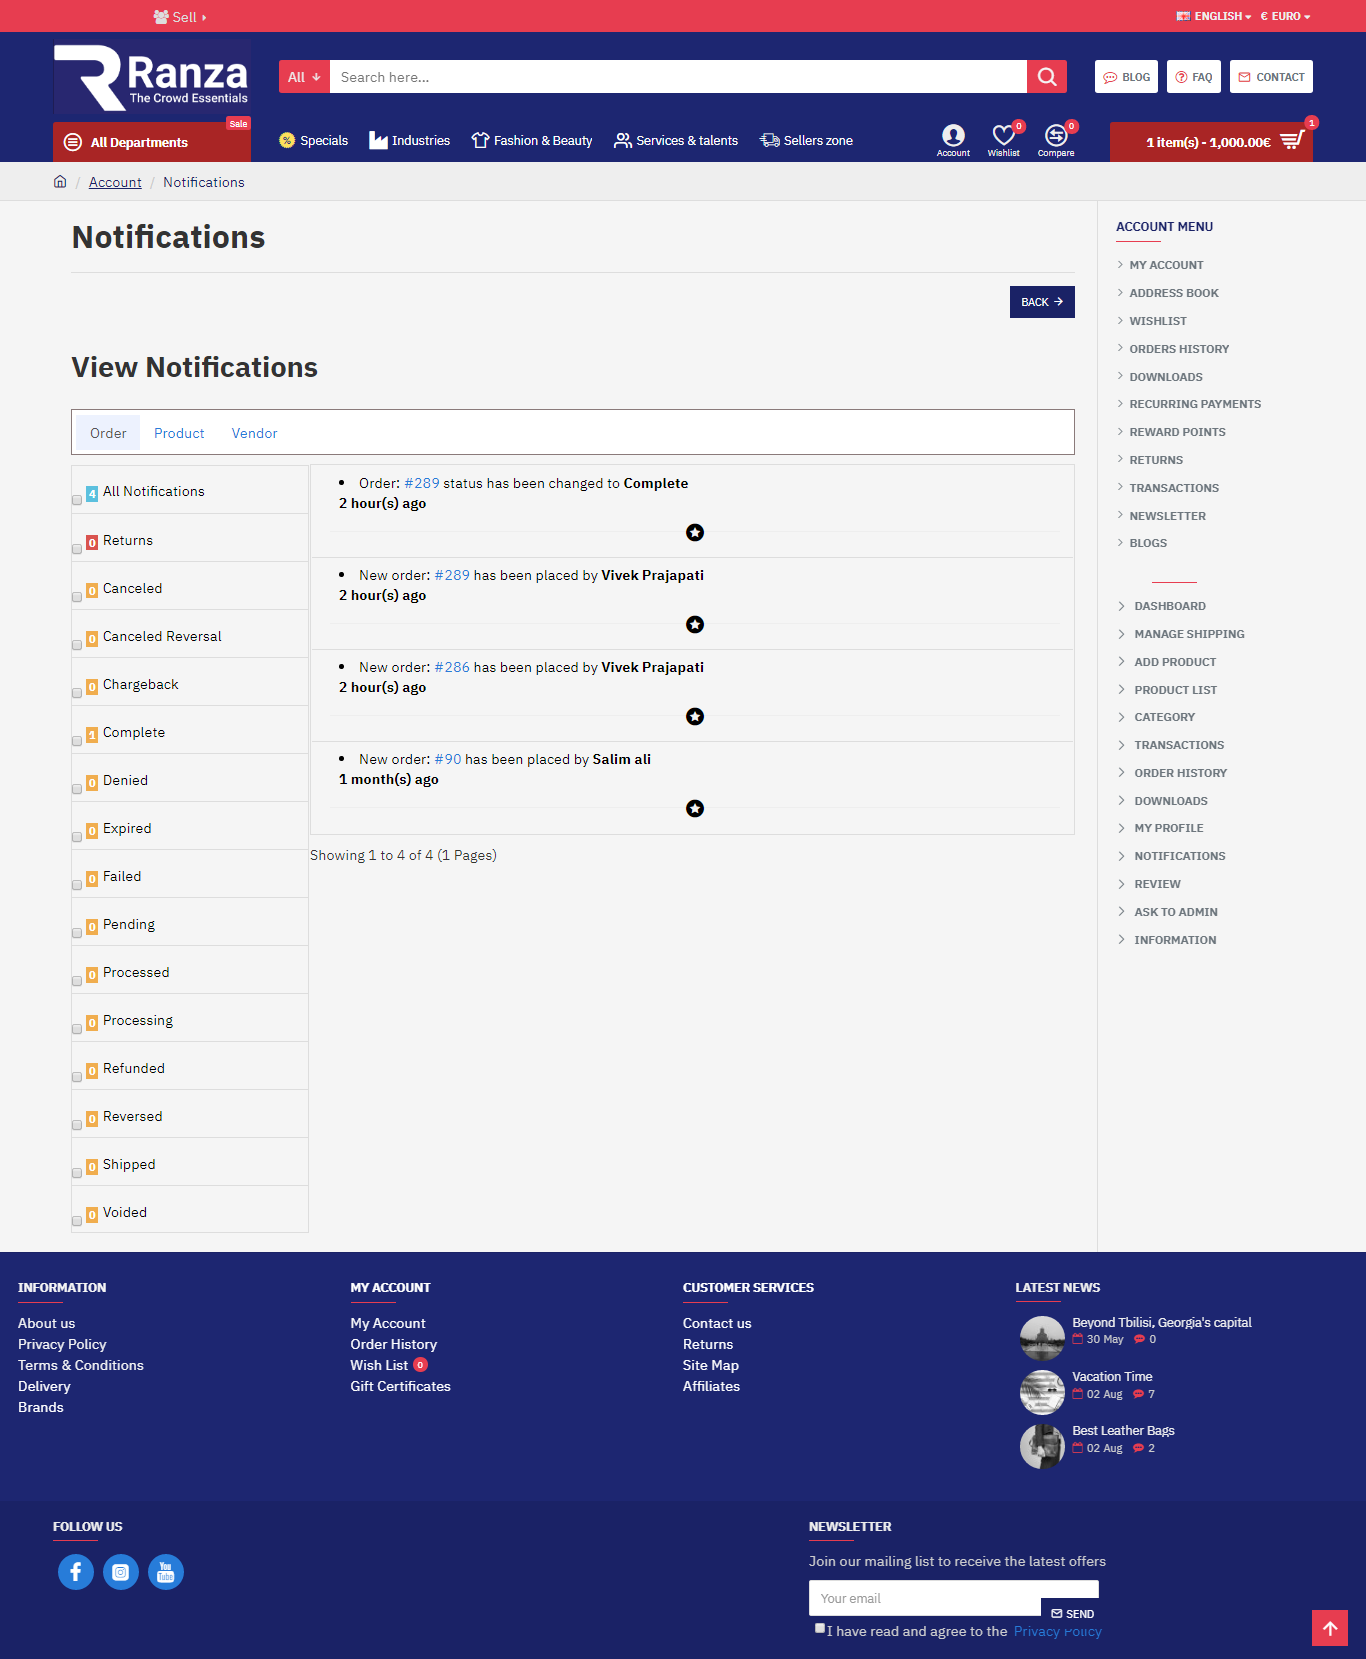
- Notification
- Review
- Ask To Admin
- Information
-
- Dashboard
- Manage Shipping
- Add Product
- (Note:-) Show product in after admin approval.
- Product List
- Category
- (Note:-) Show category in after admin approval.
- Transactions
- Order History

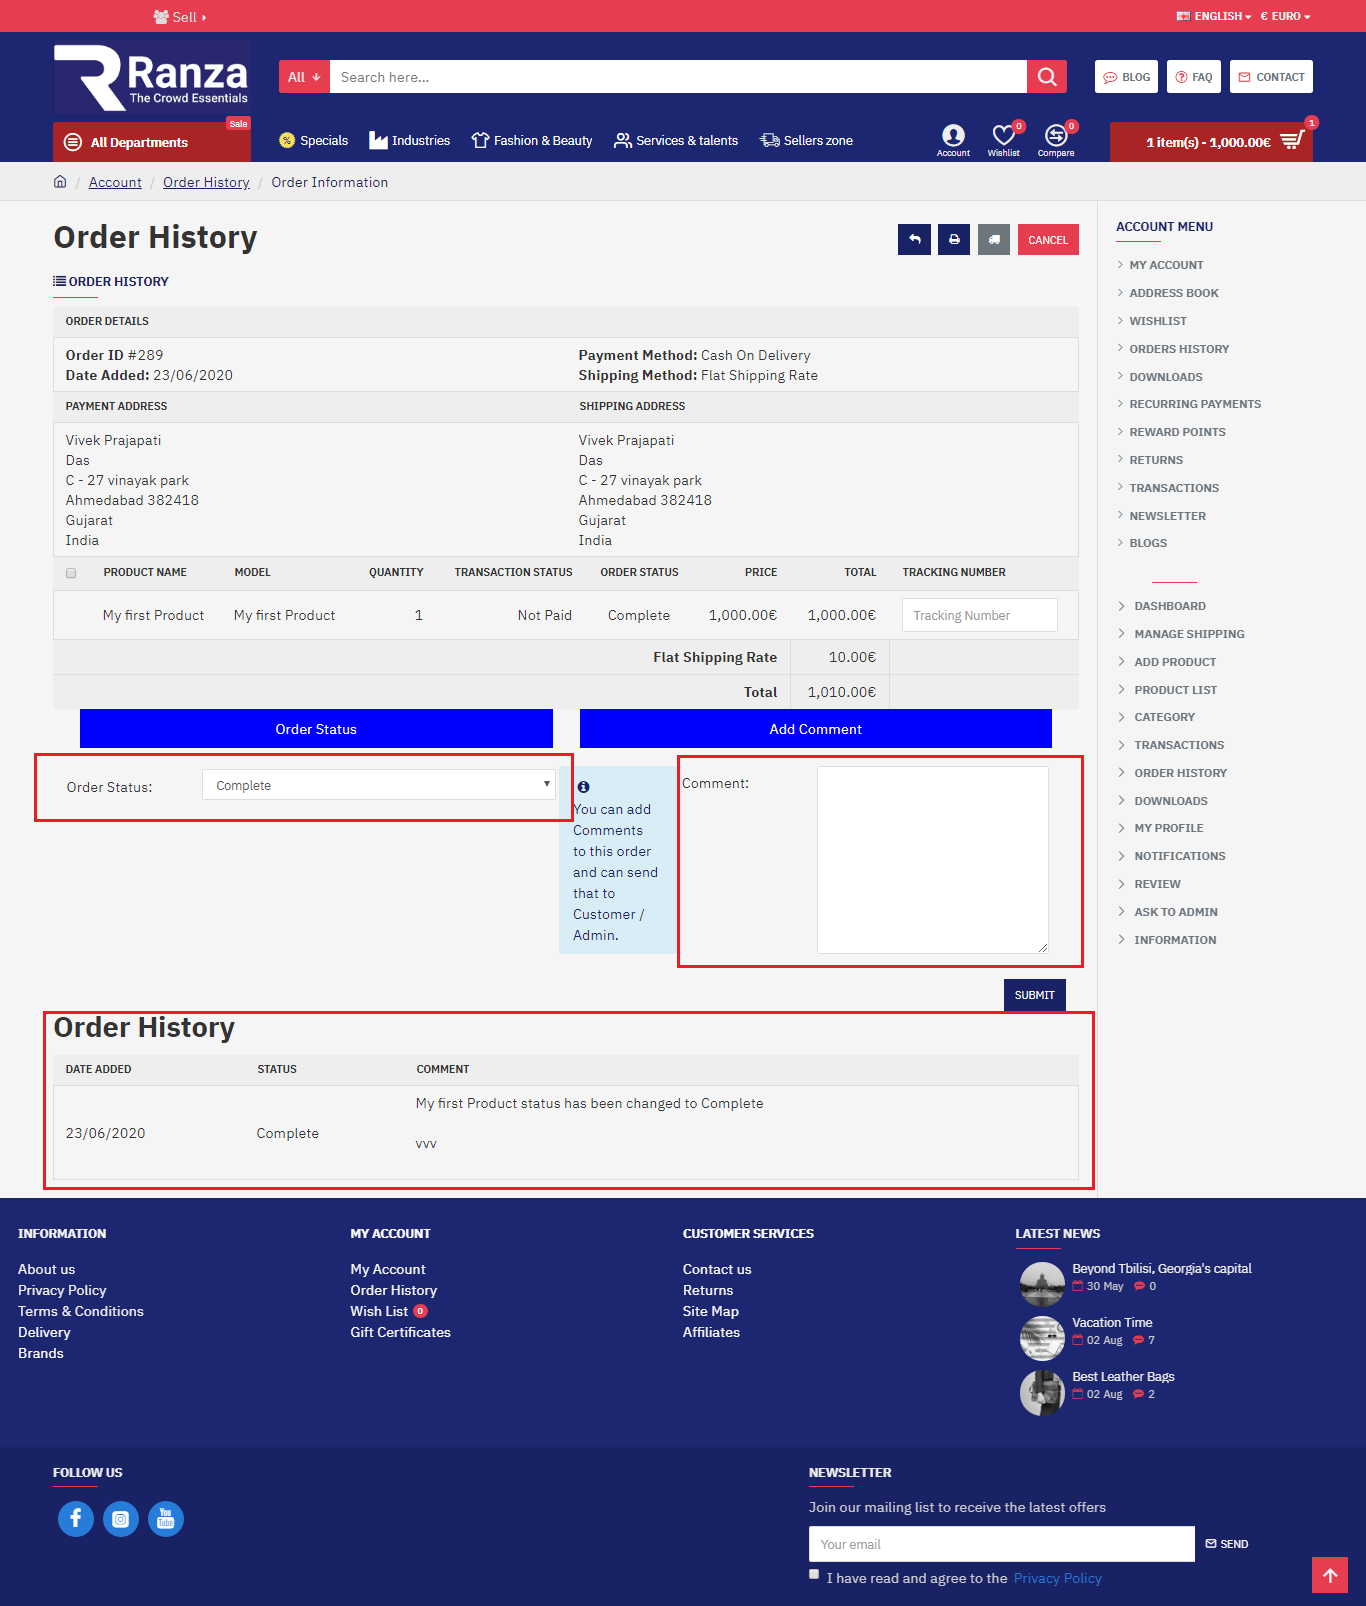
- The product will appear in the order history when the customer makes a purchase.
- Edit seller order information.
- Change the order status.
- Add the comment.
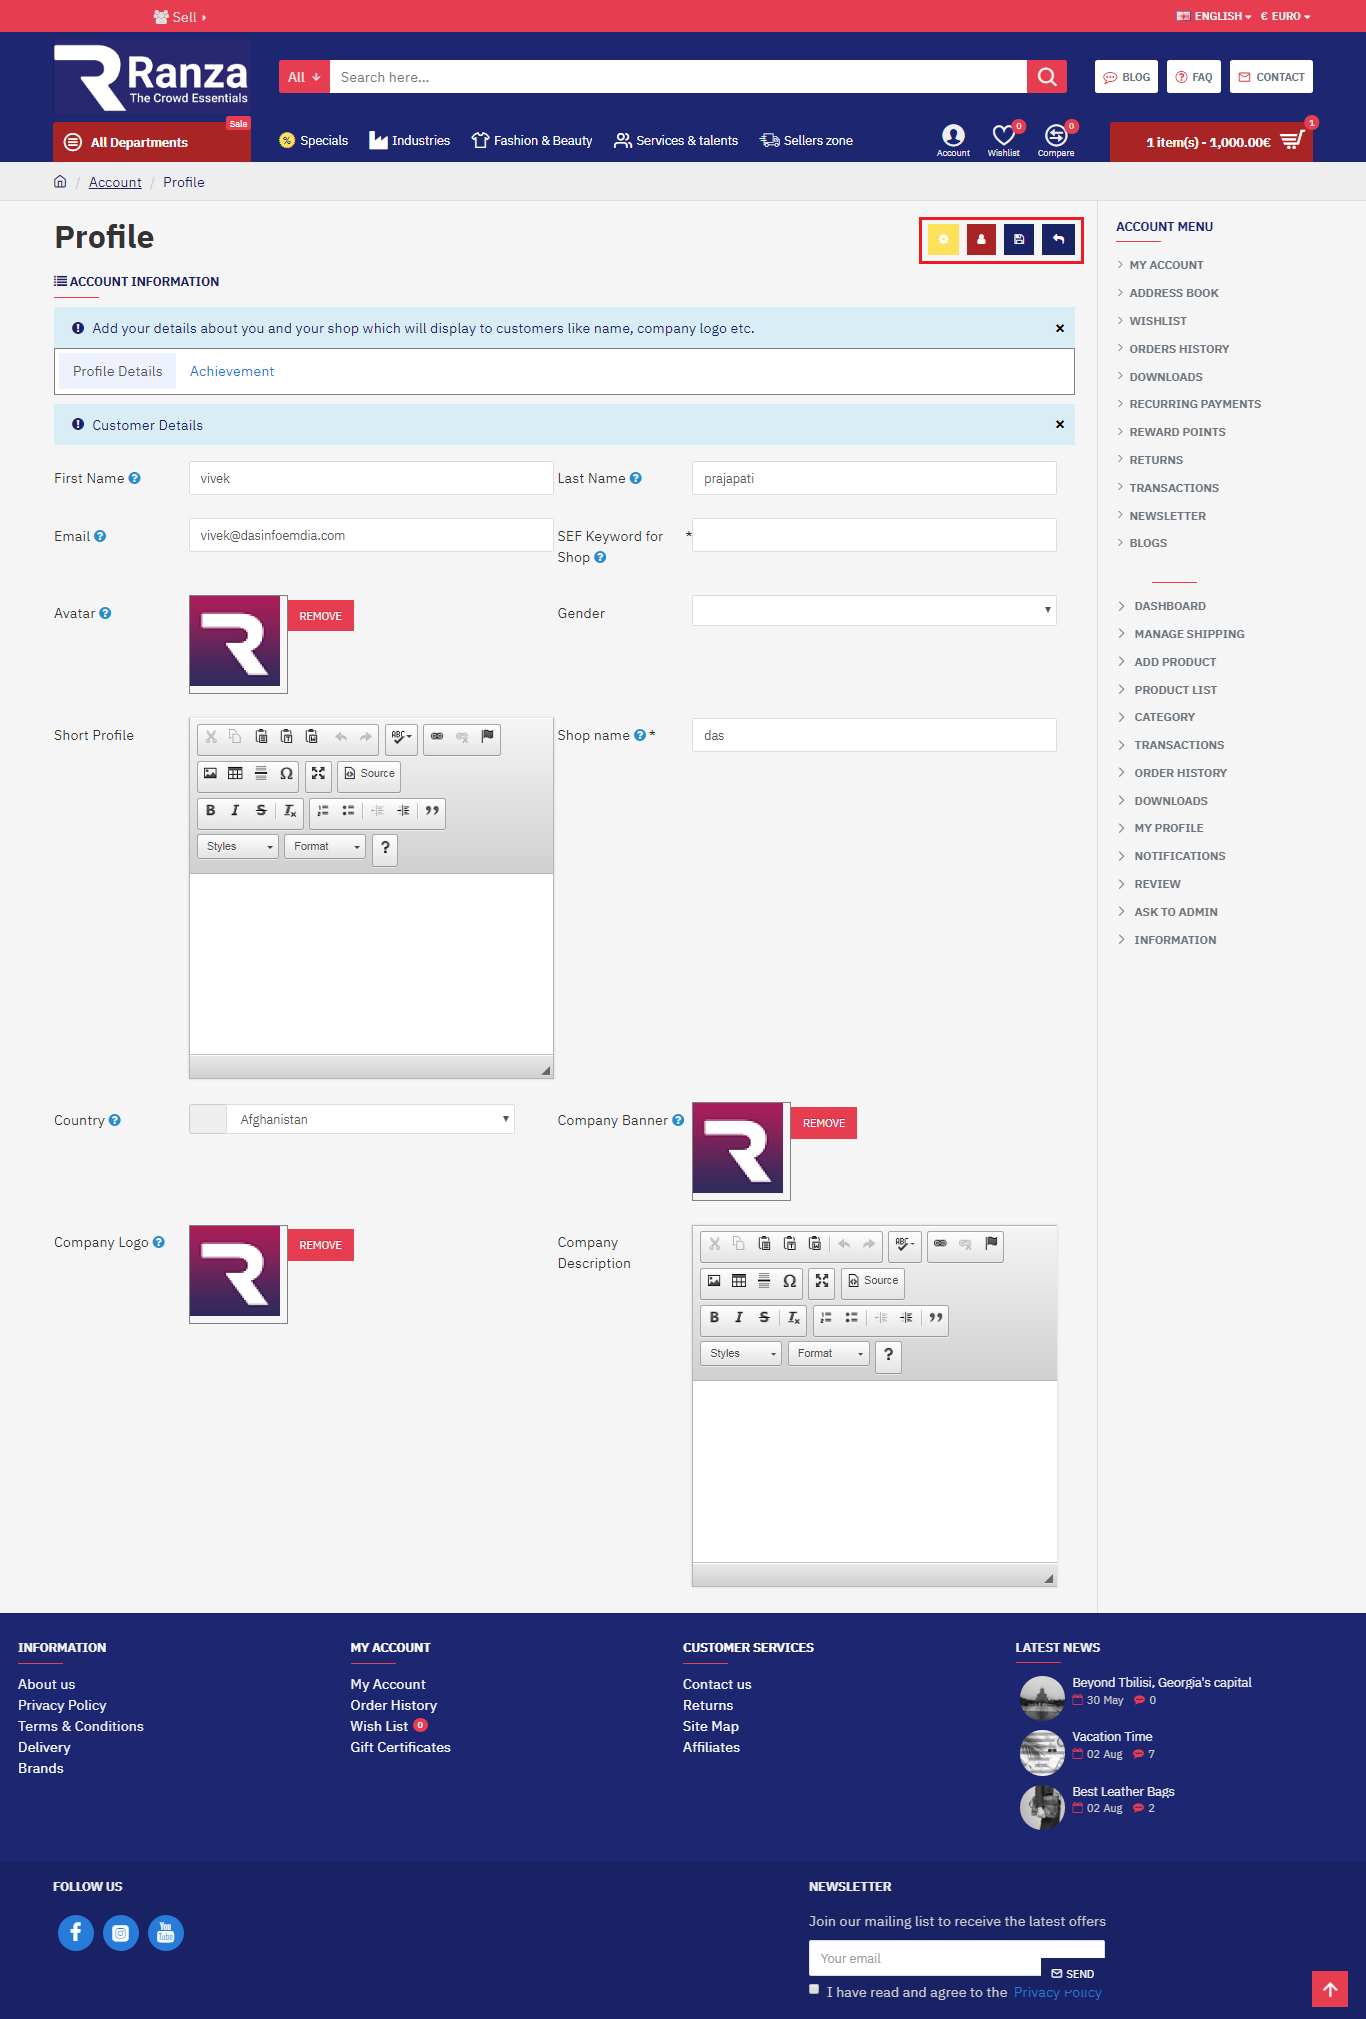
- My Profile
- Seller profile edit details in name description and image.
- Notification
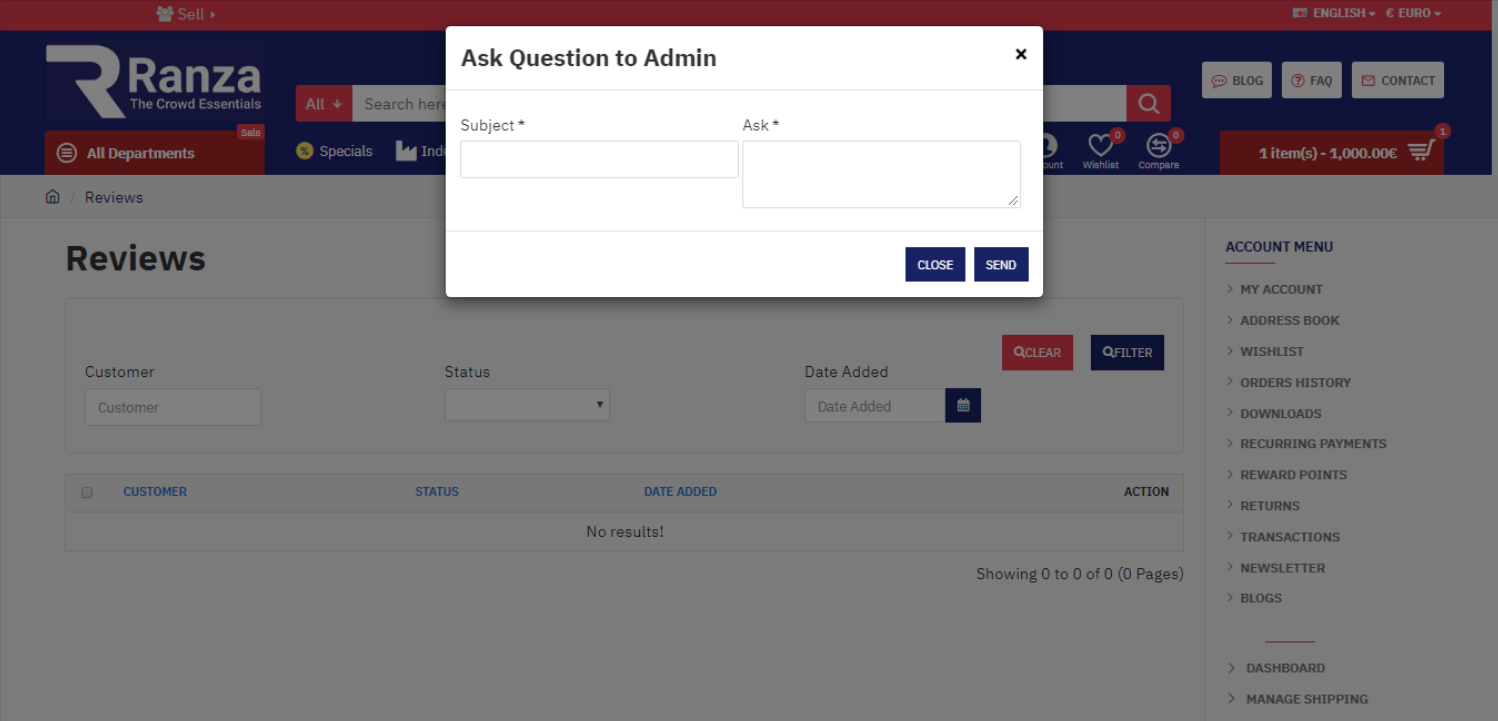
- Ask To Admin
- What is the subject.
- What is ask to admin.
Market Place Shipping Admin Side
1. Shipping Admin
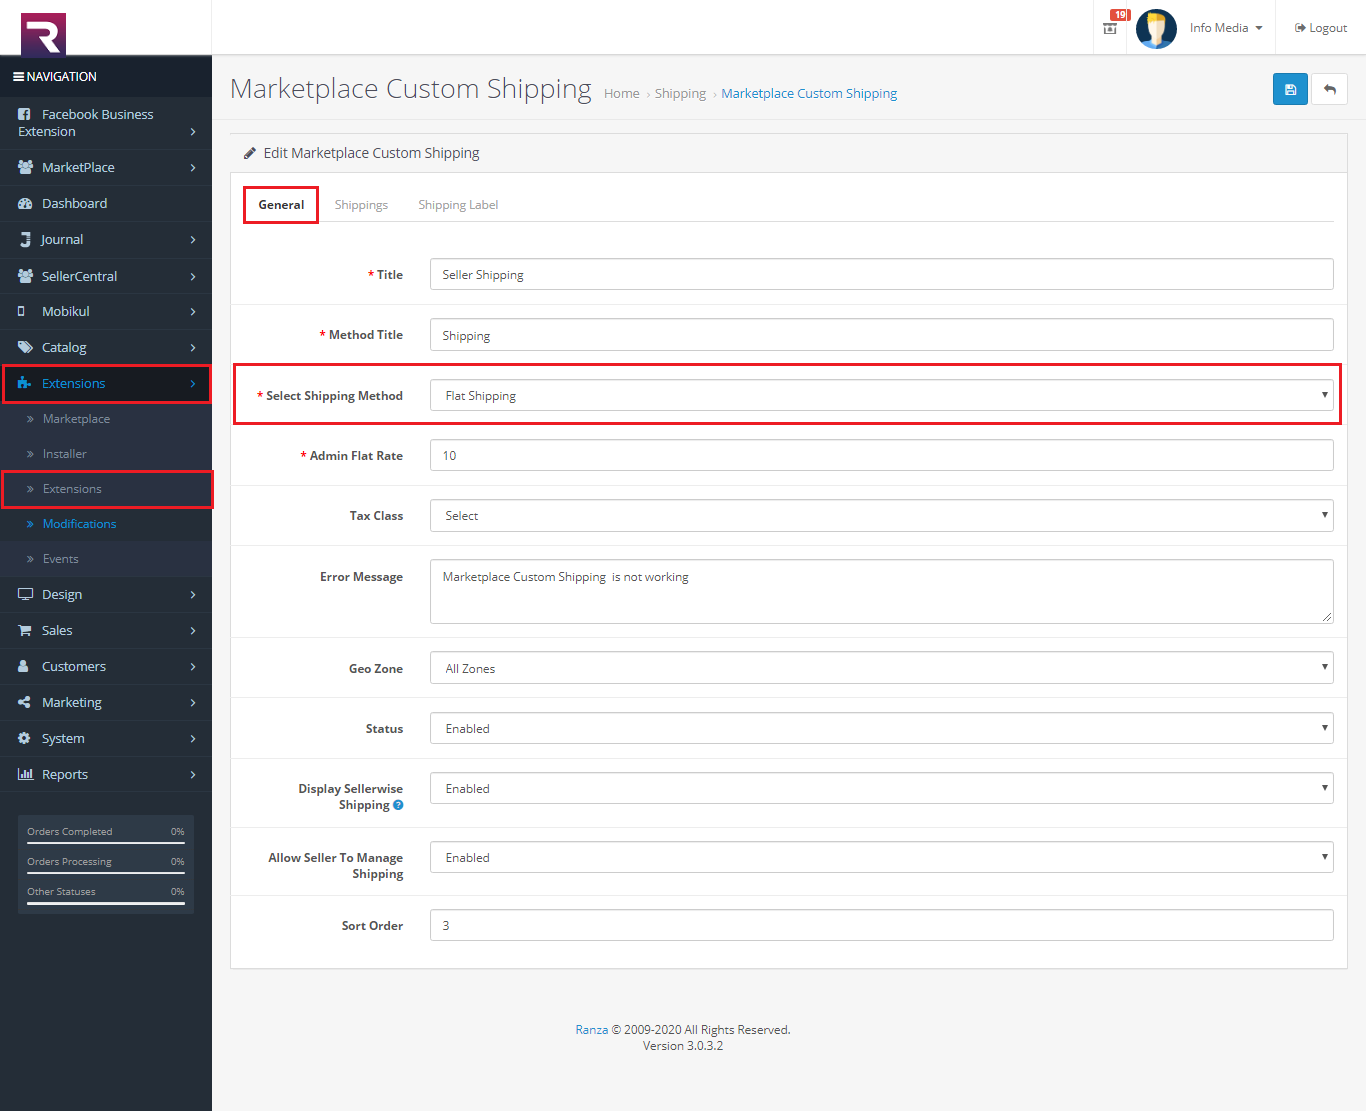
Once you will click on edit it will open a page where you can configure the shipping method.
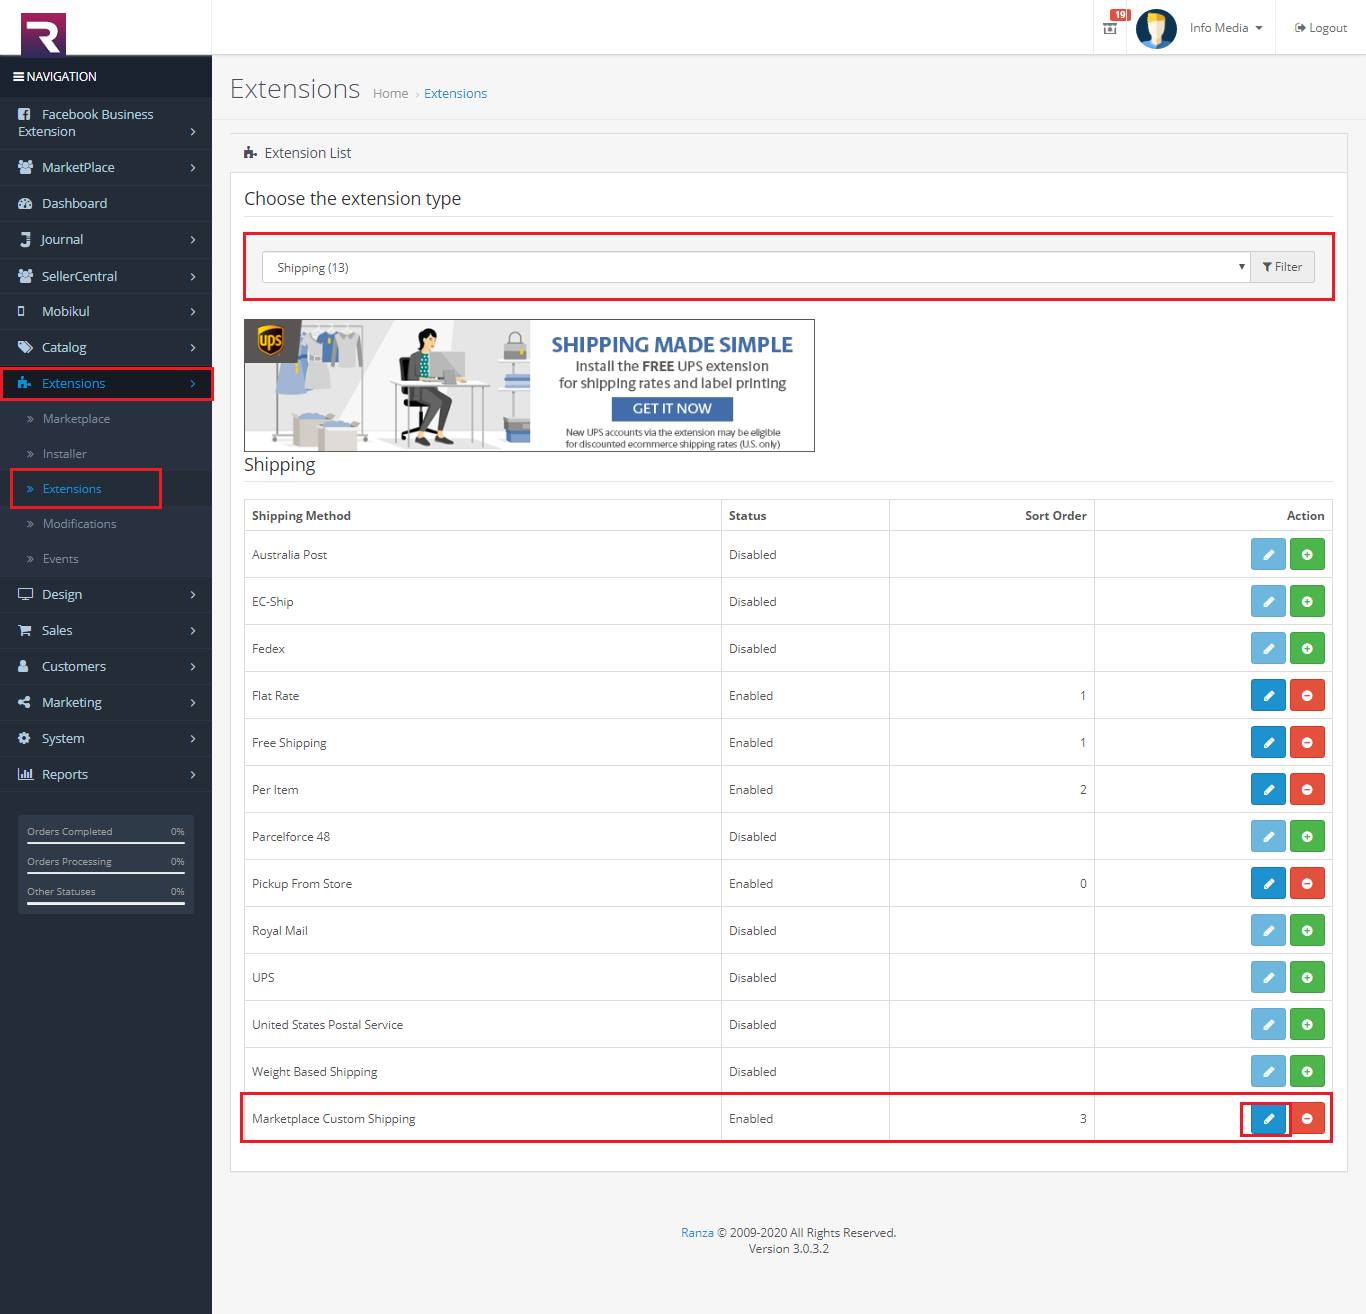
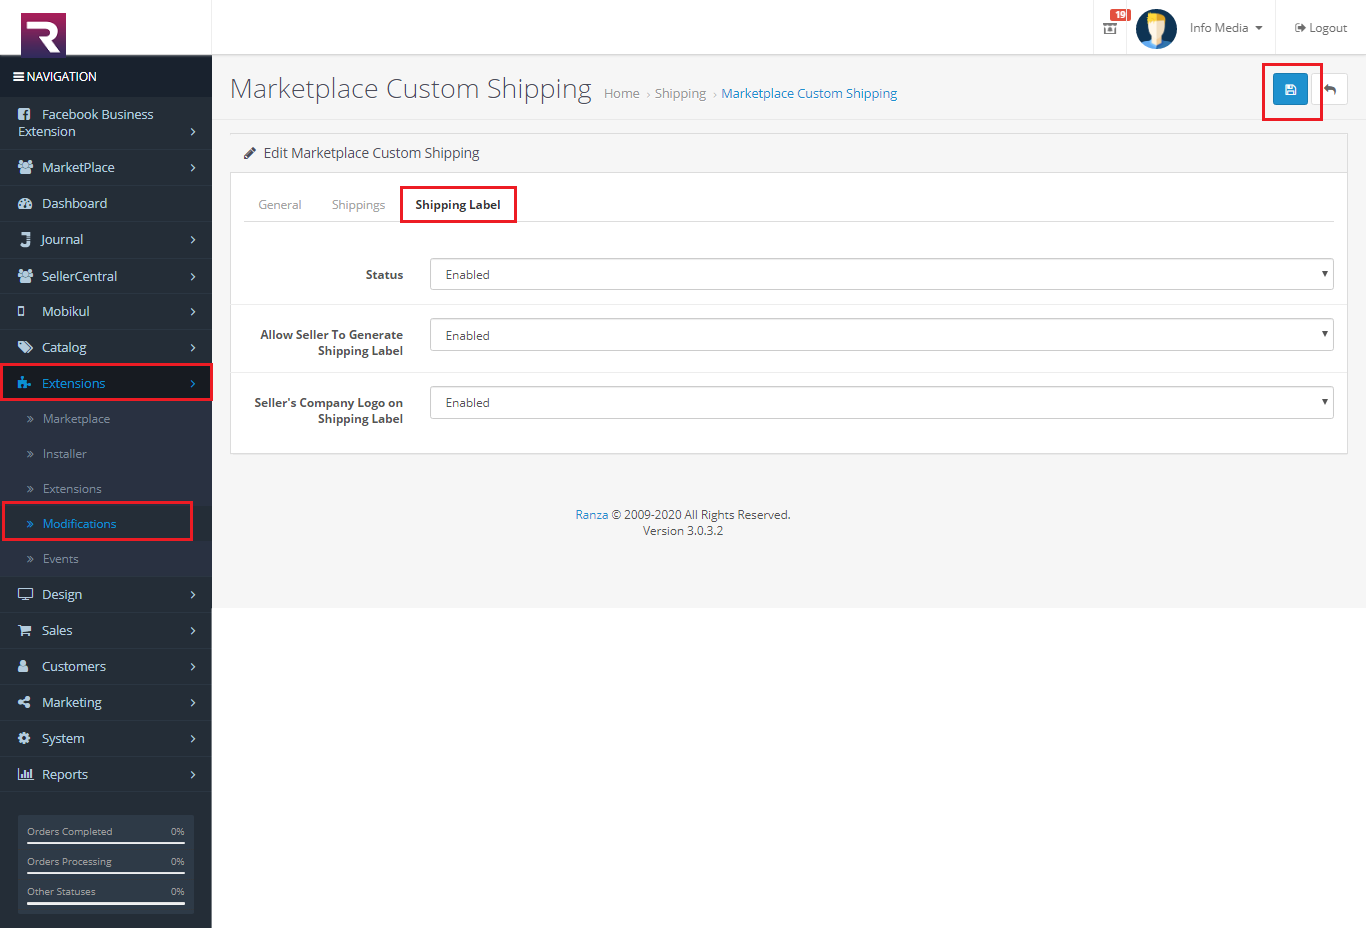
The admin can enable/disable the status of the Shipping label.
The admin can enable/disable the option of Allow Seller To Generate Shipping Label.
Also the admin have the option to enable/disable the seller to show its Company Logo On Shipping Label.
-
- Gerenal
- Select Shipping Method
Admin can select one of the three types of shipping method according to preferences.
Flat rate shipping :In this type of shipping flat rate will be charged to the customer for each product defined by seller.
Matrix Based Shipping :This shipping works according to the zip code and weight defined by the seller. If any product does not come under the seller defined zip and weight then it will show the error message entered by the admin.
Mix Shipping:This shipping method is a mixture of matrix based and flat rate shipping. If this method is selected then the shipping will be calculated according to the matrix based shipping, in case any product does not come under matrix based shipping then the flat rate shipping will be applicable.
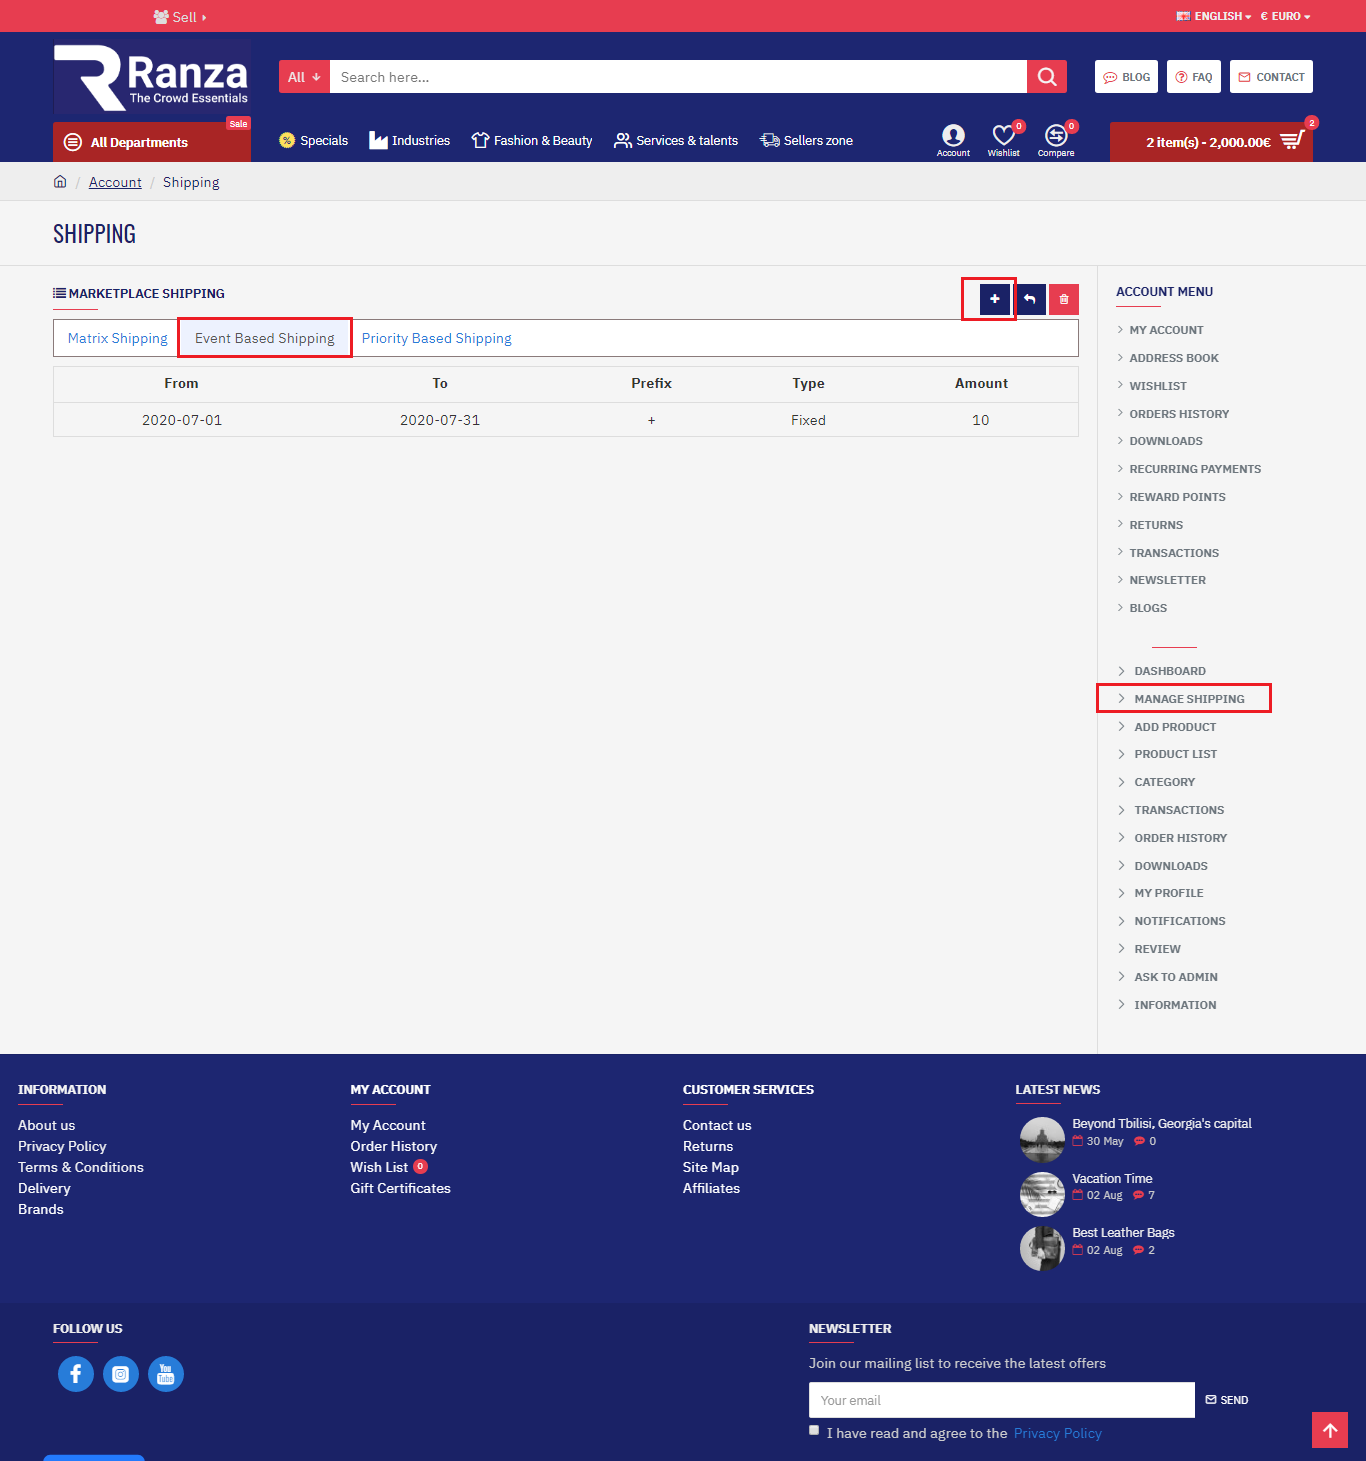
- Shipping
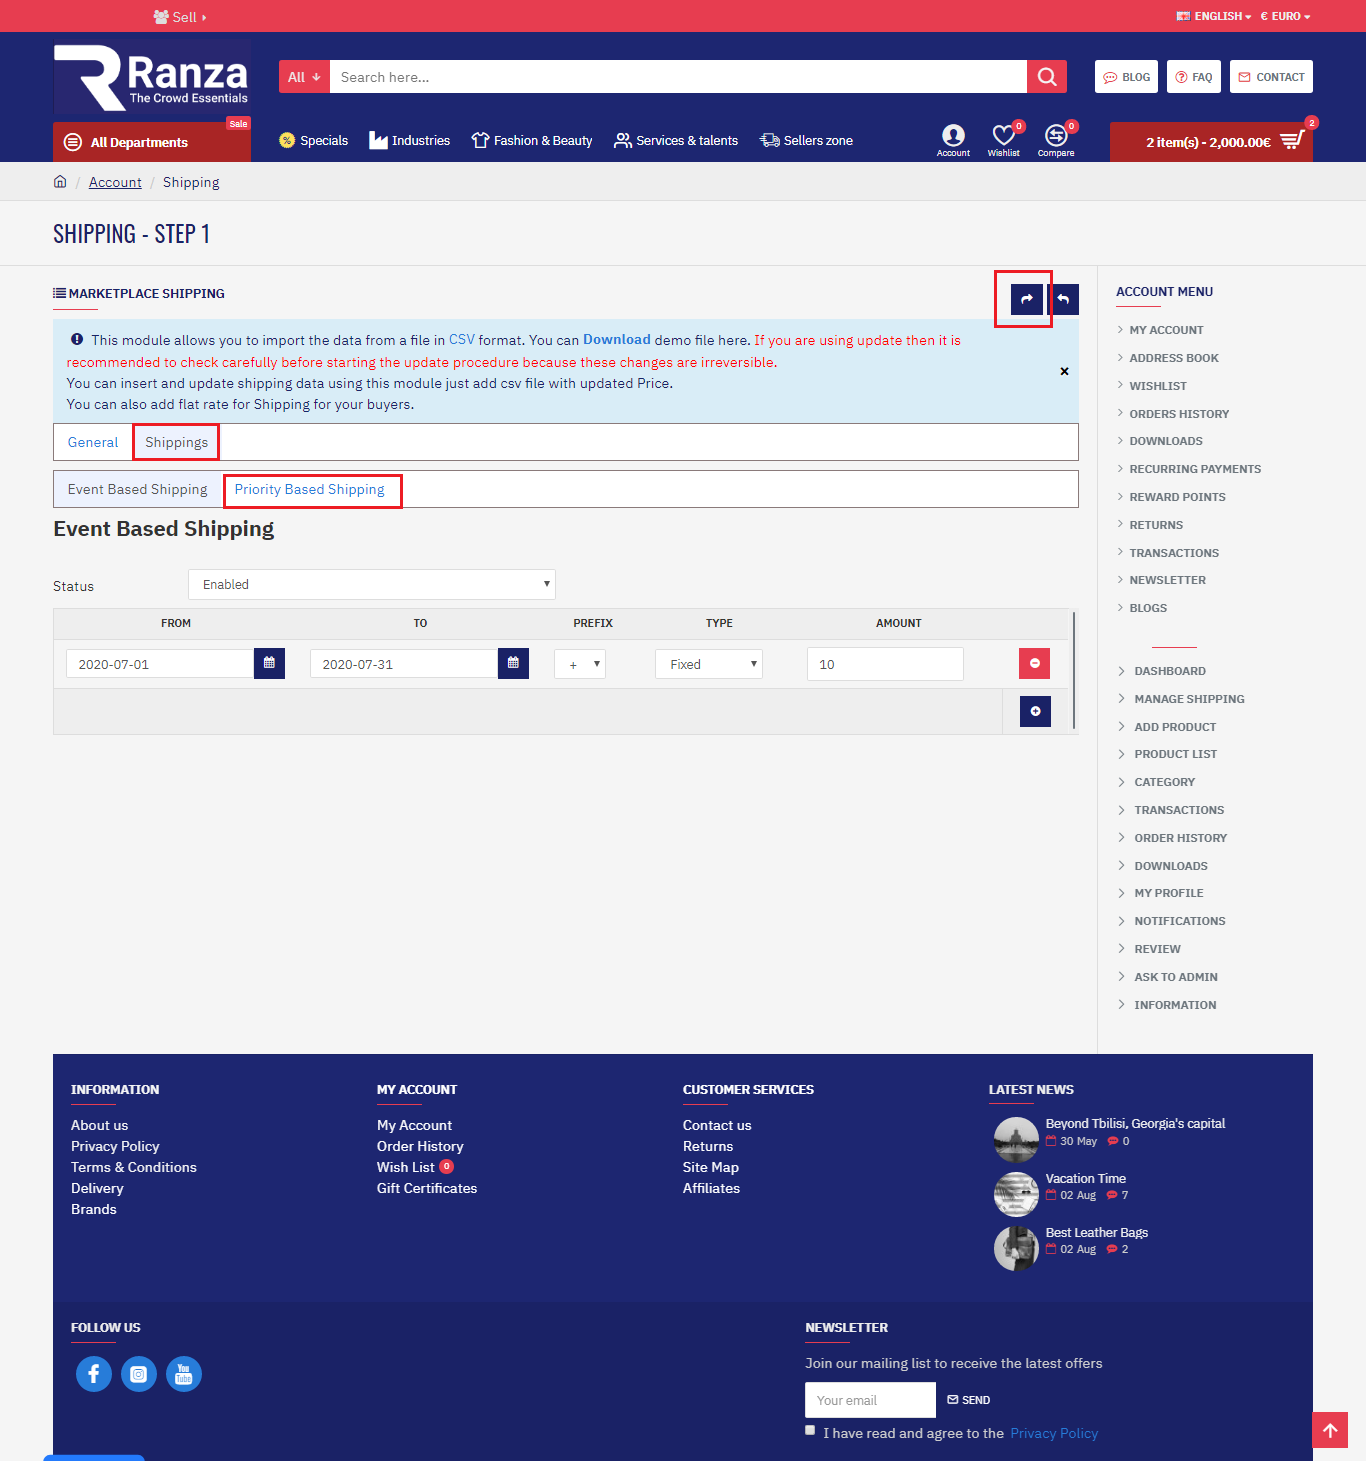
1. Event Based Shipping
The admin can enable or disable the status of this shipping type based on the need of the business.
This shipping type allows the admin to set the special day shipping amount for the order which consists of admin products by using the following options:
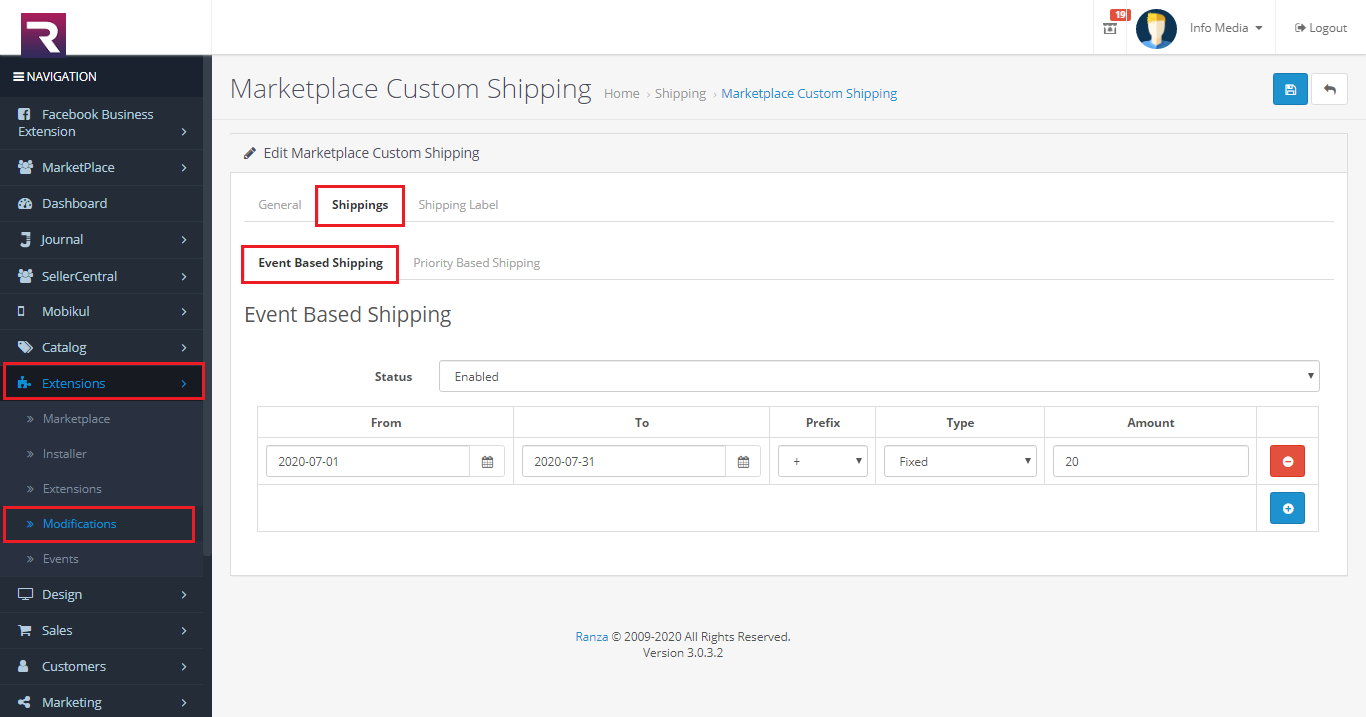
- From: Here the admin defines the starting date for the special day shipping amount.
- To: End date for the special day shipping amount.
- Prefix: Here the admin defines the opteration for that special day shipping amount i.e increment or decrement using the “+” or “-” sign.
- Type: The admin can also set the type of shipping amount i.e. fixed or percentage based.
- Amount: The amount for the special day shipping..
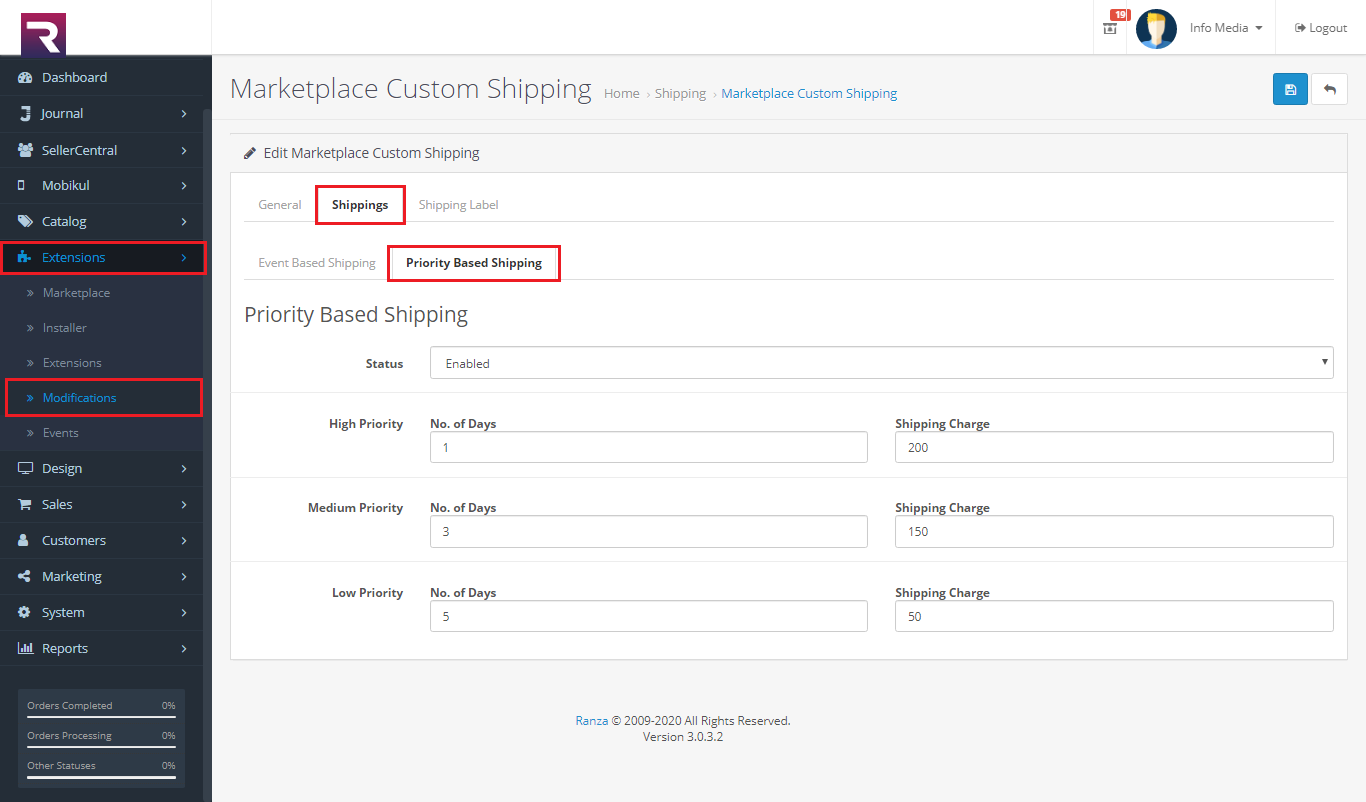
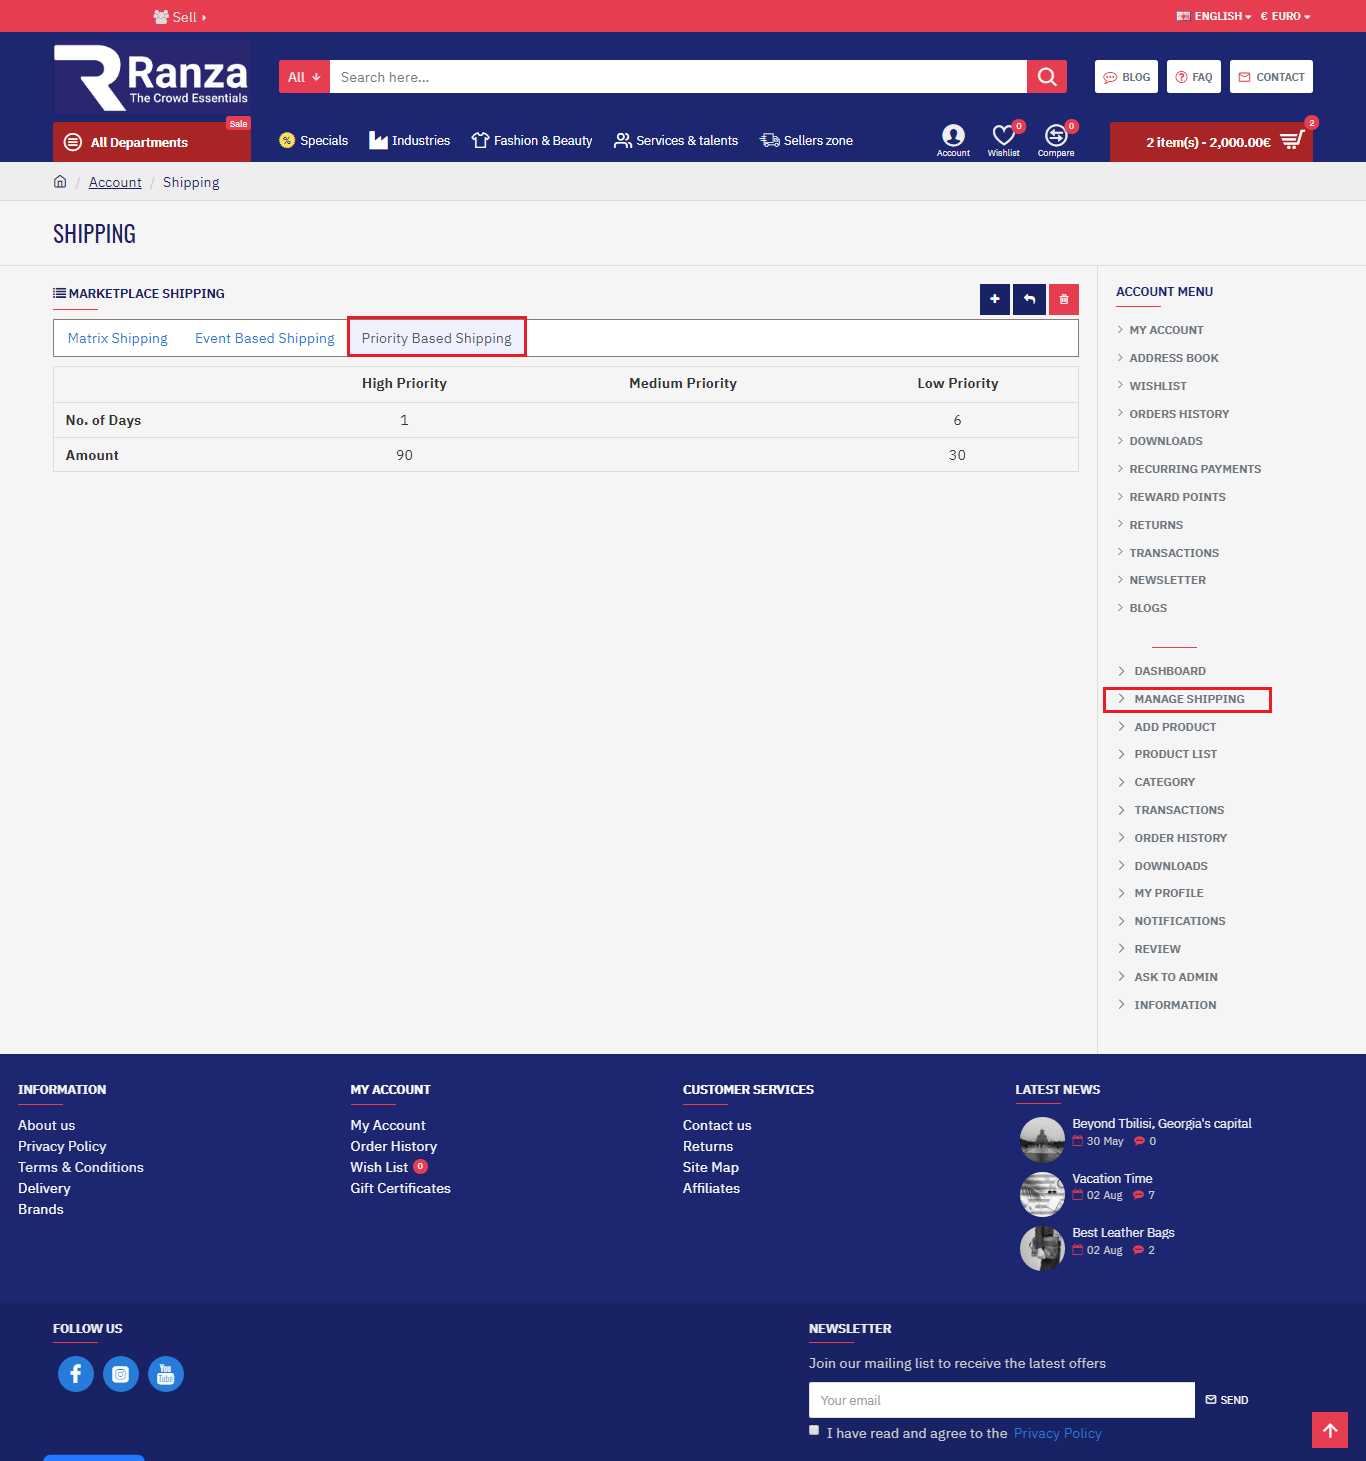
2. Priority Based Shipping
The admin can enable or disable the status of priority based shipping.
In the Priority Based Shipping the admin can set the priority for the delivery of the order consists of the admin products.
The priority based on the no. of days and also the admin can set the shipping charges accordingly.
- Shipping Label
How to set the Shipping Seller Side
Here the seller can view the data for the matrix shipping as shown.
When sellers want to add new shipping method, they need to click on Add Shipping button. After clicking on the add button, they will see as below.
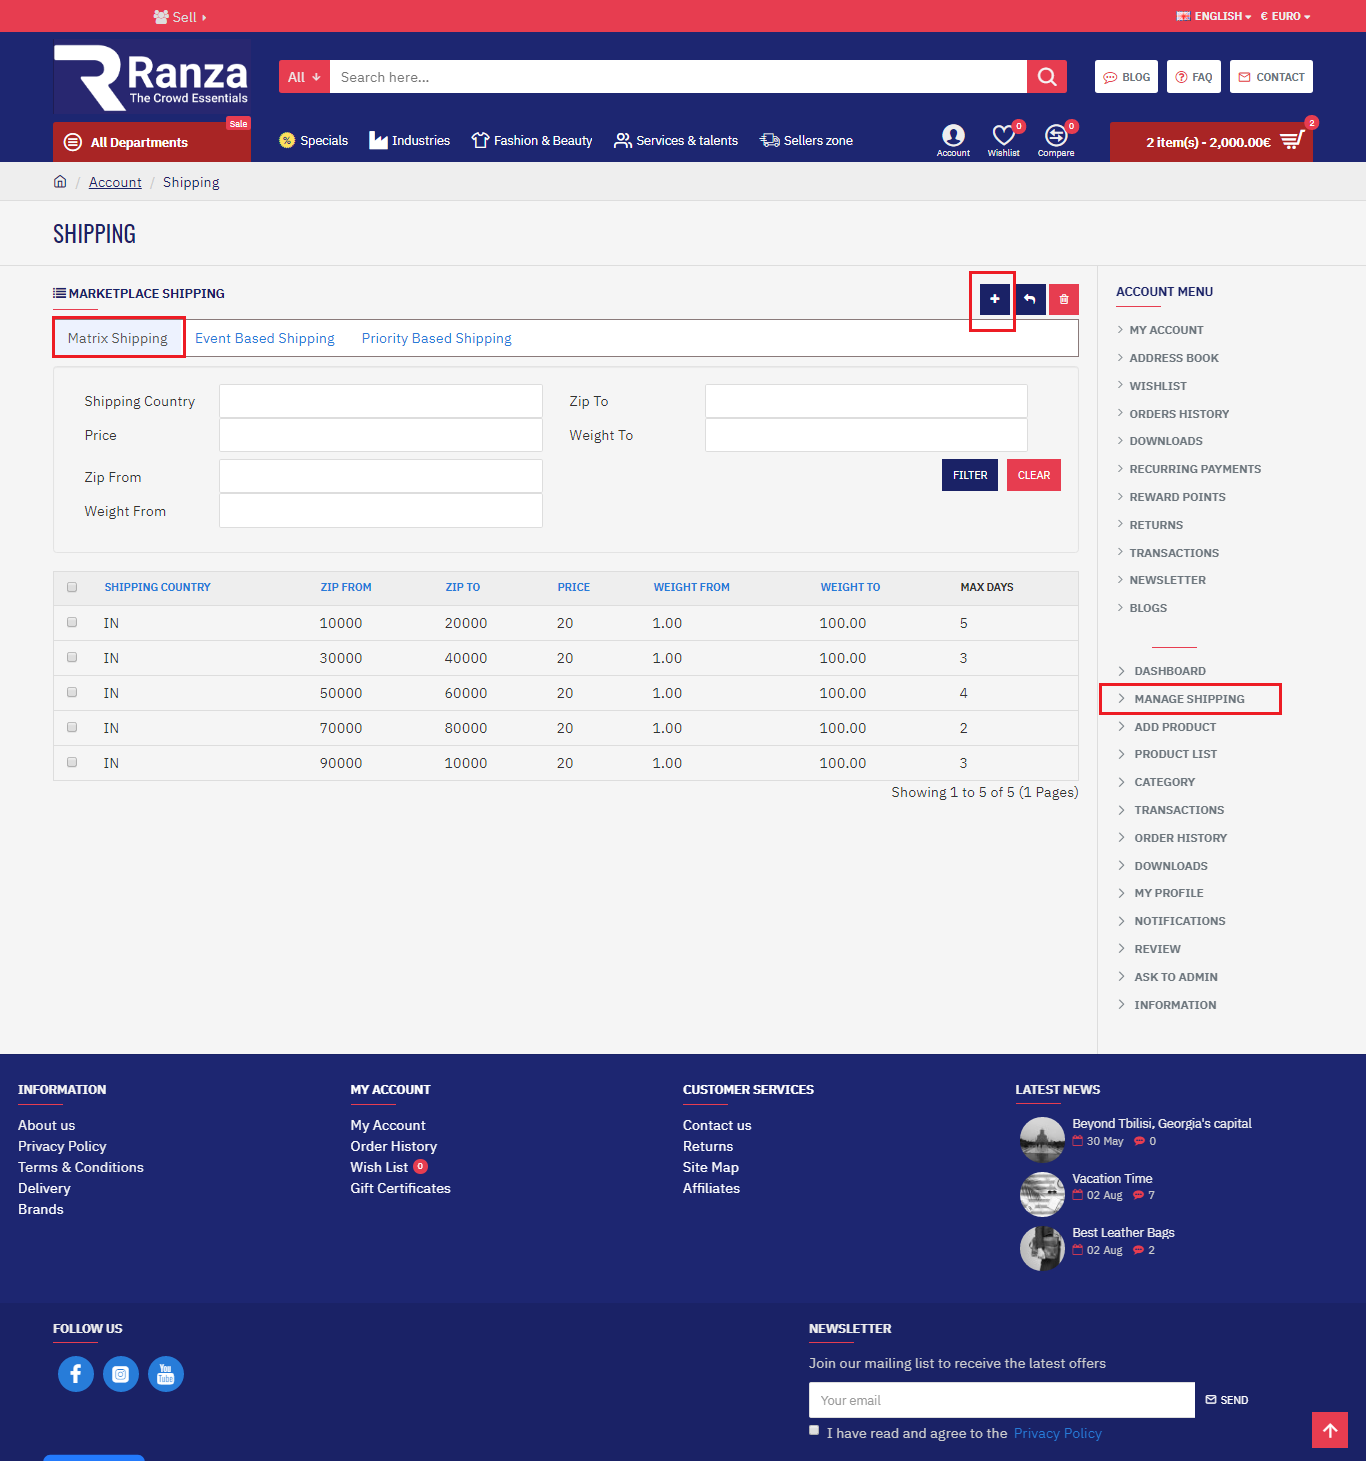
-
- Matrix shipping
- Event Based Shipping
- Priority Based Shipping
- Matrix shipping
- Step 1:
You can create a new CSV to insert or update shipping method. In CSV file, the first row defines the column name. You can write it in both small or capital letter and also in multi-languages. You can write anything in the column name, but you have to match this correctly.
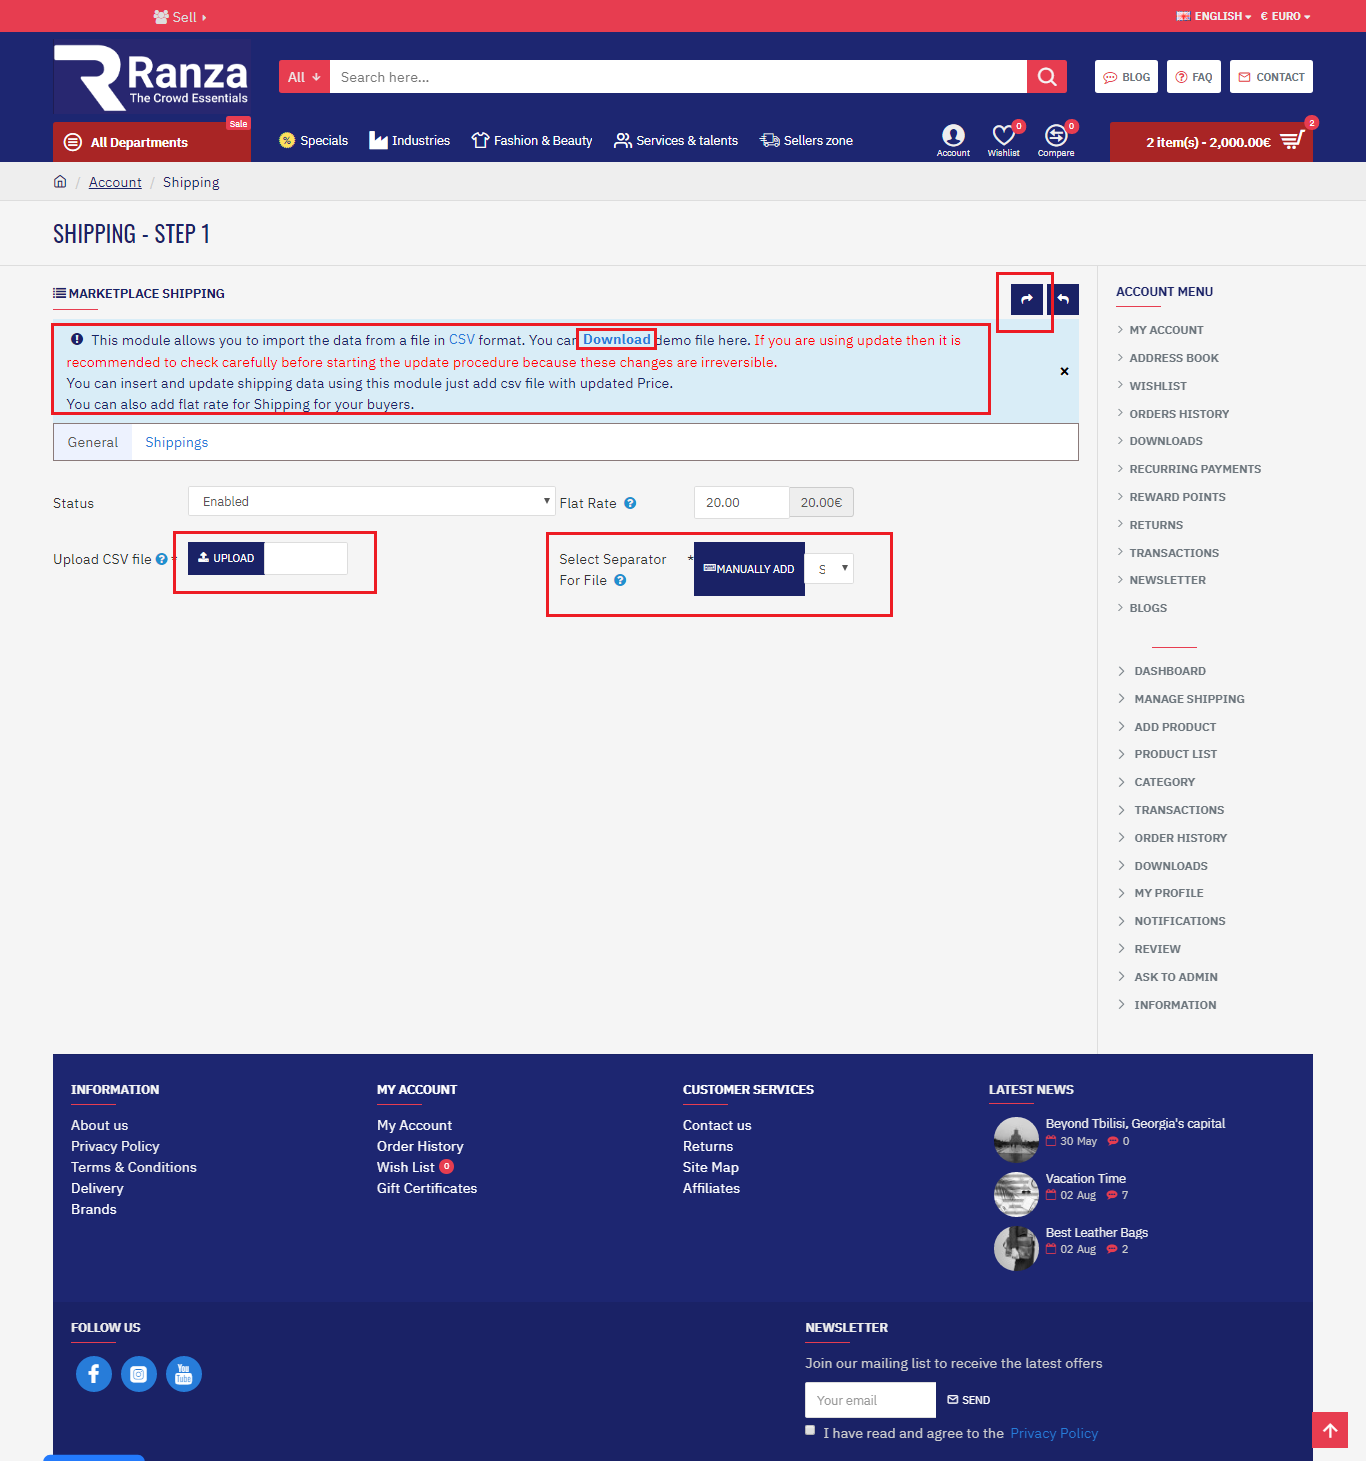
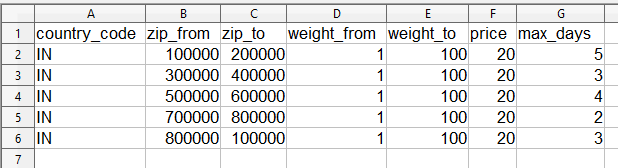
Step 2:You can create a new CSV to insert or update shipping method. In CSV file, the first row defines the column name. You can write it in both small or capital letter and also in multi-languages. You can write anything in the column name, but you have to match this correctly.
- Event Based Shipping
For viewing the data of Event Based Shipping seller needs to click on Event Based Shipping Button as shown:
- Priority Based Shipping
Here the seller can view the priority based shipping data.
How to set the Seller Side Banner
Add your details about you and your shop which will display to customers like name, company logo, company banner, etc.

Go to the Seller zone and seen to seller profile.

-
- My Profile
